Showing posts with label designed by Duni. Show all posts

Wednesday, November 1

Made.


Nope. Still not motivated to get back to regular blogging. My new "regular" since September seems to be once a month. In the meantime I've been sewing and crafting quite a bit. Sewing projects have always been therapeutic for me. The process keeps me distracted long enough not to think about what's going on with my body. Here are a few things I made. A few are decorations, and a few will be available for purchase in my online shop
🍄

Ihr Lieben, ich fühle mich immer noch nicht motiviert regelmäßig zu Bloggen. Seit September schaffe ich es gerade mal einmal im Monat. Dabei hätte ich ein paar interessante Themen, aber wie gesagt es fehlt einfach die Motivation und Kraft. Dafür habe ich viel genäht. Hier ein paar Bilder. Einiges ist Deko, wobei ich ein paar Sachen in meinen Online Shop zum Verkauf (Handmade by Duni) einstellen werde.


 photo signature_zpscqkypdzs.png

Friday, March 17

Somebunny loves you


We're already halfway through March and hopefully it will be a bit more spring-like by the time Easter (April 16th) arrives. While it is still grey and rainy outside Spring has definitely sprung here at Duni's Studio! Check out this cute postcard featuring a knitting hen - perfect for crafty friends! Also, I designed and made a couple of shabby chic bunnies. Some of you have already seen these on my instagram :) These are meant for decorating your home at Easter or any other time if you love bunnies as much as I do! Each bunny is embellished with a pretty gingham bow and cute "pompom" tail. As with most of my handmades these are limited edition. Are you excited for Spring yet?
*
Der März ist schon halb rum und ich hoffe auf frühlingshaftes Wetter, denn bis Ostern ist es nicht mehr lange. Zumindest ist bei Duni's Studio der Frühling schon eingezogen! Schaut mal diese witzige Postkarte mit der strickenden Henne - perfekt für die handarbeitsliebende Freundin, oder nicht? Ein paar Shabby Chic Häschen von mir entworfen sind neu in den Shop gehoppelt. Einige Leser haben diese ja bereits bei Instagram entdeckt! Diese sind allerdings kein Spielzeug sondern als Deko zu Ostern gedacht! Jeder Hase trägt ein hübsches Vichy Schleifchen um den Hals und hat ein zuckersüßes "Pompom-Schwänzchen". Wie bei fast allen meiner Handmade Sachen gibt es diese nur in limitierter Auflage. Wer freut sich noch auf den Frühling?


 photo signature_zpscqkypdzs.png

Tuesday, July 28

Made.

Lately I've been away from the studio for quite a bit and I'm having serious withdrawal symptoms. I'm passionate about creating and implementing ideas not to mention impatient to get things done! As a result I've been burning the candle at both ends, but at least I have something to show for it...
*
Die letzten Wochen habe ich nicht viel im Studio verbracht. Kreativ sein, entwerfen, Ideen umsetzen - das alles brauche ich wie die Luft zum atmen. Manche Ideen zwingen mich einfach die Nacht zum Tage zu machen und so sind diese Sachen entstanden...


While most of these are experimental, the arrow shorts with mini pompom trim will be added to my Priya collection.

*
Das meiste davon ist experimentell, jedoch die Shorts mit den Minipompoms ergänzen meine Priya Kollektion.


Thursday, February 5

Shabby Chic Potholder ♥ Topflappen


I've been meaning to show you how to make these cute shabby chic potholders for a while now, but I've only now found the time to write up the sewing instructions. This is a fun project to try if you're a beginning sewist.
*
Ich wollte Euch schon länger dieses Topflappen DIY zeigen, bin aber erst jetzt dazu gekommen die Anleitung dafür zu schreiben. Dieses Projekt ist auch für Nähanfänger geeignet.

You'll need:

shabby chic (or your choice) of quilting cottons 
iron on heavy weight interfacing
insulation (e.g. Insul-Bright)
4 inch piece of bias binding
sewing machine, ruler, disappearing ink fabric marker, basic sewing supplies

Ihr benötigt:

Stoffe in Patchworkqualität
aufbügelbares Vlies (z.B. H640)
10 cm Stück Schrägband
Nähmaschine, Lineal, Stoffmarker, Standard Nähutensilien


Follow these steps:

1. cut 2 pieces of fabric and interfacing/1 piece of insulation to the size of 9.5 " square.
2. Iron the interfacing to the wrong side of the fabric pieces according to manufacturer's instruction.
3. starting from the center draw diagonal lines across the fabric pieces with the fabric marker and ruler and space these about 1.5 " apart.
4. Stitch along these lines with a straight stitch set at a length of 3.0 (the ink of the marker pen will disappear after a few hours)

Und so geht's:

1. je 2 Stücke Stoff und Vlies sowie 1 Stück Thermolan à 24 x 24 cm schneiden.
2. Vlies auf die Rückseite der Stoffstücke nach Herstelleranweisung aufbügeln.
3. Von der Mitte aus in 4 cm Abständen diagonale Linien mit Lineal und Stoffmarker einzeichnen.
4. Entlang dieser Linien mit der Nähmaschine im Geradstich nähen (Stichlänge 3.0)


continued...

5. take 4 inch piece of bias binding, fold in half and stitch closed the length. Remember to backstitch at each end. This will be the loop for hanging.
6. Layer your potholder "sandwich" as follows: 1 piece fabric side up, 1 piece fabric side down, top with 1 piece insulation.
7. make a loop from the bias binding and insert between the fabric layers raw edge aligning with raw edge of fabric. The loop should be place at the top center.
8. pin the "sandwich" all around, but leave a 4 " gap at the bottom for turning

und weiter...

5. Das 10 cm Stück Schrägband längs falten und die offene Seite knappkantig steppen. Rückstiche nicht vergessen. Dies wird später die Schlaufe zum Aufhängen.
6. Stoffquadrate rechts auf rechts zusammenlegen, mit dem Thermolam abdecken.
7. Das Schrägband zur Schlaufe legen und oben mittig zwischen den beiden Stoffstücken stecken und mit Stecknadeln fixieren.
8. Das gesamte "Sandwich" rundum mit Stecknadeln fixieren, jedoch an der unteren Kante eine ca. 10 cm Öffnung zu Wenden offen lassen.


Almost done...

Starting from one point of the gap stitch (length 2.5) all around using a seam allowance of 0.4" The fabric sandwich is quite thick so go slowly! Backstitch at beginning and end. Clip corner as shown in the above picture. Then turn out the potholder carefully through the gap. Push out corners with a knitting needle or similar. Now iron the whole thing to smooth out any creases!

Final step: Edge-stitch (stitch length 3.0) all around thereby closing the gap.


Fast fertig...

An der Öffnung beginnend rundherum steppen (Stichlänge 2,5). Da der Topflappen recht dick ist immer schön langsam nähen! Am Anfang und Ende Rückstiche nicht vergessen. Die Ecken schräg abschneiden, wie im obigen Bild. Den Topflappen vorsichtig durch die Öffnung auf Rechts wenden. Die Ecken mit einer Stricknadel o. ähn. herausschieben. Dann den Topflappen bügeln! Zum Schluß rundherum knappkantig absteppen, dabei die Öffnung schließen (Stichlänge 3,0).


That was pretty easy, right? Now you can pretty up your kitchen or make some more and give as gifts :)
*
Das war doch recht einfach, nicht wahr? Nun könnt Ihr damit Eure Küche aufhübschen oder Ihr näht noch welche zum Verschenken :)

Happy Sewing!

Friday, November 28

Sparkly Clutch


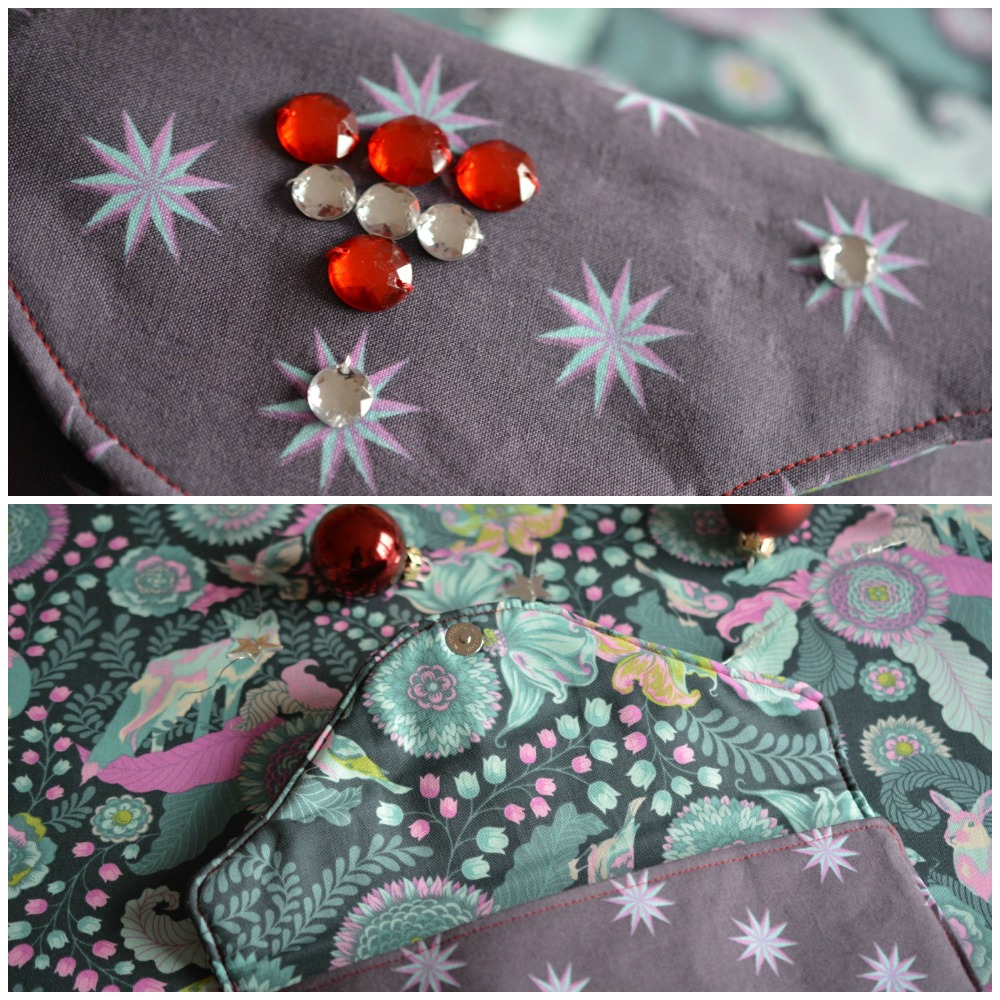
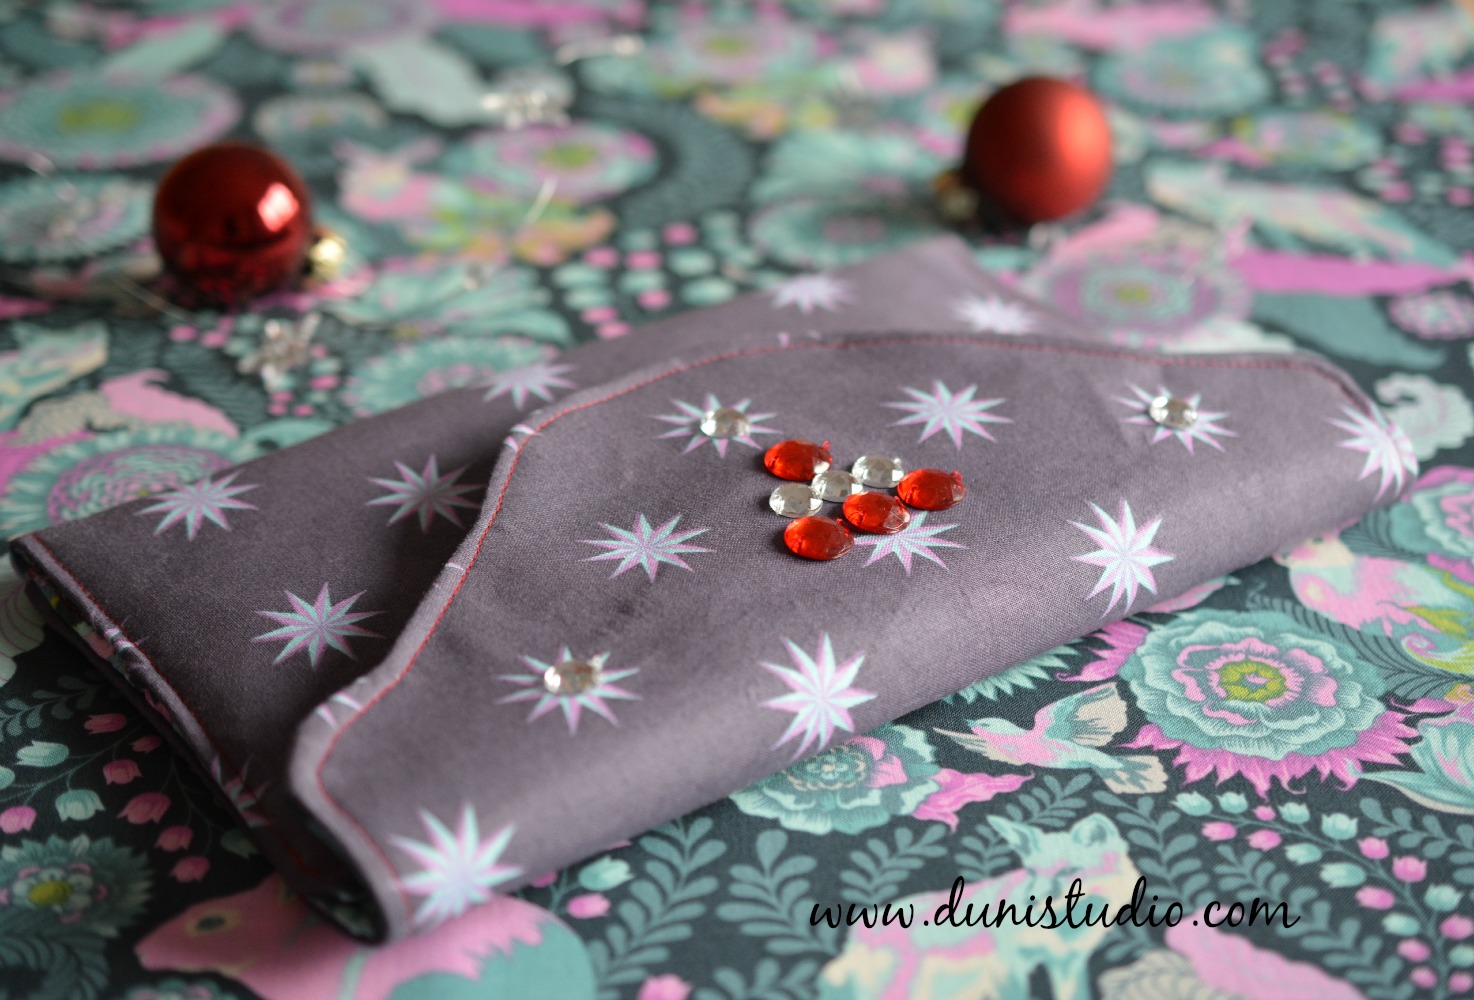
Hello and Happy Friday! I hope my US readers enjoyed a lovely Thanksgiving amongst family :) Meanwhile a friend of mine requested an evening bag with a bit of sparkle. After sketching a few designs I came up with this one-of-a-kind envelope style clutch in a subtle grey with vintage star pattern.
*
Hallo und guten Morgen, Mädels! Eine liebe Freundin wünschte sich ein Abendtäschchen. Sie sollte schlicht sein, aber dennoch elegant wirken. Nach ein paar Überlegungen und Skizzen ist nun diese originelle Clutch in Sanftgrau mit Vintage Sterne Muster entstanden.

I embellished the flap with sparkly sew-on beads in festive red and crystal colour. These were kindly provided to me by Union Knopf. Thanks a bunch! I think they are really eye-catching, don't you? The bag opens/closes with a magnetic snap button and measures 9.5 x 6 inches.
*
Die Taschenklappe habe ich mittig mit flachen Glitzerperlen in Rot und Kristall verziert. Diese sind Teil des großen Weihnachtspakets von Union Knopf. So wird die schlichte Clutch zum Blickfang!
Die Perlen sind beidseitig gelocht - mit etwas Geduld und Feingefühl lassen sie sich relativ einfach auf den Stoff nähen. Die Clutch öffnet/schließt mit einem Magnetknopf und bemisst ca 26 x 15 cm


Have a terrific day!
*
Habt einen wunderschönen Tag!

Wednesday, August 27

★ Surprise x 2 ★


Hi there lovelies!              Hallo, ihr Lieben!

I've been having fun designing and sewing shirts with these adorable knit fabrics that have recently arrived in my fabric shoppe. The cool thing about knits is that they don't fray. Plus they are soft and stretchy. If you have never sewn with knits go ahead and try - they are easy to work with so long as you remember to switch your regular sewing machine needle to a ballpoint needle and set the pressure foot to medium or light, depending on how thick the knit fabric is. Here are two longsleeve shirts that I made. The left fabric is called Sweet Apple; the right side fabric used for the sleeves is called Fall Flower and are part of a collection called "Surprise Surprise".

Schon beim Auspacken der Jersey-Kollektion "Surpise Surpise" von JoliJou für Swafing kribbelte es mir in den Fingern, so schön ist sie! Beim Anblick von Sweet Apple und Fall Flowers (der türkisfarbene Stoff ganz oben) wusste ich sofort, dass daraus Langarmshirts werden. Es hat Spaß gemacht meine Ideen für die Shirts umzusetzen. Mit diesen elastischen Stoffen zu nähen ist nicht schwer, man benötigt jedoch eine Jersey-Nadel und sollte darauf achten, dass der Nähfußdruck dem Material angepasst wird. Die Surpise2 Jerseys sind aus 95% Baumwolle/5% Elasthan und Ökotex 100 zertifiziert.


Up next are these thicker sweatshirt-type fabrics perfect for Fall! They come in pink or teal and have a funky owl and star print. With the coming season in mind (actually, it has already arrived over here!) I have designed a comfy lounge pant with side pockets. I am working like crazy to make this pattern available as a PDF, so that you, dear readers and seamstresses, may make a pair for yourself :)


Ebenfalls eingetroffen sind diese etwas dickeren Sweatstoffe in Pink und Türkis mit den lustigen Eulen und Sternen. Diese sind innen schön kuschelig angerauht und perfekt für die kommende Herbst-Saison (die ist ja hier leider schon eingetroffen!). Vor einigen Wochen habe ich eine Kuschelhose entworfen und arbeite nun mit Hochdruck daran, dass Schnittmuster in PDF Format umzuwandeln, damit bald auch Ihr, liebe LeserInnen und NäherInnen, eine solche Hose nachnähen könnt :)


And last but not least, this coming Friday I will be attending a special Fall Market and Open House at Swafing, where I will have the chance to view new fabric collections, attend workshops and chat with colleagues and fellow sewing enthusiasts. This market is always well attended and very busy, so hopefully I will think about snapping a few pics!


Und eine letzte Neuigkeit! Diesen kommenden Freitag fahre ich nach Nordhorn zur Swafing Herbst-Messe. Dort erwarten mich neue Kollektionen und Hausmesse Highlights, und das ein oder andere Stöffchen wandert ganz bestimmt ins Stofflädchen :) Außerdem bietet sich die Möglichkeit an Workshops teilzunehmen. Natürlich freue ich mich bekannte Gesichter wiederzusehen und vielleicht ist ja unter meinen LeserInnen auch jemand am Freitag dort? Würde mich freuen :)

Have a wonderful day!
Habt einen wunderschönen Tag!

Thursday, June 12

From Men's Shirt to Girl's Skirt - DIY in Three Easy Steps


Hi everybody! Today I'd like to share another fun DIY idea that is easy enough for beginning sewists too! Give a regular men's buttondown shirt a new lease of life by turning it into a girl's summer skirt :) This will work best for young girls 8 - 10 years old. For tweens you might need a bigger/longer shirt :)


Hallo, ihr Lieben! Heute zeige ich Euch wieder ein einfaches DIY welches auch für NähanfängerInnen geeignet ist! Man nehme ein Hemd mit Knopfleiste und upcycle es in einen sommerlichen Rock für junge Mädchen ca. 8 - 10 Jahre. Für ältere Mädchen bräuchte man eventl. ein größeres bzw. längeres Hemd.

You'll need // Ihr braucht

1 regular cotton men's shirt // 1 standard Herrenhemd
2 cm wide elastic for waistband // 2 cm breites Elastikband
Minipompom trim // Minipompoms
novelty buttons // Kinderknöpfe
sewing machine & basic sewing kit // Nähma + Nähutensilien


For my project I chose these fun limegreen novelty buttons with tiny red mushrooms and hearts kindly sponsored by German button and accessories manufacturer Union Knopf. These are available in lavender and white as well. Click on the link below for more information on their products:

click

Für mein Projekt habe ich mich für diese witzigen Fliegenpilzknöpfe von der Fa. Union Knopf entschieden. Obwohl ich persönlich nicht unbedingt Fan von Knöpfen mit Steg bin, hat mich die limettengrüne Farbe und das süße Motiv überzeugt :) Diese Knöpfe gibt außerdem noch in einer fliederfarbenen und weißen Variante. Wer mehr über die Produktpalette von Union Knopf wissen möchte klickt bitte den Link oben.


Step One // Schritt Eins

To make the skirt you'll require two measurements. Measure the girls waist and cut elastic minus 1 cm. Set aside. Measure from waist to knee plus 2.5 cm. Cut straight across the shirt. If there is a button or pocket in the way, remove as necessary.
*
Um aus dem Shirt ein Rock zu nähen benötigt Ihr zwei Maße. Taillenmaß abmessen und Elastikband minus 1 cm zuschneiden. Taille bis Knie abmessen plus 2,5 cm. Geradlinig abschneiden. Eventuell vorher Pattentaschen, oder störende Knöpfe entfernen.


Step Two // Schritt Zwei

To make the casing for the elastic, fold under first 0.5cm and iron, then fold again at 2.5 cm. Pin and edge-stitch all around leaving a 6 cm gap at one side seam. Then attach the minipompom trim to the hemline starting and ending at the front opening of the shirt. Now insert the elastic through the waistband gap, pull through until it comes out at the other side and overlap ends by 1 cm. Stitch across the overlapping part several times to secure. Finish waistband by closing gap. Iron skirt.
*
Für den Bund die obere Kante 0,5 cm nach innen einschlagen und bügeln. Dann nochmals auf 2,5 cm einschlagen. Feststecken und rundherum knappkantig steppen, dabei an einer Seitennaht eine 6 cm Lücke zum späteren Durchziehen des Elastikbandes offen lassen. Dann am Saum von der Hemdmitte aus rundherum die Minipompomborte annähen. Nun das Elastikband durchziehen und 1 cm überlappend gut vernähen. Lücke schließen. Rock bügeln.


Limegreen Minipompom trim from here
*
Limettengrüne Minipompomborte von hier


Step Three // Schritt Drei

Remove the original shirt buttons and replace with novelty buttons. It' doesn't matter if they are larger than the original, since they only serve as decoration! Your girl's summer skirt is finished and ready to wear :)
*
Original Hemdknöpfe entfernen und mit Glückspilzknöpfen ersetzen. Es ist nicht schlimm wenn diese größer ausfallen, da sie rein dekorativ sind! Der sommerliche Mädchenrock ist nun fertig zum Tragen :)


Union Knopf // Union Knopf Facebook

Wanna see more easy DIYs made with Union Knopf products? Simply type "union knopf" in the search function in the side bar
*
Möchtet Ihr noch weitere einfache DIY Ideen mit Union Knopf Produkten sehen? Einfach "union knopf produkte" im Suchfeld in meiner Sidebar eingeben

  
A huge thank you to ten year old V. for her excellent modelling abilities :)
Ein riesen Dankeschön an die 10-jährige V. für's hervorragende Modeln :) 

Friday, February 21

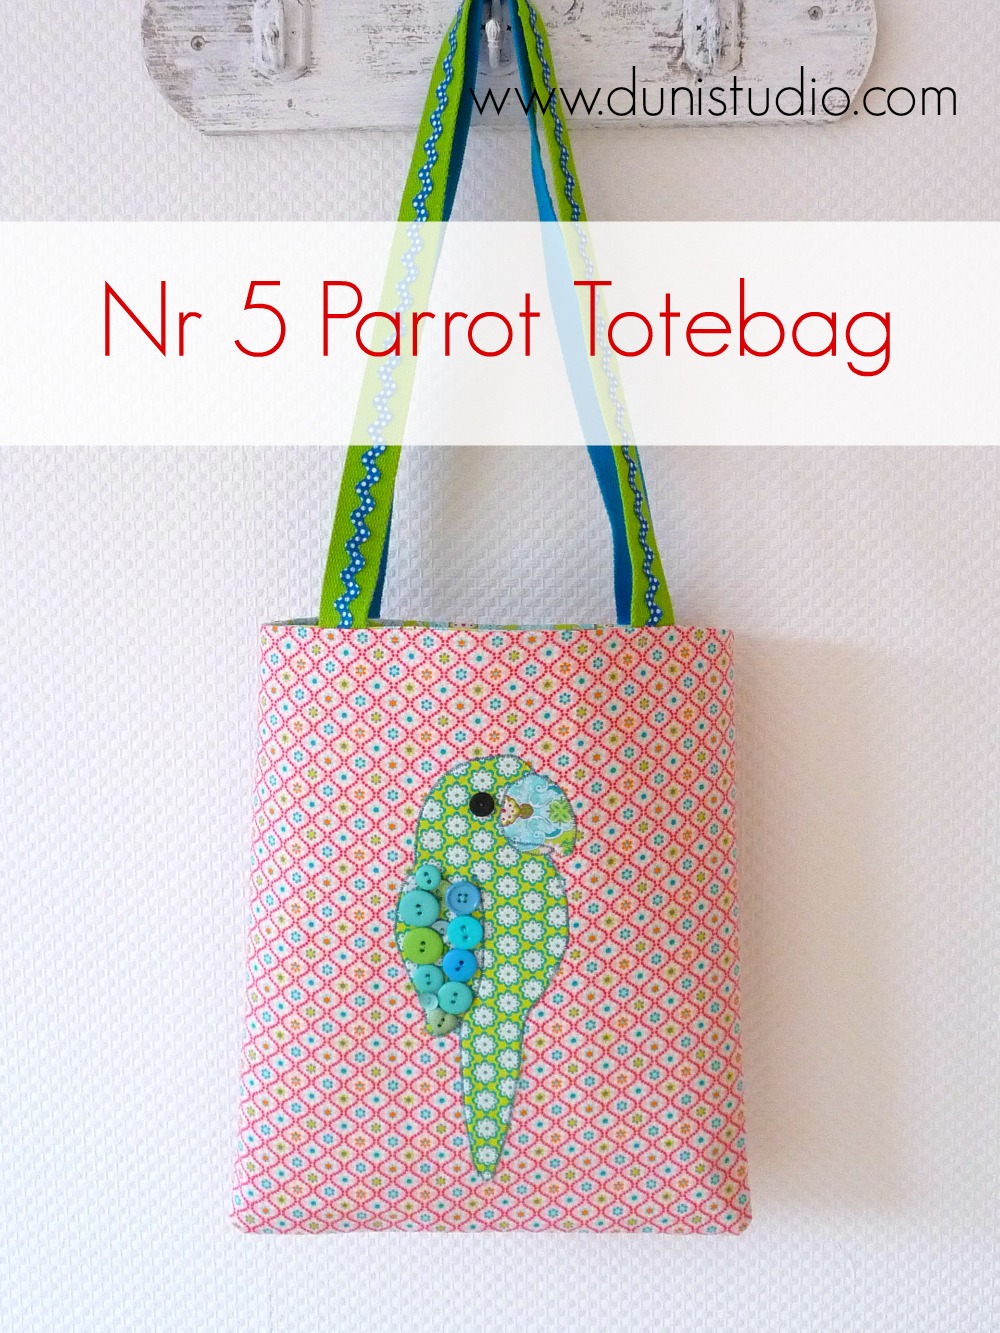
Parrot Tote Bag - Tutorial

A number of my readers have been anxiously waiting for my tote bag tutorial. Here it is -  the last installment of the DIY Frida Kahlo costume!
*
Interessierte LeserInnen/NäherInnen wollten wissen wann ich denn endlich die Anleitung für die Papagei Tasche poste...nun, heute ist es soweit! Dies ist die letzte Anleitung meines DIY Frida Kahlo Kostüms. Danke für Eure Geduld!


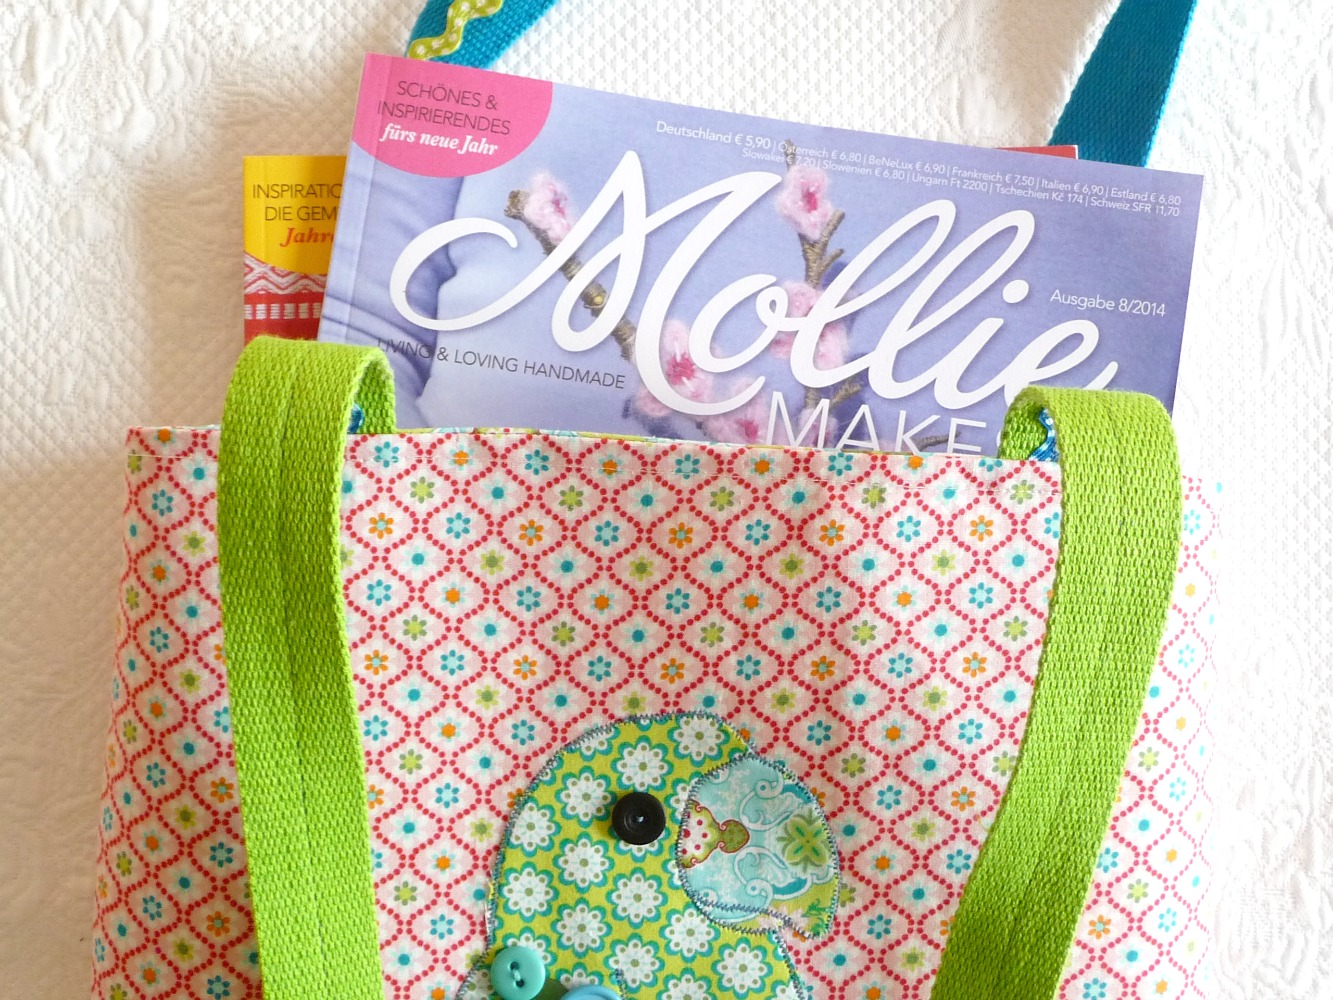
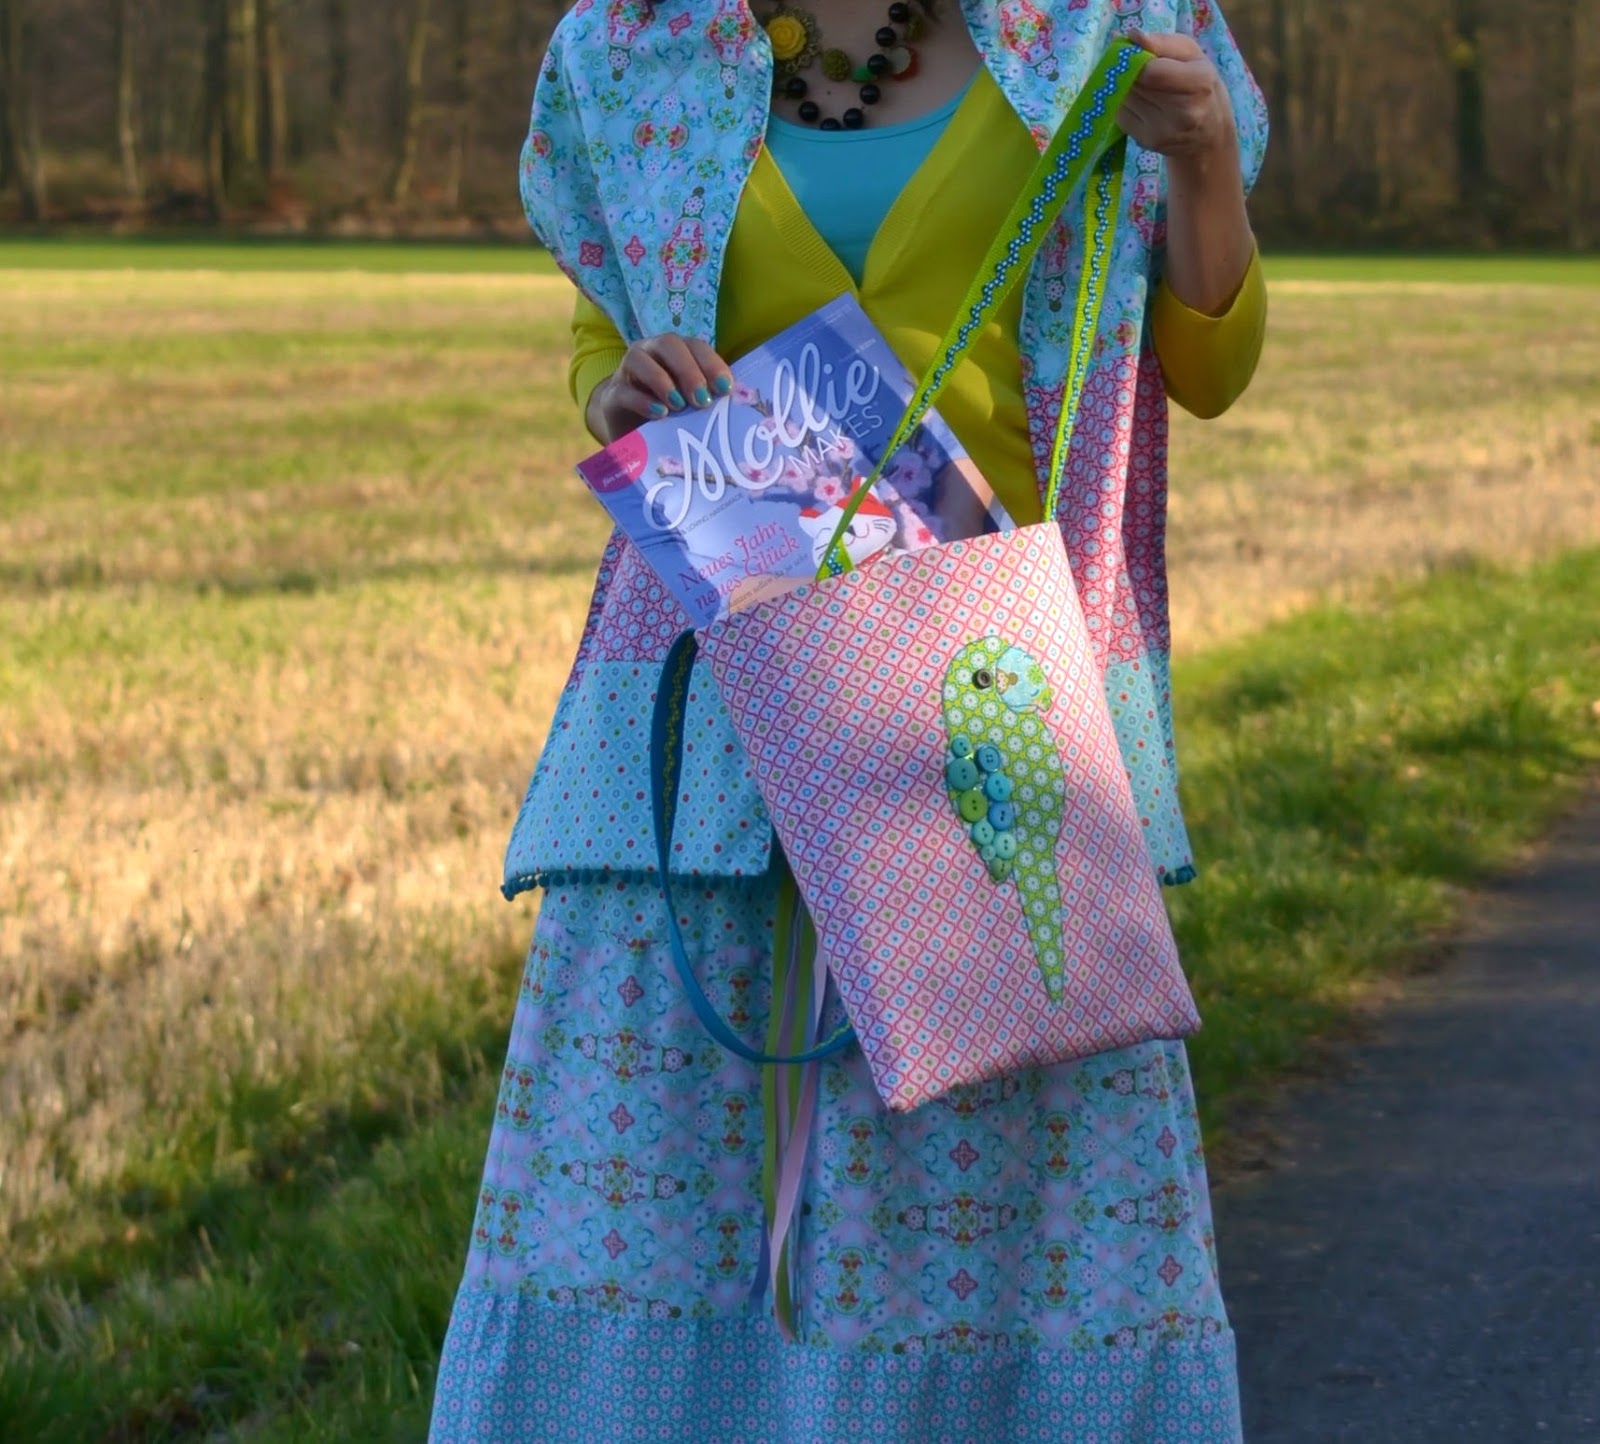
This is a simple bag shape that I designed to fit the Mollie Makes magazine or two. The parrot appliqué requires some handsewing and patience :)
*
Diese Tasche habe ich so entworfen, dass die Mollie Makes Zeitschrift oder auch zwei perfekt reinpasst! Die Papagei Applikation bedarf etwas Geduld :)

You'll need

2 pieces 30 cm x 35 cm main fabric
2 matching pieces of Decovil stabilizer
2 pieces 30 cm x 35 cm lining fabric
2 matching pieces of H630 interfacing
contrasting fabric for the parrot 
Vliesofix (fusible webbing)
assorted buttons, 1 small black one for the eye
2 x 72 cm pieces of webbing
2 x 72 pieces of rick rack trim
sewing machine + basic sewing kit

Ihr benötigt

2 Rechtecke 30 cm x 35 cm Hauptstoff
2 passende Stücke Decovil I Light
2 Rechtecke 30 cm x 35 cm Futterstoff
2 passende Stücke H630 Vlies
Kontraststoff für die Papagei Applikation
Vliesofix
Knopfsortiment, 1 kleiner schwarzer Knopf für das Auge
2 x 72 cm Webband (Träger)
2 72 cm Zackenlitze
Nähmaschine + Basic Nähutensilien

Step One // Schritt Eins

Start by ironing on the Decovil (a thin pelmet like interfacing) onto the wrong side of the main fabric pieces and the H630 interfacing onto the wrong side of the lining fabric pieces.
Next, stitch the rick rack trim on the two webbing pieces. I used contrasting ones. Set aside.
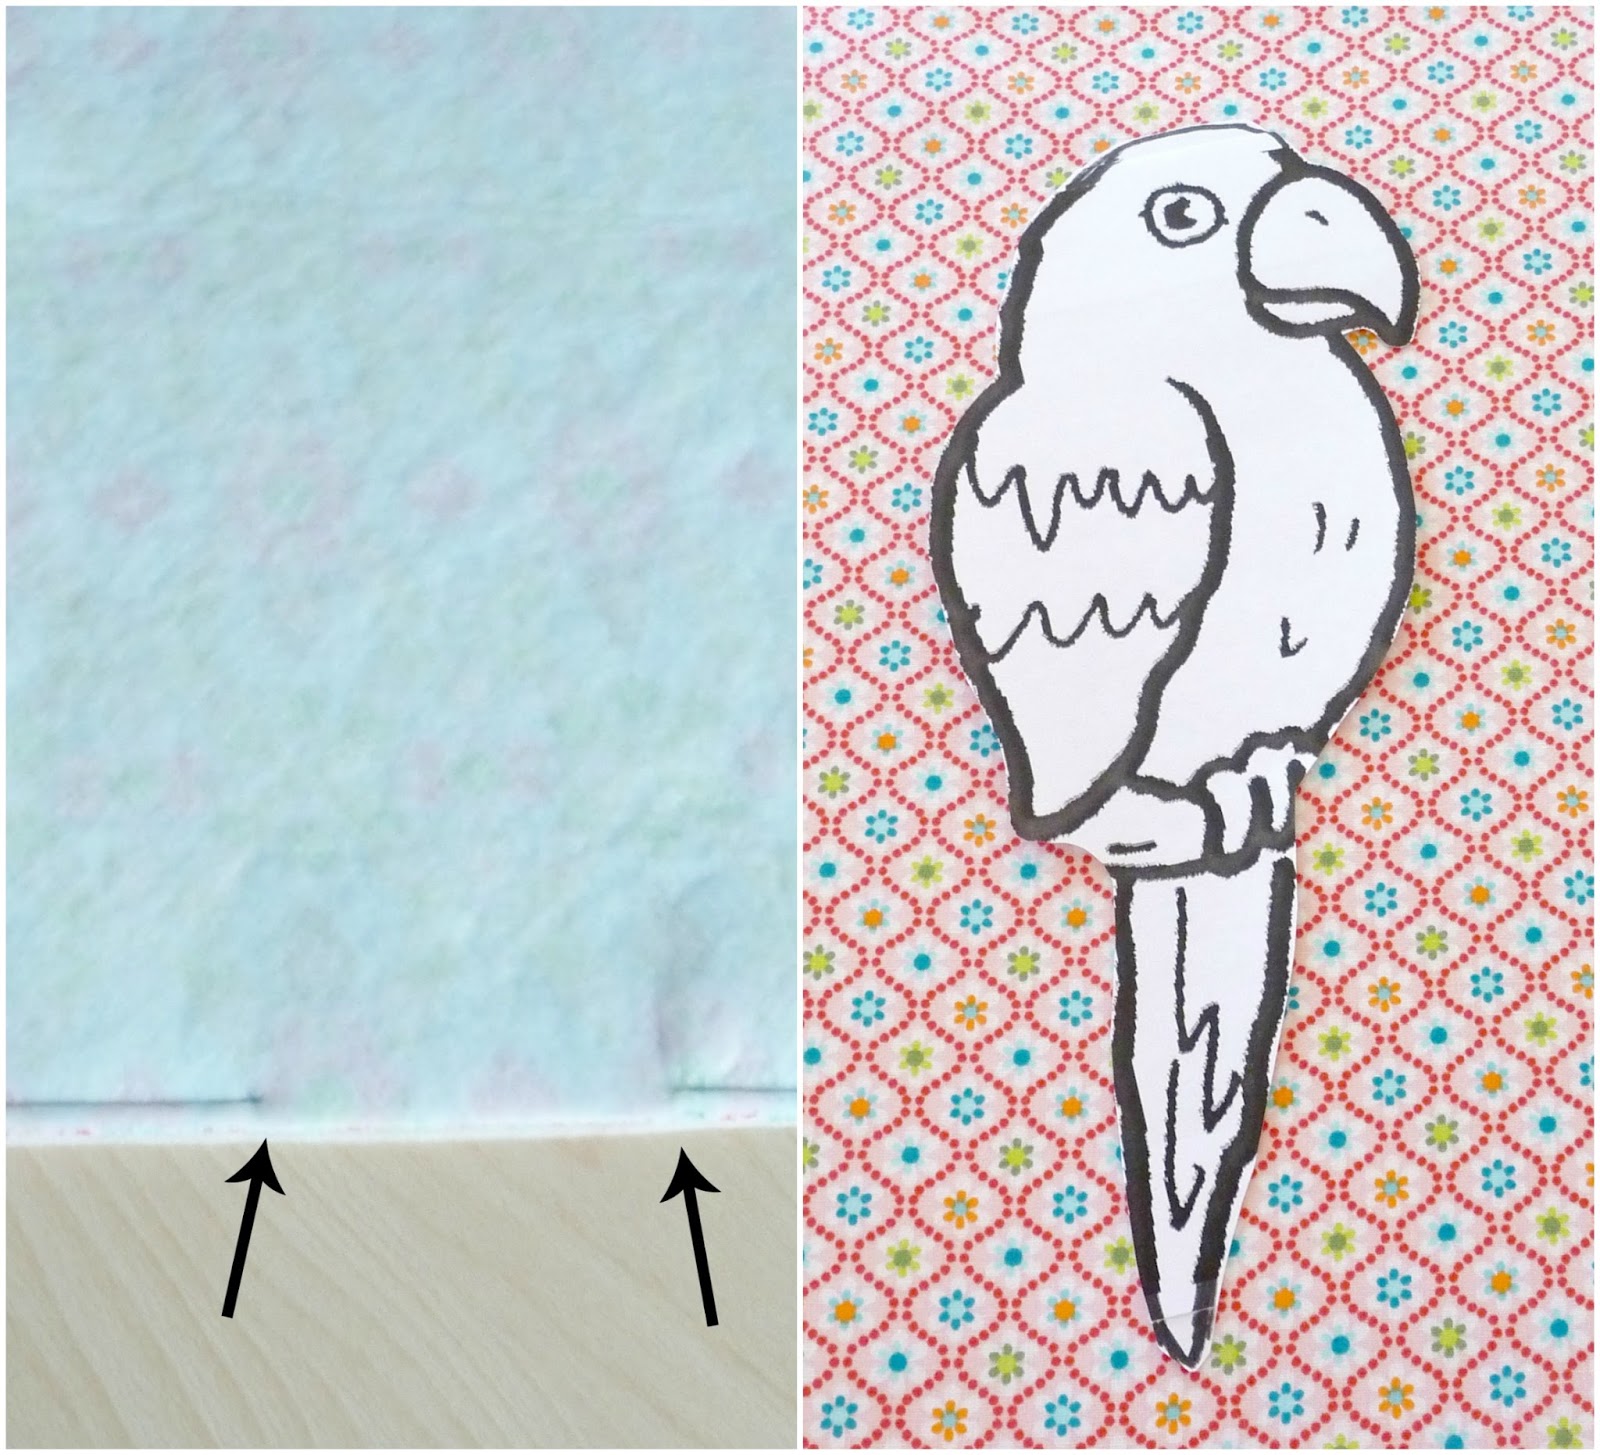
Sew lining pieces together right sides facing at the sides and bottom using a 1 cm seam allowance. Leave a 12 cm gap at the bottom. Snip off corners. Iron seams open.
*
Zunächst das Decovil auf die linke Seite der Hauptstoffteile und das H630 Vlies auf die linke Seite der Futterteile nach Herstelleranweisung bügeln. Dann, die Zackenlitze mittig auf die zwei Webbänder (Träger) steppen. (Meine sind verschieden farbig, da es von jedem Band nur jeweils eine Farbe gab). Beiseite legen.
Futterteile rechts auf rechts legen und Seitennähte und Boden der Futterteile steppen (1 cm Naht). Unten eine 12 cm Öffnung zum Wenden lassen. Ecken kurz vor der Naht abschneiden. Nähte auseinander bügeln.


Step Two // Schritt Zwei

Now go to your computer and google "free parrot drawing for coloring" or "free parrot drawing for kids" and print out your preferred parrot image. Remember it should fit on the front panel of the tote. Cut out the parrot image only (ignore any leaves, trees or branches).
Iron a suitably sized piece of fusible webbing onto the wrong side of the contrasting fabric. Trace the parrot template and cut out. Pull off the backing of webbing and iron the parrot onto the middle of the front panel (main fabric piece).
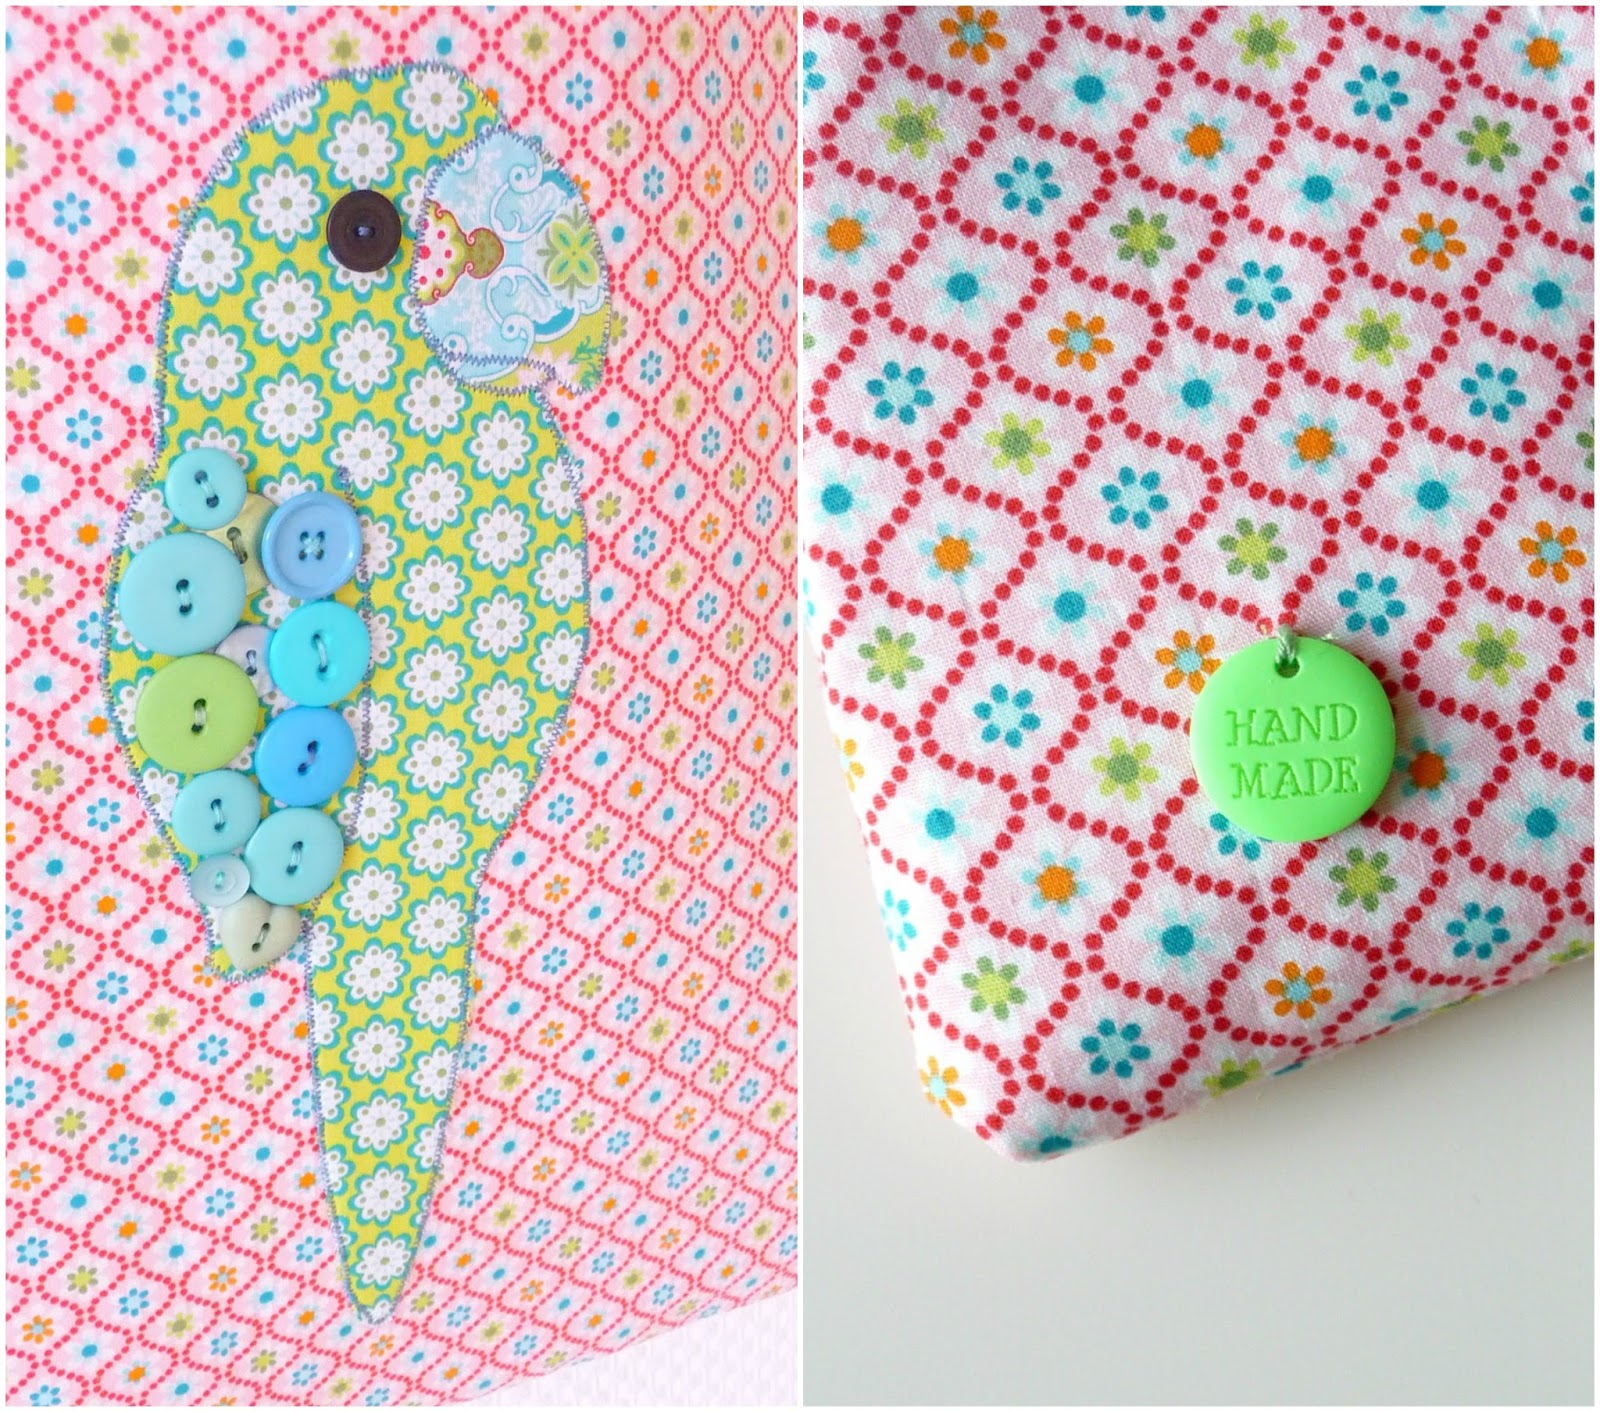
Using a tiny zigzag stitch on your machine (try out on a scrap of fabric first) sew along the contours of the parrot and important areas, such as the beak and wings. Go slowly!
Now sew on the button eye and fill in the wing(s) with colorful buttons. Optional - sew a handmade tag on the back bag piece.


Nun bei Google die Stichwörter "Papagei kostenlose Malvorlage" oder "Papagei malen Kinder" ein und schon bekommt Ihr seitenweise Papagei-Bilder. Euer Wunschbild ausdrucken und auschneiden (Bäume, Blätter, Äste etc. ignorieren). Ein passendes Stück Vliesofix auf die Rückseite des Kontraststoffes bügeln. Papagei als Vorlage zum Nachzeichnen verwenden. Ausschneiden, Folie abziehen und mittig auf ein Hauptstoffteil bügeln. Mit der kleinsten Zickzack-Einstellung der Nähmaschine (vorher an einem Reststück ausprobieren) entlang der Umrisse und wichtige Linien wie Schnabel und Flügel langsam! nähen. Den kleinen schwarzen Knopf als Auge annähen und den Flügel mit farblich passenden Knöpfen plastisch hervorheben. Wer möchte näht noch ein "Handmade" Tag an das rückwärtige Hauptteil.

Step Three // Schritt Drei

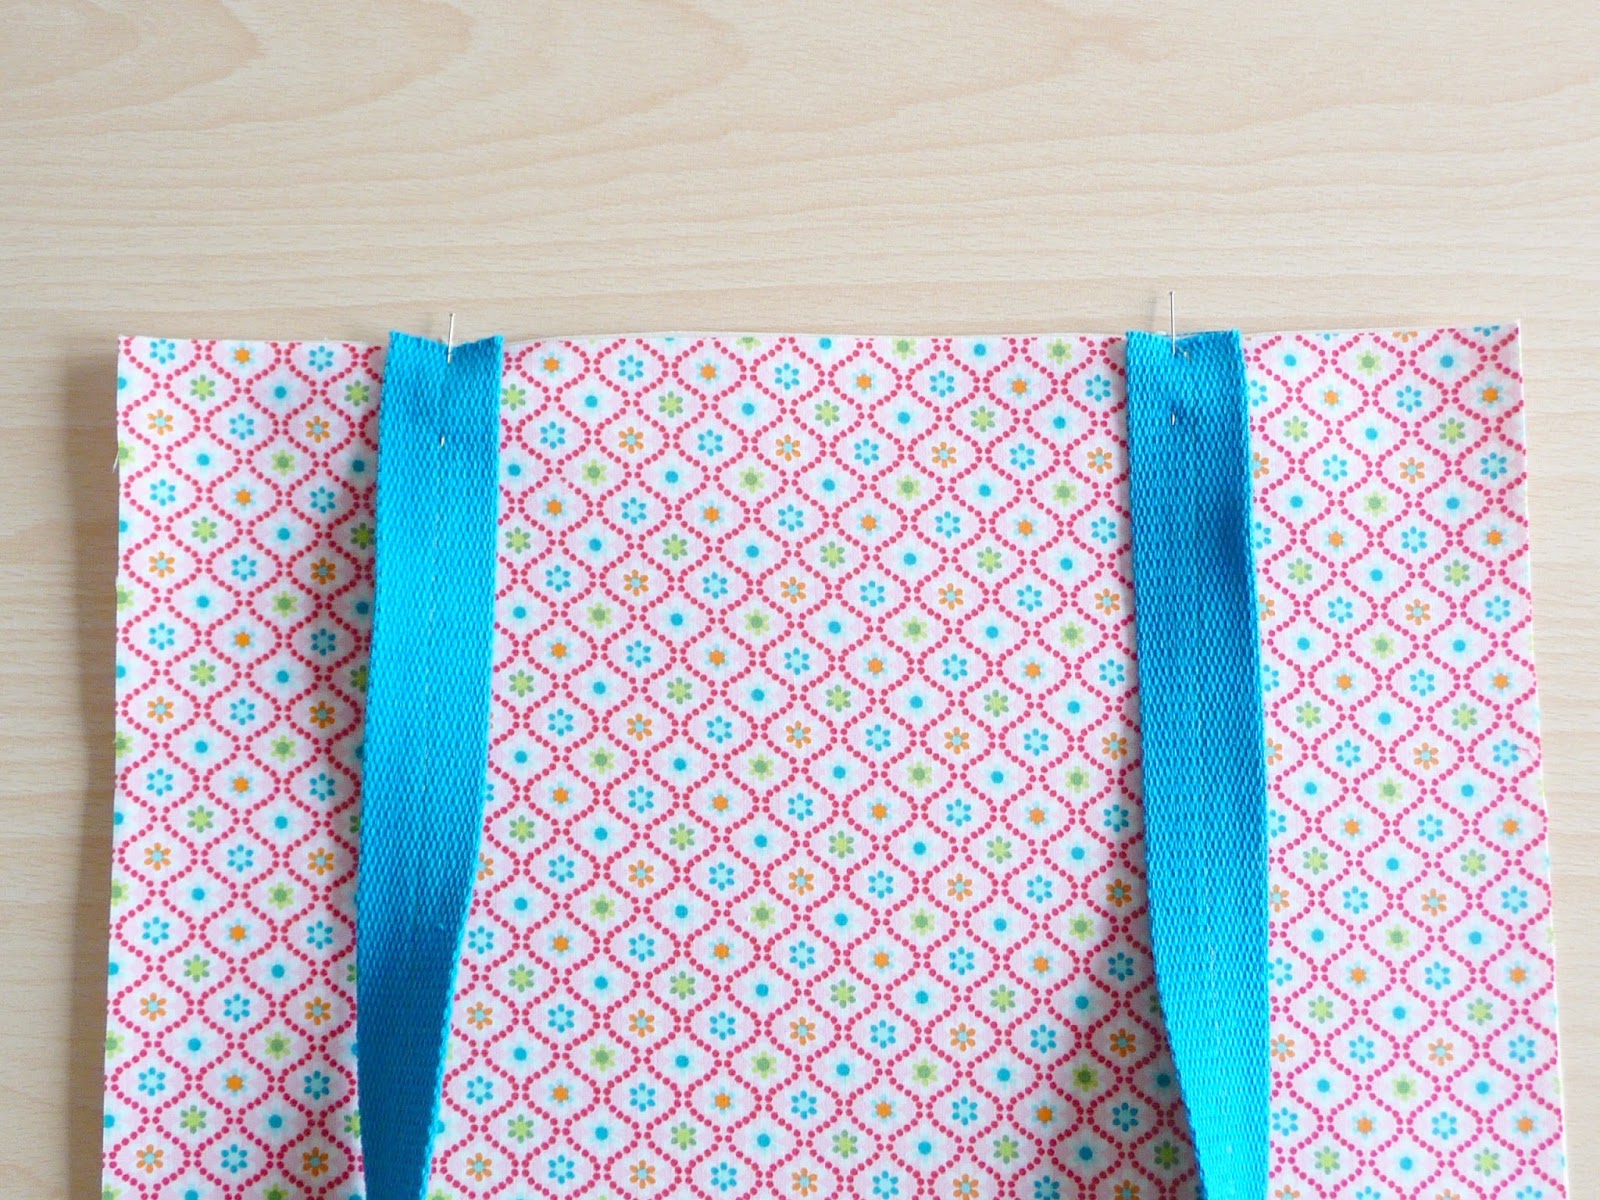
Next, baste the handles to the main fabric pieces, 7 cm from each side.
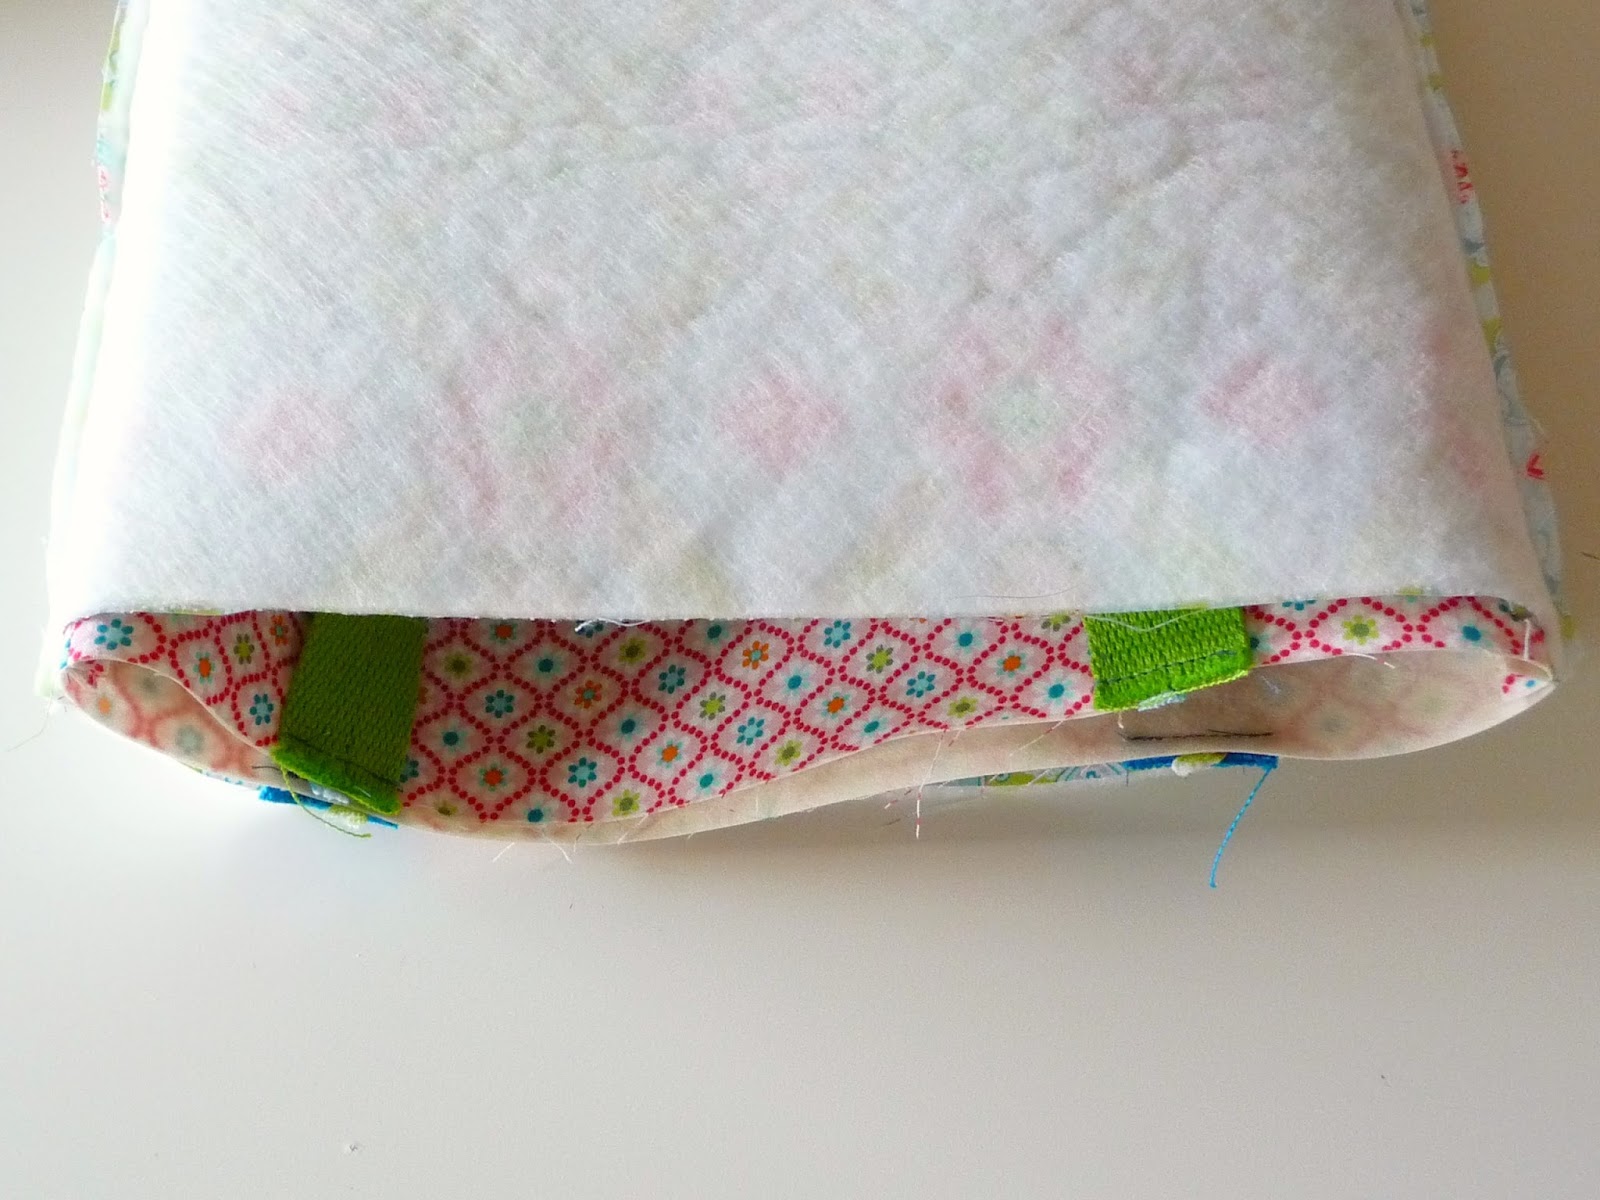
Then sew the main fabric pieces together at the sides and bottom, right sides facing. Make sure the handles are tucked inside, safely out of the way of your seams. Snip corners as before. Iron seams open and turn bag right side out.


Als nächstes die Träger an den Hauptstoffteilen 7 cm von jeder Seite heften (rechts auf rechts). Dann die Stoffteile rechts auf rechts legen und Seiten- und Bodennaht (1 cm) steppen. Darauf achten, dass die Träger nicht im Weg sind. Ecken kurz vor der Naht abschneiden. Nähte auseinander bügeln und Tasche wenden.


Main bag inside lining bag, handles tucked inside // Außentasche in Futtertasche, Träger innenliegend

Finishing the bag. Insert the main bag into the lining bag, right sides facing. The handles should be tucked inside. Make sure the side seams align. Then pin all around the top edge and stitch (1 cm seam). Carefully pull the main bag through the opening in the lining. Close the gap by hand. Push the lining down into the main bag and iron the entire bag thoroughly, being careful not to iron over the buttons! Finish the top edge by edge-stitching along the entire circumference. 
Congratulations, you're done!
*
Nun die Außentasche rechts auf rechts in die Futtertasche stecken, Träger innenliegend. Seitennähte treffen aufeinander. Obere Kante mit Nadeln fixieren und 1 cm breit absteppen. Die Außentasche vorsichtig durch die Öffnung der Futtertasche ziehen. Loch mit ein paar Handstichen schließen. Futtertasche in die Haupttasche stecken und die gesamte Tasche gut bügeln, dabei die Knöpfe aussparen. Zuletzt rundum an der oberen Kante knappkantig absteppen. Glückwunsch, Ihr habt's geschafft!

p.s. comments for this post are off, but if you have any questions feel free to drop me a line or leave a comment on the main post here

P.S. Kommentare habe ich für diesen Post abgeschaltet, aber falls Ihr Fragen habt, könnt Ihr mir gerne eine Mail schreiben oder einen Kommentar im Hauptpost hinterlassen.