Showing posts with label fashion. Show all posts

Friday, December 15

DIY Fabric Bead Necklace { Bonbonkette }


Hello lovelies!         Hallo, ihr Lieben!


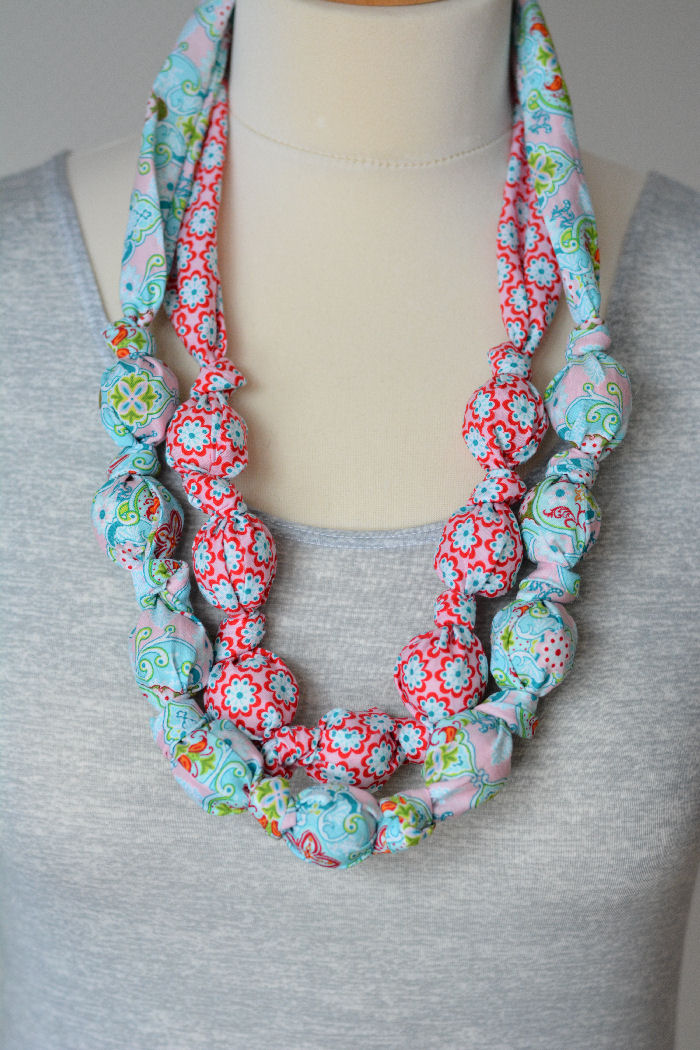
Add a pop of color to your wardrobe this (drab winter) season with a fabric bead necklace! These cheerful necklaces are easy to sew and quickly made plus you get to use up those long strips of fabric scraps! 

Diese fröhliche Halskette aus Stoff heitert im Winter richtig auf! Die Kette ist einfach zu nähen und schnell gefertigt. Und endlich finden die langen Stoffstreifen aus der Restekiste Verwendung!
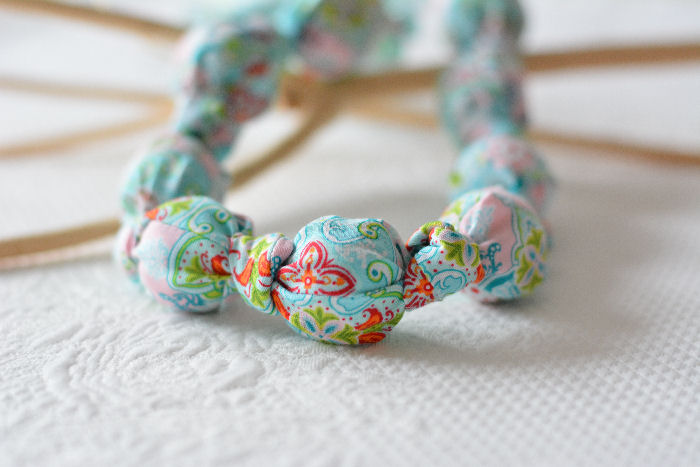

You'll need 

1 inch wooden beads 
long fabric strips in cotton, at least 1 yard long
ribbon clamps with lobster claw and jump ring (extension chain optional)
important: clamp width at least 3/4 inch
sewing machine
basic sewing utensils

Ihr braucht

2,5 cm Holzperlen
Lange Stoffstücke, Baumwolle, mind. 80 cm lang
Bandklemmen mit Karabiner und Ring (Verlängerungskette optional)
Wichtig: Bandklemmen sollten mind. 2 cm breit sein
Nähmaschine
Nähutensilien

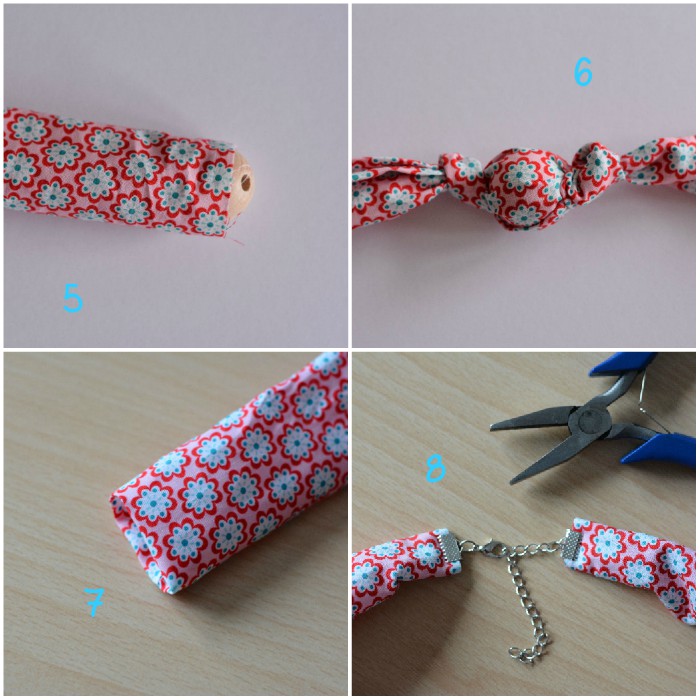
How to

I couldn't get better pictures, since it's been dark here for weeks. Sorry.
  1. gather your materials.
  2. for one necklace cut a strip at least a yard long and 4.4 inches wide.
  3. Fold the long edge in half, right sides facing and pin.
  4. Stitch down the length, then iron the seam open. Try not to iron the edges as you would want to keep the tube shape.
  5. Turn the fabric tube right side out and slide a bead to the center. 
  6. Tie a knot at each side of the bead. Continue to add beads (always uneven number, 5 - 7 - 9 etc.) and knot each bead in place. I did one with 7 beads and one with 9 beads. You can try out different lengths.
  7. Cut off excess fabric if necessary, then fold in the edges on both sides. 
  8. Double up the fabric ends and use a pair of pliers to secure the clamps. As you can see mine are too small, but those are the only ones I had on hand. They do the job, but bigger ones would have been better! p.s. alternatively you can leave the long ends and simply tie a bow in the back :)
Und so geht's

Die Bilder sind nicht die Besten, aber es ist leider schon seit Wochen duster hier. Sorry.
  1. Materialauswahl.
  2. für eine Kette einen Streifen ca. 80 - 100 cm lang und 11 cm breit schneiden.
  3. Lange Seite rechts auf rechts legen und mit Nadeln feststecken.
  4. Steppen, Naht auseinander bügeln, dabei die Ränder nicht bügeln.
  5. Auf Rechts drehen und eine Holzperle zur Mitte schieben.
  6. Beidseitig der Perle verknoten. Weitere Perlen links und rechts der Perle in der Mitte durch den Schlauch schieben und verknoten. Meine Ketten sind jeweils mit 7 und 9 Perlen gefertigt. Ihr habt da freie Wahl - einfach ausprobieren.
  7. Wenn nötig, überschüssige Stoffenden abschneiden. Enden einschlagen.
  8. Eingeschlagene Enden falten und mit Hilfe einer Zange die Klemmen daran befestigen. Meine sind leider zu klein, das waren aber die Einzigen, die ich da hatte. Sie halten zwar, aber 2 cm breite wären auf jeden Fall besser gewesen! Alternative: lange Enden nicht abschneiden, sondern im Nacken zum Knoten binden :)

Happy Crafting!

 photo signature_zpscqkypdzs.png

Friday, July 14

DIY frame purse { pattern & tutorial }


Hello lovelies!      Hallo Mädels!

Today I'm sharing my new Lottie frame purse tutorial. This is a sew-in frame purse, which is a little bit more work, but looks way cuter. Plus no stinky glue. I designed it so that it fits in most handbags. Finished purse measures approximately 7 x 5 inches and keeps all your essentials in one place!

Ready to make your own? Download the free template & the complete tutorial (English version) with step-by-step instructions and pictures.

🌸 🍒 🌸

Seit langem gibt es mal wieder eine Anleitung für ein von mir entworfenes Täschchen mit Bügelverschluss! Lottie, so heißt dieses Täschchen ist ca. 17,5 cm breit und 13 cm hoch und passt in fast jede Handtasche. Ich habe mich bewusst für einen Rahmen zum Annähen entschieden. Siehteinfach süßer aus!

Möchtet ihr auch so ein Täschchen nähen? Dann ladet einfach die kostenlose Vorlage sowie die vollständige Anleitung (Deutsch) mit Bildern runter.

Happy Sewing!


 photo signature_zpscqkypdzs.png

Wednesday, April 13

Coastline Cardigan

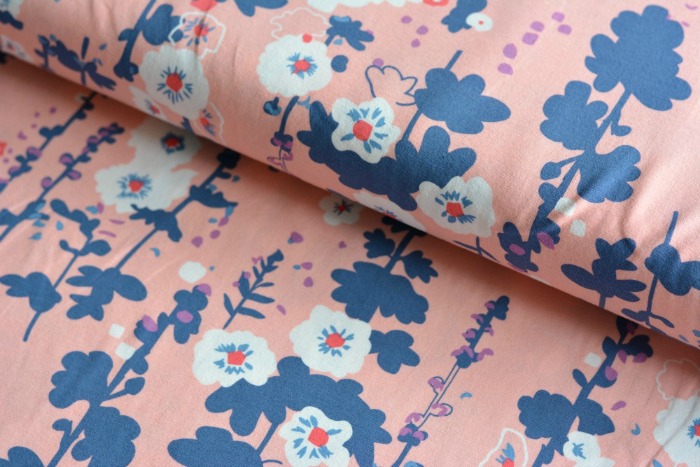
I'm a cardigan girl. More out of necessity as the weather over here is unpredictable, even in summer. While I appreciate the classic cardigan style, especially while working, I was looking to update my spring wardrobe with something more fun. Preferably with fringe. When I received Coastline, a soft jersey knit fabric by designer Sharon Holland, I knew straight away that it was the perfect choice for my sewing project!
*
Ich bin ein "Cardigan Girl" (lässt sich schwer übersetzen). Da das Wetter hier in meiner Gegend selbst im Hochsommer unberechenbar ist, sind Strickjacken für mich unverzichtbar. Obgleich ich den klassischen Cardigan schätze, vor allem bei der Arbeit, wünschte ich mir ein pfiffigeres Outfit, z.B. mit Fransen! Neulich ist Coastline, ein weicher Jersey von Designerin Sharon Holland im Lädchen eingetroffen und ich wusste sofort, das ist der Stoff für meine neue Jacke!

source
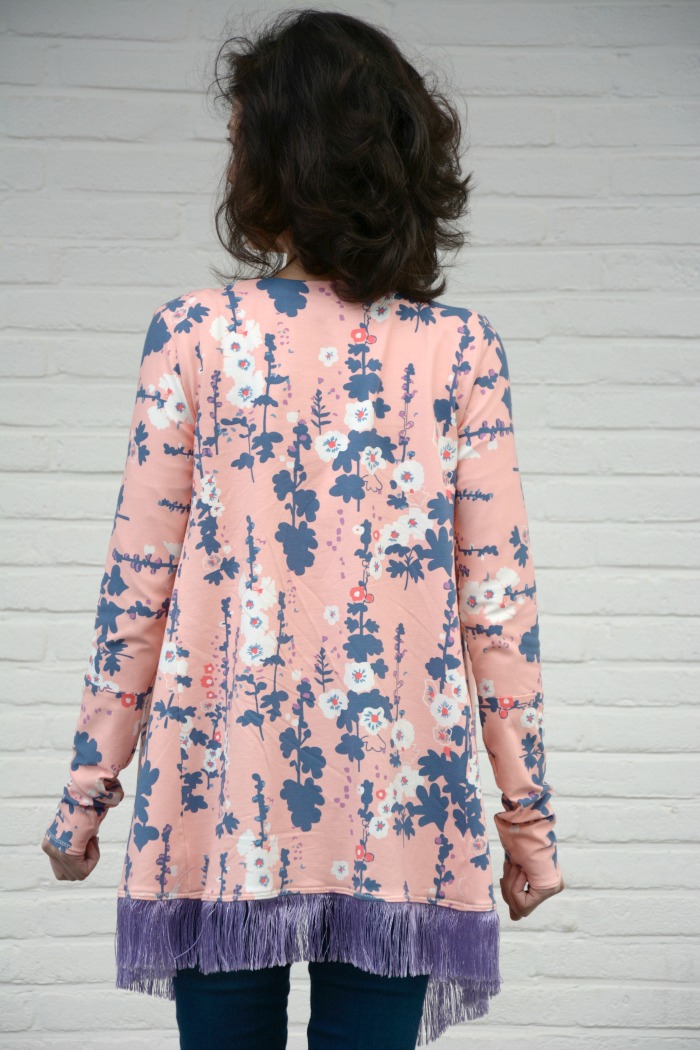
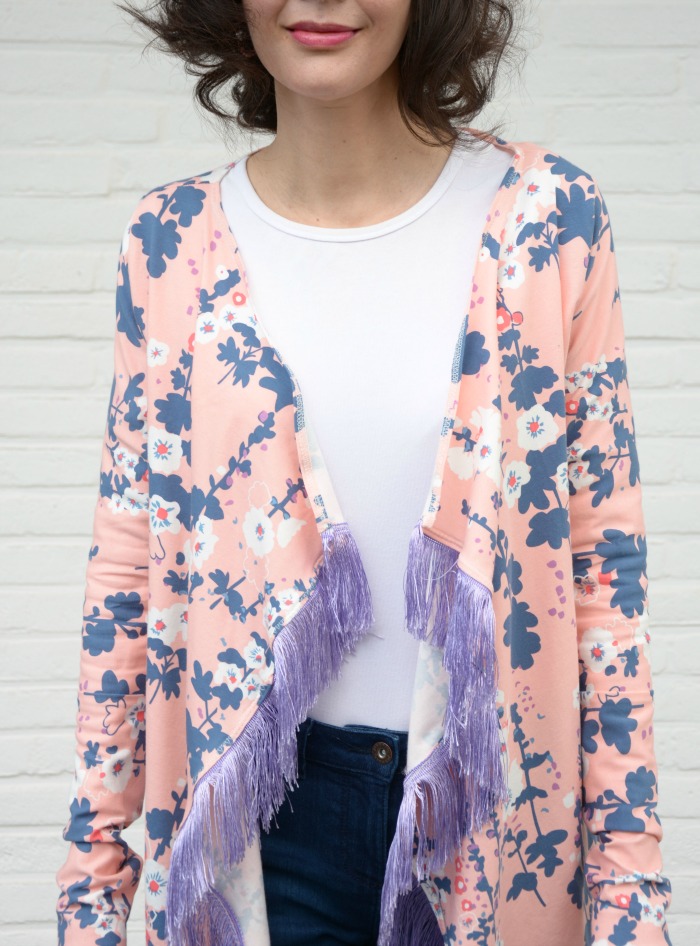
This fabric features a coral, white and navy floral pattern on a soft peach background. And if you look closely you will discover some pops of lavender on there too! This is the color I picked up for the fringe. The overall look is fresh, spring-y and casually chic. The front has two asymmetric panels a little bit longer than the back. It's an open style cardigan without any closures, thus it is fairly easy to sew. Btw, I didn't use a paper pattern. I copied the style from a wool cardigan that I own. This isn't too difficult for someone with dressmaking experience. Also, I elongated the sleeves, because I love narrow sleeves that go halfway up my hands :) Those who sew will notice that I cut the sleeves perpendicular to the grainlain to save on fabric...normally, you shouldn't be doing this, but since the fabric is pretty stretchy I got away with it. #bendtherules


Dieser hochwertige Jersey hat ein florales Muster in Koralle,Weiß und Navy auf einem sanften pfirsichfarbenen Hintergrund. Und wer genau hinschaut entdeckt ein paar Tupfen in Lavendel! Die Fransen habe ich auf die letztere Farbe abgestimmt. Das enstandene Teil ist lässig schick und frühlingshaft frisch. Das Vorderteil ist asymmetrisch und etwas länger als der Rücken. Es ist eine verschlusslose Jacke und somit ziemlich einfach zu nähen. Übrigens, es gibt kein Schnittmuster. Ich habe den Schnitt von einer Wollstrickjacke, die ich besitze kopiert. Mit etwas Näherfahrung im Bekleidungsbereich ist dies gar nicht so schwierig. Zudem habe ich die Ärmel verlängert, weil ich überlange Ärmel, die bis mittig der Hände reichen einfach sehr mag :) Diejenigen unter Euch, die ebenfalls nähen haben sicherlich festgestellt, dass ich die Ärmel senkrecht zum Fadenlauf zugeschnitten habe...dies sollte man niemals tun, aber um Stoff zu "sparen" und da er ziemlich elastisch ist und ich dünne Arme habe ging es nochmal gut. #bendtherules


Actually, attaching the silky fringe was the most challenging. It's very slippery and I had to take care not to get the threads under my needle! The fringe trim was kindly sponsored by Union Knopf.
*
Die seidige Fransenborte anzunähen hat ein wenig länger gedauert. Ich musste beim Nähen total aufpassen die Fäden nicht unter die Nadel zu bekommen! Die Fransenborte wurde mir von Union Knopf gesponsert.


Have you made some spring-y item for yourself or your children lately? Do you like the current fringe trend?
*
Habt Ihr auch schon etwas frühlingshaftes für Euch (oder eure Kinder) genäht? Wie findet Ihr den Fransen-Trend?
photo signature_zpscqkypdzs.png

Tuesday, February 16

Denim Love

I think it is safe to say that everyone (at least in the western world) owns at least one piece of denim. Few things are as classic and versatile as denim, and in 2016 it's as hot as ever - skinny, straight or flared jeans, skirts, dresses, button down shirts, shoes, bags and not to forget home decor. There truly is something for everyone!
*
Ich glaube, dass es niemanden gibt (zumindest in der westlichen Welt) der nicht mindestens eine Jeans im Schrank hängen hat. Denim ist klassisch, vielseitig und auch in diesem Jahr sehr angesagt. Ob Skinny-, Straight- oder Flared Jeans, Röcke, Kleider, Jeansshirts, Schuhe, Taschen oder Heimdeko - es ist wirklich für jeden etwas dabei!


1. button down shirt Esprit // 2.  // 3. skintight jeggings Uniqlo // 4. jeans dress Uniqlo // 5. flower print skirt Montego// classic black jeans (sold out)


And for those who wish to sew their own clothes (like me) I'm happy to report that I'll be introducing beautiful premium quality denims from The Denim Studio, a division by Art Gallery Fabrics to my fabric shoppe in late spring! Yay! The fabrics are 150 cm wide in dressmaker quality. They come in a fun selection of prints, classic solids, smooth or textured. See swatches below:
*
Gute Neuigkeiten für alle Nähbegeisterten. Im Mai/Juni kommen die wunderschönen Jeansstoffe von The Denim Studio by AGF in den Laden. Die Stoffe sind ca 150 cm breit, bedruckt oder uni, mit glatter oder strukturierter Oberfläche. Perfekt um daraus allerlei Modisches zu zaubern! Siehe Stoffmuster unten:


I've been wanting to sew my own denim shirt dress for ages (the store-bought ones are usually too long) and except for the textured one in the bottom right any one of these fabrics would look cute! The floral one would make a great blouse and my niece would appreciate a pair of jean shorts in the modern print! The solid, textured fabrics can be turned into cool bags! Speaking of bags - how cool is that bag below! It's a diaper bag, but I wouldn't mind using it as a regular bag or perhaps sewing something similar :)
diaper bag / Wickeltasche

Ich wollte schon lange ein Jeanskleid nähen (die im Modegeschäft sind in der Regel zu lang). Dafür wäre der Stoff unten links in der Collage ideal. Der floral bedruckte könnte ich mir als Bluse gut vorstellen und meine Nichte würde sich über eine Shorts mit modernem Print sehr freuen :) Für Taschen sind die strukturierten Unis toll. Apropos Tasche - wie toll ist denn die Wickeltasche aus Jeansstoff oben?! Die würde ich glatt als Tasche für jeden Tag benutzen oder vielleicht eine ähnliche selbst nähen :)

Friday, December 18

{DIY} Pompom Scarf


Still looking for a gift for your friend, sister, colleague? Here's a cute last minute handmade gift idea that it easy to sew and customizable!

For this project all you need is a length of jersey (knit fabric) in colour of your choice and some leftover wool yarn. Check illustrations below for basic instructions. Use a ball-point needle on your sewing machine.


Auf der Suche nach einer schnellen Handmade Geschenkidee für die Freundin, Schwester oder Kollegin? Dieser Pompom Schal aus Jersey ist originell und schnell genäht!
Dazu benötigt Ihr ein langes Stück Jersey, dicke Wolle für die Pompoms sowie eine Maschinennadel speziell für Jerseystoffe.


(1 + 2) Start by making two pompoms. Follow this method. Use the large cardboard template.
*
(1 + 2) Zunächst zwei Pompoms machen. Hier die Anleitung. Die größere Variante (7 cm) wählen.


( 3 ) Fold fabric in half as shown in illustration. Mark the center and cut off corners diagonally at each end (the angle determines how pointy the scarf will look - mine is 45°). Pin the raw edges from one X to the other X right sides together - leave a 4" gap at one long side. Remember to place the pompoms inside and as close as they go to the pointy tips. Leave long thread dangling for the time being. Carefully and slowly sew a seam (0.4"). When you reach the pointy tip, push pompom to other side, pivot and continue to sew.
*
( 3 ) Jersey wie in der Zeichnung längs falten, rechte Seite innen. Von der Mitte aus an beiden Enden die Ecken diagonal abschneiden (der Winkel richtet sich je nachdem wie spitz zulaufend der fertige Schal sein soll - bei mir 45°). Die offene Kante von X zu X mit Nadeln feststecken, dabei eine 10 cm Öffnung an der langen Kante offen lassen. Pompoms zwischen die Stofflagen schieben und so nah wie möglich an die jeweilige Spitze. Vorsichtig und langsam im Geradstich nähen (1 cm Saum). Sobald Ihr die Spitze erreicht habt, dem Pompom vorsichtig zur anderen Seite schieben, Schal drehen und weiternähen.

( 4 ) Snip off wool yarn. Turn right side out through gap. If necessary, iron lightly. Close gap by hand with a slip stitch.
*
( 4 ) Überstehenden Wollfaden abschneiden. Vorsichtig durch die Öffnung auf Rechts drehen. Leicht überbügeln falls nötig. Öffnung mit ein paar Handstichen schließen.
vegan leather jacket from ONLY | shirt from Uniqlo Berlin | scarf handmade by me

p.s. the past couple of weeks have been so stressful, that it's affected my hair badly. I had no choice but to cut all the frizzy bits off, which leaves me with this casual bob. 
*
P.S. meine Haare haben so sehr unter den stressigen letzten Wochen gelitten, dass mir nichts anderes übrig blieb als die kaputte Partie abzuschneiden. Ich trage jetzt einen durchgestuften Bob.

xoxo

Wednesday, November 11

Minimalist Jewelry { 10% discount + free worldwide shipping }


I own a couple of statement pieces, but for everyday wear, especially in my line of work (sewing, crafting, cutting fabrics, packing orders) I prefer minimalist jewelry that doesn't get in the way! The other day the lovely people over at Onecklace approached me once again to review their new items, including their line of dainty jewelry. Perfect timing as I had been looking for a minimalist ring for myself :) I fell in love with this sterling silver STAR set. So cute and dainty. I had the ring custom sized and it fit perfectly.  My jewelry arrived packaged in a cute box and included a certificate of authenticity.


Onecklace is a jewelry manufacturer specializing in customized jewelry such as: name necklaces, monogram necklaces, Mama/Child pendants, rings, earrings and more! They offer 14K, 24K gold plated, 0.925 sterling silver as well as 14K white gold. They have a variety of necklace lengths to choose from in addition to personalizing most items as well as having the option to include a Swarovski crystal birthstone.  Here are a few pretty items in sterling silver from their website:

sterling silver engraved heart necklace set

sterling silver dreamcatcher bracelet

sterling silver bar ring with customized initial

I am really pleased with my STAR jewelry set. Check out the earstuds worn here. Did you know that sterling silver jewelry stays shiny by wearng it often? Once in a while you might like to polish it with a soft cloth. Personally, I'd remove it before taking a bath or shower and keep it stored away from direct sunlight or heat source.


If you are considering purchasing from Onecklace get 10% OFF your purchase by entering duni10 during the checkout process! Plus they offer FREE worldwide shipping. Remember Christmas is just around the corner...happy shopping!

This post is in collaboration with Onecklace

Wednesday, August 5

DIY Tassel Scarf


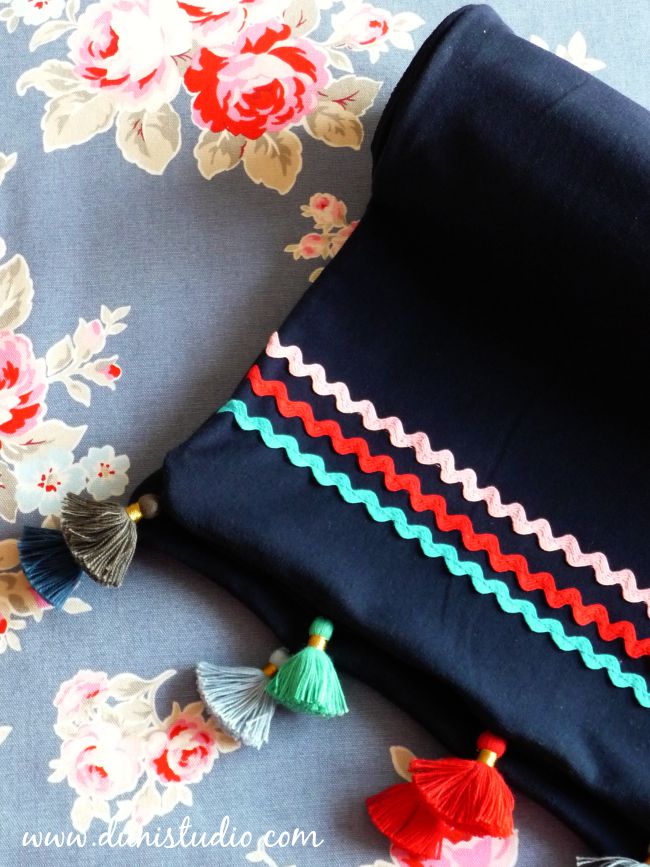
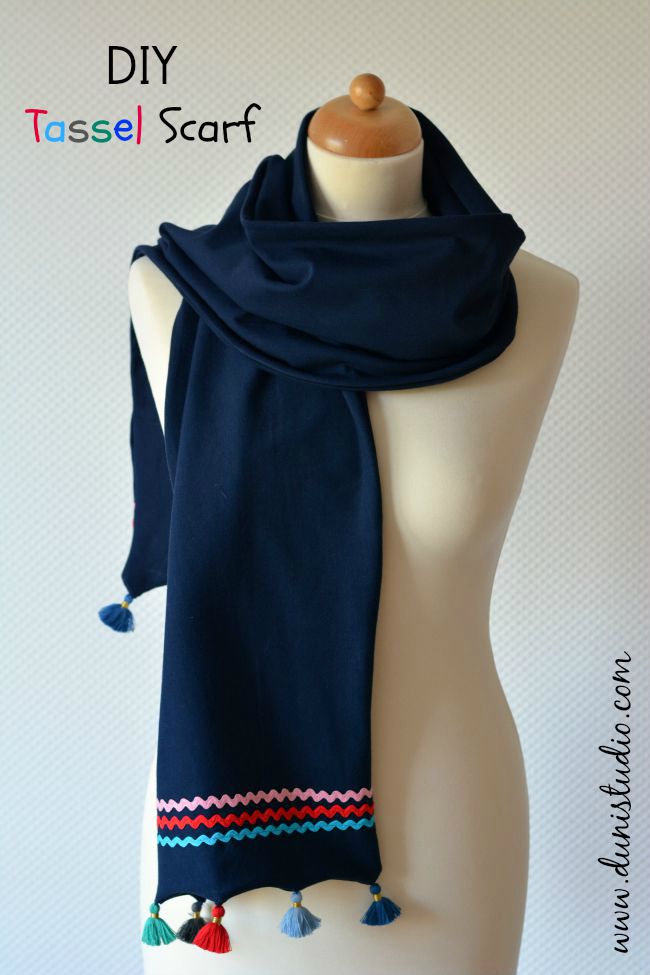
As a DIY blogger specialising in handmade fashion I need to think ahead to next season...trust me, fall will be here faster than you can say tassel! The other day I saw a cute scarf online and thought to myself: I could make that! This scarf is made from a lovely soft knit (95% CO / 5% Spandex) in a solid colour. If you've never sewn with knits before, this is the perfect starter project!
*
Als DIY Blogger, auf Handmade Fashion spezialisiert, schaue ich bereits jetzt nach Trends in der kommenden Saison, so z.B. Fransen und Quasten. Neulich entdeckte ich beim virtuellen Shoppen einen süßen Schal und es kam der Gedanke: Den mache ich mir selbst! Zumal ich das Material schon vorhanden hatte. Der Stoff ist ein weicher, unifarbener Jersey mit 95% Baumwollanteil. Falls Ihr noch nie mit Jerseys genäht habt, so ist dies das perfekte Einsteigerprojekt!


You'll need // Ihr benötigt

knit fabric, solid colour // Jersey, uni
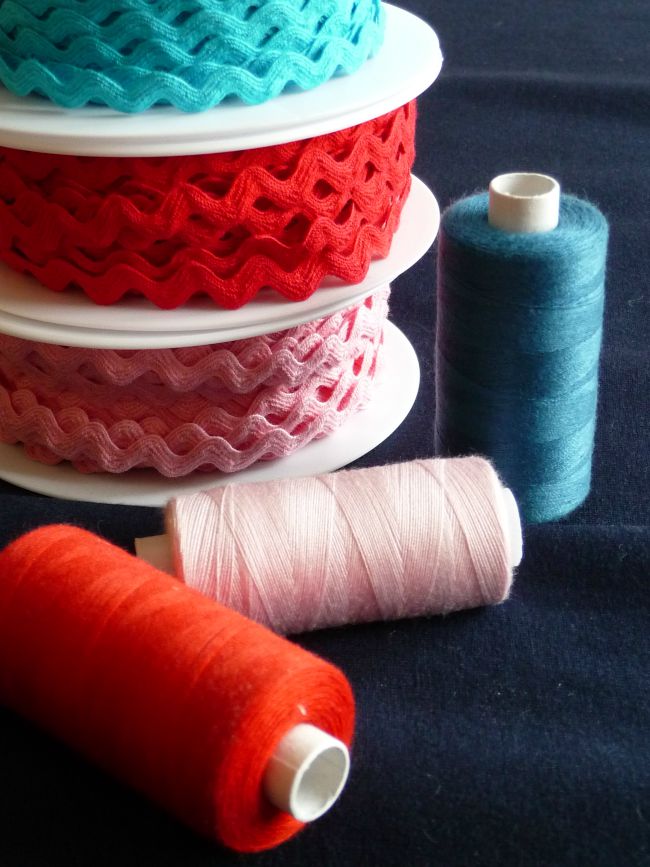
rick rack trim, various colours 1 m each // Zackenlitze, verschiedene Farben je 1 m
coordinating thread // farblich passendes Nähgarn
10 small tassels, various colours // 10 kleine Quasten, verschiedene Farben
ball point needle for sewing machines // Jersey Nadel für die Nähmaschine
basic sewing kit // Basic Näh-Utensilien 


Step 1

Cut two pieces of fabric 32 cm x 160 cm (approx. 12.5" x 63"). See illustration above. Sometimes, with solid coloured knits, especially dark colours it's difficult to determine which side is the right side. In this case simply check which way the selvedges roll, namely toward the wrong side. 

Schritt 1

Vom Jersey zwei Streifen je 32 cm x 160 cm schneiden. Siehe obige Abbildung. Bei dunklen Unis ist es manchmal schwer zu erkennen welches die rechte Seite ist. Am einfachsten ist es zu schauen in welche Richtung sich die Webkanten (nämlich zur linken) einrollen. 

Step 2

Take one piece and place it right side up. Measure 5 cm (approx. 2") up from short end. This is the placement of the first rick rack. Cut rick rack to fit across the width and straight stitch using coordinating thread. Space the other colours 1,5 cm (approx. 0.6") apart and stitch on. Repeat for the other short end. See illustration above.

Schritt 2

Nehmt nun ein Teil, rechte Seite oben. Passende Stücke Zackenlitze schneiden. Plaziert die erste Zackenlitze 5 cm von der Kante der kurzen Seite entfernt. Mit farblich passendem Garn im Geradstich steppen. Die zwei weiteren Litzen mit jeweils 1,5 cm Abstand annähen. Genauso bei dem anderen Ende vorgehen. Siehe Abbildung oben.


Step 3

Now lay the remaining piece exactly on top of the first piece, right sides facing. Pin all around leaving a 10 cm (approx. 4") gap on one long side. Straight stitch all around (seam width 0.4") starting and ending from gap. Don't forget to backstitch! Turn scarf carefully through opening and gently push out corners. Close the gap by hand. Press.

And finally, sew on by hand five tassels at each end, spacing them 7 cm (approx. 2.75") apart.

Schritt 3

Nun das zweite Teil exakt auf das erste Teil legen, rechte Seite innen. Rundherum mit Stecknadeln fixieren, dabei eine 10 cm Öffnung an einer langen Seite zum Wenden offen lassen. An der Öffnung beginnend ringsherum steppen (Nahtzugabe 1 cm). Rückstiche nicht vergessen! Schal vorsichtig durch die Öffnung wenden. Offene Naht mit Handstichen schließen. Schal bügeln. 

Zum Schluß mit ein paar Handstichen jeweils fünf Quasten an den kurzen Seiten immer mit 7 cm Abstand annähen.


 Happy Sewing!

Wednesday, July 22

Finishing Techniques for T Shirts {Sewing Tutorial}


A few of my lovely readers have inquired about how to finish necklines and hems on knits, such as T-shirts, tops etc., because sewing with knits is fun, but finishing the neckline is tricky and requires practice and patience. So, I've finally put together a little tutorial with step-by-step instructions and photos. Hope all you sewists out there feel more confident sewing with knits after reading this post!
*
Ein paar meiner nähbegeisterten Leserinnen hatten mich vor einiger Zeit gefragt, ob ich eine Anleitung für T-shirt-Ausschnitte schreibe, denn obgleich das Nähen mit Jersey super viel Spaß macht, sind die Ausschnitte meist doch recht knifflig. Nun habe ich endlich eine Nähanleitung inklusive Fotos für Euch. Ich hoffe sie ist verständlich. Bei Rückfragen einfach mailen!


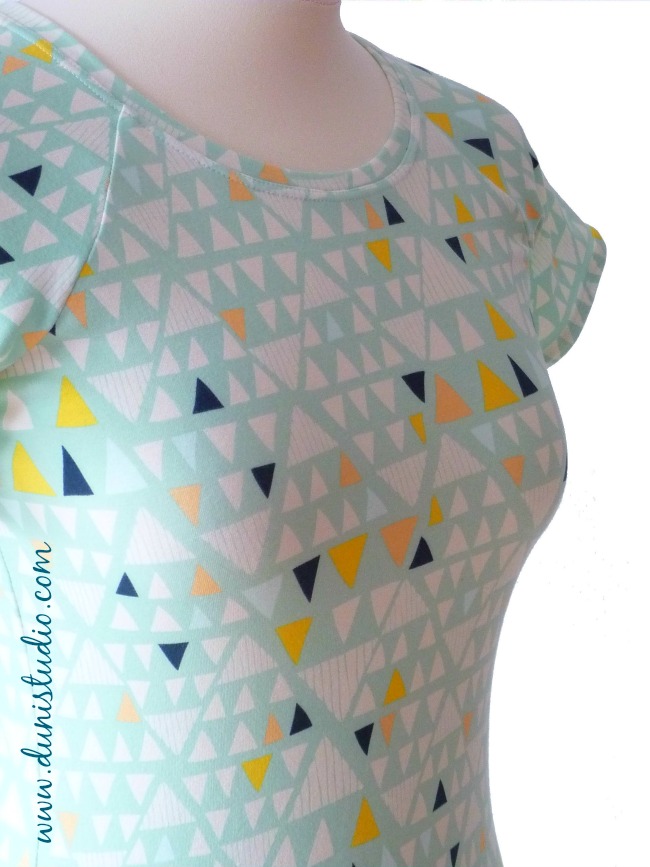
I'm assuming that you have finished your Tshirt right up to the point where all you need to do now is finish the hems on the sleeves and bottom plus add a neckband to the neckline. Let's start with hemming first, because that is quite simple! For sleeves, whether short or long, fold under the raw edge 0.40" twice. Pin. Top stitch at point 3 length all around using a twin needle. Don't forget to backstitch at the beginning and end. Then press.
*
Ich gehe davon aus, dass Ihr Euer Shirt bereits zusammengenäht habt und nur noch die Ärmel, Saum sowie Halsausschnitt genäht werden müssen. Fangen wir mit den Ärmeln an, denn das geht ganz einfach! Egal ob kurz oder lang, ich schlage die Kanten zweimal 1 cm nach innen um, stecke diese mit Nadeln ab und steppe ringsherum mit der Zwillingsnadel (Stichlänge 3). Rückstiche nicht vergessen. Dann bügeln.


Do exactly the same for the bottom hem, except fold under approx. 0.80" twice. Important - don't forget to press!
*
Für den Saum schlage ich gerne zweimal 2 cm ein und wiederhole die Schritte wie beim Ärmel. Anschließendes Bügeln nicht vergessen!


Adding the neckband

There are several ways to finish a knit neckline, but this method is the simplest and always looks professional. Fold the Tshirt in half and mark the center back with a pin. Measure circumference and jot down the number. Remember that the neckband needs to stretch in the curves in order to lay flat, therefore you'll need to deduct a couple of inches from this number. There is no hard-and-fast rule, as every knit fabric is a little different, but after much trial and error I find that deducting at least 2" from your circumference makes for a nice flat neckband later on. The width of the neckband is a matter of preference. For a regular neckline such as above a 1.5" - 1.75" width works best.

Cut the neck band according to your measured length x 1.5" (or wider) width. Be sure that you cut the neckband perpendicular to the grainline. Fold short ends right sides facing and stitch 1/4" seam. Open seam, press and fold lengthwise wrong sides facing to form a circle. Press again, so that folded edge is clearly defined. You should end up with this:


Bündchen an Halsausschnitt annähen


Es gibt mehrere Ausschnittlösungen, aber diese Methode ist die einfachste und sieht immer professionell aus. Das T-Shirt zur Hälfte falten und hintere Mitte mit einer Stecknadel markieren. Den Halsausschnitt abmessen und die Zentimeter notieren. Denkt bitte daran, dass das Bündchen in den Kurven gedehnt werden muss, damit es später flach anliegt, daher müsst Ihr von dieser Zahl mehrere Zentimeter abziehen. Es gibt keine pauschale Regel, da Stretchstoffe sich unterschiedlich verhalten, aber durch viel Ausprobieren habe ich festgestellt, dass man mindestens 3 cm (bis zu 5 cm) von der Zahl abziehen sollte. Die Breite des Bündchens ist Geschmacksache. Für einen normalen Ausschnitt wie oben funktioniert eine Breite von 3,5 cm.

Halsbündchen vertikal zum Fadenlauf schneiden. Länge x 3,5 cm (oder breiter). Die kurzen Seiten rechts-auf-rechts legen und 0,5 cm Naht nähen. Naht öffnen und bügeln. Bund längs und links-auf-links falten (Naht trifft aufeinander). Nochmals bügeln, so dass eine schöne Kante entsteht. Euer Bündchen sollte nun wie oben aussehen.


Next, divide neckline into quarters. Do the same with the neckband. Pin the neckband to the shirt, raw edges aligning. The seam on the band should match the center back. Before attaching check the overall fit by stretching the neckband between quarters. Do not stretch the shirt fabric. If your neckband is cut too large you'll end up with the dreaded "pie-crust" neckline. If it is too short the shirt fabric will pucker. NOW is the time to adjust. You can always shorten a too long neckband, but you'll have to cut anew if your original neckband is too short :-/
Once you're satisfied serge or zig-zag stitch through all layers starting from center back. Flip seam to the inside and press well.


Als nächstes den Ausschnitt und das Bündchen in Viertel teilen und markieren. Das Bündchen mit der offenen Kante nach oben zeigend am Ausschnitt feststecken, die Naht trifft auf die hintere Mitte.  Vor dem endgültigen Annähen unbedingt Paßform überprüfen. Dabei das Bündchen je Viertel dehnen (aber nicht den Stoff). Ein zu langes Bündchen resultiert in einen welligen Ausschnitt; ein zu kurzes wird den Stoff am Ausschnitt kräuseln. JETZT könnt Ihr das noch anpassen, allerdings bei einem zu kurz geratenen Bündchen müsst Ihr es leider erneut zuschneiden :-/

Wenn alles stimmt, das Bündchen mit der Overlock oder mit schmal eingestelltem Zickzack-Stich beginnend an der hinteren Mitte ringsherum annähen. Anschließend die Naht nach unten legen und in Form bügeln.


Finishing touch - top stitch with twin needle (point 3 length) starting and ending at center back. Don't forget to backstitch. Woohoo, you're done!
*
Letzter Schritt - mit der Zwillingsnadel (Stichlänge 3) beginnend an der hinteren Mitte ringsherum steppen. Rückstiche nicht vergessen. Juchhu - fertig!


For this T-shirt I used the wonderful premium quality knit fabric Mojave Aloe by Art Gallery Fabrics
*
Für dieses Shirt habe ich den hochwertigen Jersey Mojave Aloe von Art Gallery Fabrics verwendet.


Happy Sewing!!!

Friday, June 19

Hello Summer!


My favorite season is officially starting two days from now. Yay! Of course, what I'm really craving is a nice, balmy 80°F which I might be lucky enough to experience in August, but for now I'm just happy for the longer days. Anyway, I'm glad this post has finally come together, as I had been planning it for weeks or rather ever since I laid eyes upon the gorgeous Art Gallery Fabrics at the trade show back in March!
*
Meine Lieblingsjahreszeit beginnt offiziell in zwei Tagen. Ich freue mich auf milde Temperaturen und lange Sommerabende. Nun bin ich erstmal froh, dass dieser Blogbeitrag endlich zustande gekommen ist. Schließlich habe ich ihn seit Wochen geplant oder vielmehr, seit ich auf der Fachmesse im März diese wunderschönen Jerseys von Art Gallery Fabrics entdeckt hatte!


The pink swallow print knit fabric screamed "maxi dress" and I knew I was going to sew one for myself as soon as I got the bolt in. I love maxi dresses, but the ones off the rack are always way too long and I just find it too cumbersome to shorten them. Completing this dress from cutting, to sewing and fitting wasn't done in a day, but it was incredibly fun, as the light-weight fabric is easy to work with and really great quality, trust me.
Sewing with knits requires some patience, as the edges have a tendency to roll, but this is easily solved by serging them. The trickiest part of sewing with knits, in my opinion, are the necklines. You'd want to avoid the dreaded "pie-crust" effect or waviness. I've sewn with knits for quite some time and have finished several shirts with various necklines, so I'm particularly proud of the nice, even and flat open V-neck on this dress :) I will be showing you how to sew a banded neckline on a knit garment in a future post!


Einen davon, nämlich der pinkfarbene mit Schwalbendruck musste ich unbedingt zum Maxikleid vernähen. Ich liebe Maxikleider, aber die von der Stange sind immer viel zu lang und ich finde es einfach zu mühselig das Kleid nachträglich zu kürzen. Die Fertigung dieses Kleides, vom Schneiden bis zum Nähen und Anpassen dauerte zwar etwas länger, aber es hat unglaublich viel Spaß gemacht.  Der Feinjersey lässt sich gut vernähen und hat eine wirklich tolle Qualität - das könnt Ihr mir ruhig glauben.
Nähen mit Jersey erfordert etwas Geduld, da die Kanten die Tendenz haben einzurollen, daher versäubere ich sie immer mit der Overlock. Etwas kniffliger sind meistens die Halsausschnitte, denn wellige Ausschnitte sind einfach unschön und zu vermeiden. Mittlerweile habe ich den Dreh raus, denn ich habe bereits viele Shirts mit den verschiedensten Ausschnitten gefertig. In einem zukünftigen Beitrag zeige ich allen Interessierten wie man einen gleichmäßig anliegenden Ausschnitt an jedes selbstgenähte Jersey Shirt hinbekommt!


I made my very first tassel necklace to go with the dress. I used little wooden beads in pink, fuchsia, purple and added pops of yellow and orange to the mix. I also made an orange tassel pendant, but I think I will make it smaller next time. I also made matching pink rose earstuds.
 *
Passend zum Kleid habe ich meine erste Halskette mit Quaste gefertigt. Ich habe kleine Holzperlen in Pink, Fuchsia, Lila sowie Gelb und Orange aufgefädelt, aber ich denke beim nächsten Mal mache ich die orangefarbene Quaste etwas kleiner. Als i-Tüpfelchen habe ich noch pinkfarbenene Ohrstecker gefertigt.


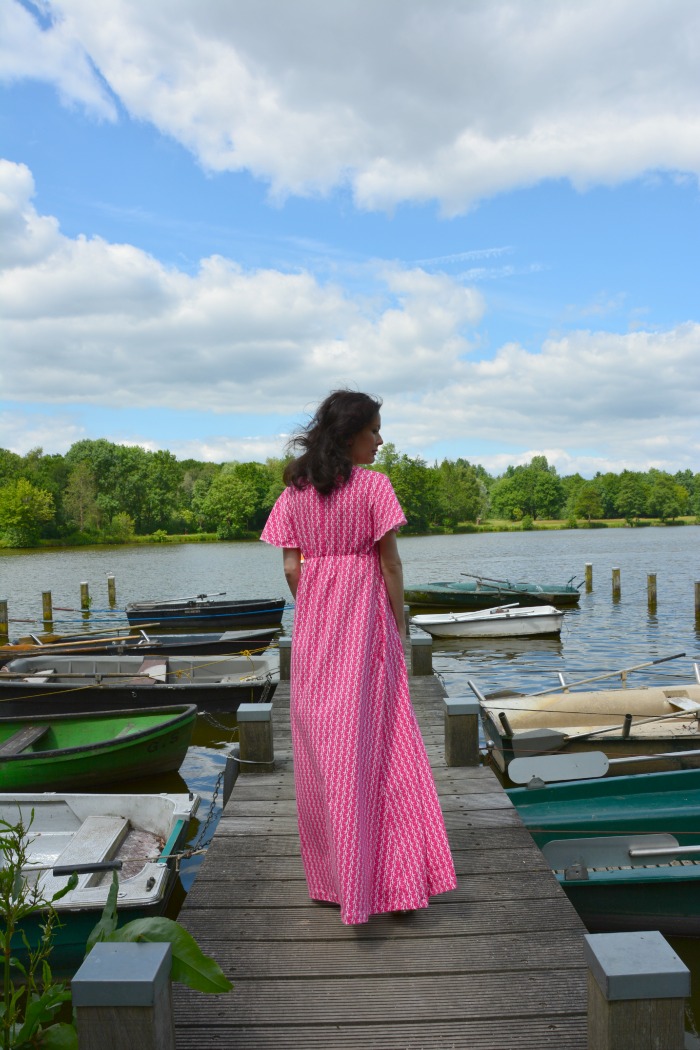
Sometimes, when I make elaborate outfits such as this one, I like to take photos in a suitable location. Since there is no beach here far and wide I went to the nearest lake and this secluded little jetty seemed like the perfect spot. I set up my tripod and snapped away. It is not easy taking pictures of oneself with a remote control, while trying not to look too self-conscious and simultaneously not to fall off the narrow jetty (I was wearing strappy high-heeled sandals). I think the most annoying part (you can tell from the expression on my face below) was that the day started out bright, but within a half hour or so, just as I was taking these pictures, the sky clouded over and it got really windy. You probably won't believe this, but the temperature dropped to around 50°F. Then it got downright stormy so I called it quits. I fully intended to re-do the photos, but then I considered the pile of work back at my home office waiting to be finished and decided to just use those pics where I didn't look entirely windswept ;-)
 *
Manchmal, bei aufwendigen Outfits wie diese, mag ich es an einer geeigneten Location das Outfit in Szene zu setzen. Da es hier weit und breit keinen Strand gibt, bin ich zum nächsten See und dieser etwas abgelegene Steg schien mir der perfekte Ort. Ich baute also mein Stativ auf und stellte die Kamera entsprechend ein. Ich muß Euch sagen: es war nicht einfach diese Selbstportraits zu machen, dabei nicht verlegen zu gucken und gleichzeitig auch nicht vom schmalen Steg (ich trug Highheel-Sandalen) zu fallen! Aber der mit Abstand nervigste Teil (siehe Gesichtsausdruck unten) war, dass der Himmel sich in wenigen Minuten genau zum Zeitpunkt meiner "Fotosession" verdunkelte und es plötzlich sehr, sehr windig wurde. Es waren dann tatsächlich auch nur noch 12°C. Letztendlich wurde es so stürmisch, dass ich die Fotos vorzeitig beenden musste, mit dem Vorhaben, das Ganze später zu wiederholen. Allerdings erwartete mich Zuhause leider einen Haufen Arbeit und so ist mir die Lust nochmal mit Stativ & Co. rauszufahren vergangen. Also habe ich für diesen Post die wenigen Bilder verwendet, in denen ich nicht allzu zerzaust aussehe ;-)

getting stormier + colder :-(

The main thing is I totally love how this dress turned out. This is adapted from a tunic pattern with some minor alterations. It's got romantic flutter sleeves and nifty concealed side pockets in the skirt. I like that you can style it up or down. I particularly like it with my denim jacket thrown over. I also made a fun summer tote to go with the dress, but forgot to bring it along! 
 *
Naja, das Wesentliche ist, dass das Kleid genauso geworden ist, wie ich es mir vorgestellt habe. Der Schnitt ist eine abgewandelte Tunika mit verlängertem Rockteil. Das Kleid hat romantische Flügelärmel und raffinierte Seitentaschen im Rockteil. Ich mag es besonders in Kombination mit meiner Jeansjacke. Zudem hatte ich noch einen Canvasbeutel genäht, aber vergessen ihn zu fotografieren bzw. mitzunehmen. 


Happy Friday!
xoxo