Showing posts with label knit fabric. Show all posts

Wednesday, August 5

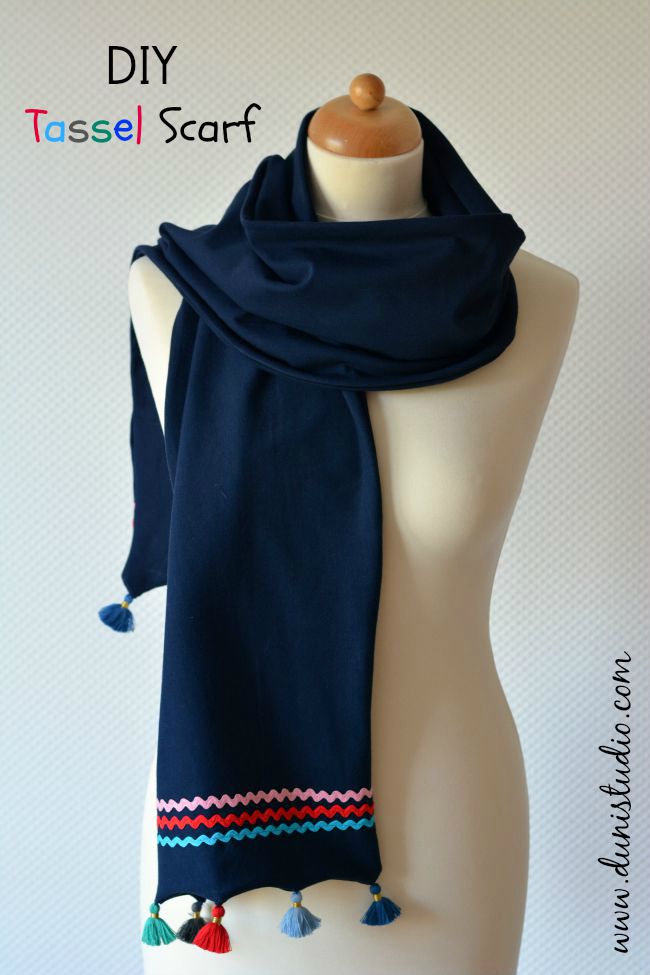
DIY Tassel Scarf


As a DIY blogger specialising in handmade fashion I need to think ahead to next season...trust me, fall will be here faster than you can say tassel! The other day I saw a cute scarf online and thought to myself: I could make that! This scarf is made from a lovely soft knit (95% CO / 5% Spandex) in a solid colour. If you've never sewn with knits before, this is the perfect starter project!
*
Als DIY Blogger, auf Handmade Fashion spezialisiert, schaue ich bereits jetzt nach Trends in der kommenden Saison, so z.B. Fransen und Quasten. Neulich entdeckte ich beim virtuellen Shoppen einen süßen Schal und es kam der Gedanke: Den mache ich mir selbst! Zumal ich das Material schon vorhanden hatte. Der Stoff ist ein weicher, unifarbener Jersey mit 95% Baumwollanteil. Falls Ihr noch nie mit Jerseys genäht habt, so ist dies das perfekte Einsteigerprojekt!
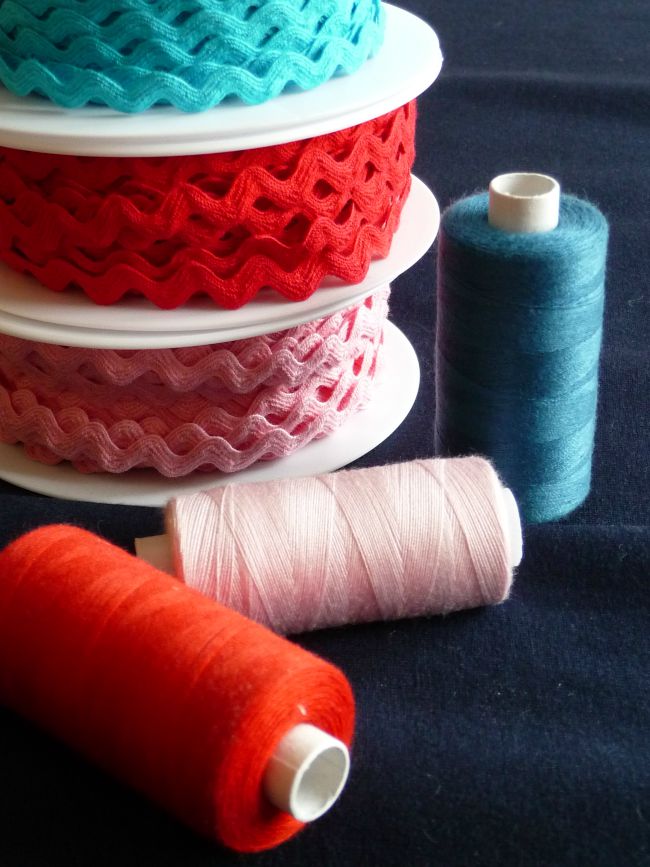


You'll need // Ihr benötigt

knit fabric, solid colour // Jersey, uni
rick rack trim, various colours 1 m each // Zackenlitze, verschiedene Farben je 1 m
coordinating thread // farblich passendes Nähgarn
10 small tassels, various colours // 10 kleine Quasten, verschiedene Farben
ball point needle for sewing machines // Jersey Nadel für die Nähmaschine
basic sewing kit // Basic Näh-Utensilien 


Step 1

Cut two pieces of fabric 32 cm x 160 cm (approx. 12.5" x 63"). See illustration above. Sometimes, with solid coloured knits, especially dark colours it's difficult to determine which side is the right side. In this case simply check which way the selvedges roll, namely toward the wrong side. 

Schritt 1

Vom Jersey zwei Streifen je 32 cm x 160 cm schneiden. Siehe obige Abbildung. Bei dunklen Unis ist es manchmal schwer zu erkennen welches die rechte Seite ist. Am einfachsten ist es zu schauen in welche Richtung sich die Webkanten (nämlich zur linken) einrollen. 

Step 2

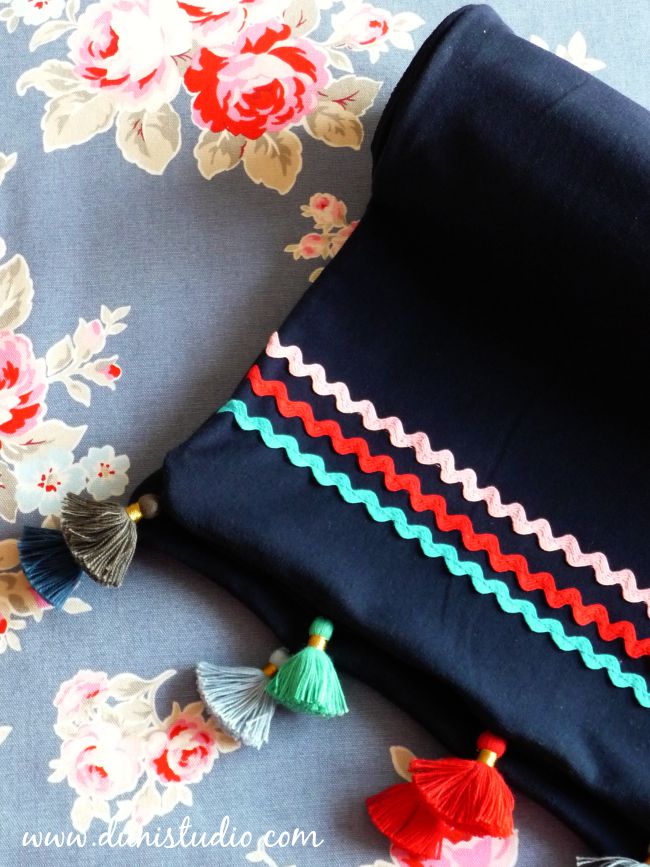
Take one piece and place it right side up. Measure 5 cm (approx. 2") up from short end. This is the placement of the first rick rack. Cut rick rack to fit across the width and straight stitch using coordinating thread. Space the other colours 1,5 cm (approx. 0.6") apart and stitch on. Repeat for the other short end. See illustration above.

Schritt 2

Nehmt nun ein Teil, rechte Seite oben. Passende Stücke Zackenlitze schneiden. Plaziert die erste Zackenlitze 5 cm von der Kante der kurzen Seite entfernt. Mit farblich passendem Garn im Geradstich steppen. Die zwei weiteren Litzen mit jeweils 1,5 cm Abstand annähen. Genauso bei dem anderen Ende vorgehen. Siehe Abbildung oben.


Step 3

Now lay the remaining piece exactly on top of the first piece, right sides facing. Pin all around leaving a 10 cm (approx. 4") gap on one long side. Straight stitch all around (seam width 0.4") starting and ending from gap. Don't forget to backstitch! Turn scarf carefully through opening and gently push out corners. Close the gap by hand. Press.

And finally, sew on by hand five tassels at each end, spacing them 7 cm (approx. 2.75") apart.

Schritt 3

Nun das zweite Teil exakt auf das erste Teil legen, rechte Seite innen. Rundherum mit Stecknadeln fixieren, dabei eine 10 cm Öffnung an einer langen Seite zum Wenden offen lassen. An der Öffnung beginnend ringsherum steppen (Nahtzugabe 1 cm). Rückstiche nicht vergessen! Schal vorsichtig durch die Öffnung wenden. Offene Naht mit Handstichen schließen. Schal bügeln. 

Zum Schluß mit ein paar Handstichen jeweils fünf Quasten an den kurzen Seiten immer mit 7 cm Abstand annähen.


 Happy Sewing!

Wednesday, July 22

Finishing Techniques for T Shirts {Sewing Tutorial}


A few of my lovely readers have inquired about how to finish necklines and hems on knits, such as T-shirts, tops etc., because sewing with knits is fun, but finishing the neckline is tricky and requires practice and patience. So, I've finally put together a little tutorial with step-by-step instructions and photos. Hope all you sewists out there feel more confident sewing with knits after reading this post!
*
Ein paar meiner nähbegeisterten Leserinnen hatten mich vor einiger Zeit gefragt, ob ich eine Anleitung für T-shirt-Ausschnitte schreibe, denn obgleich das Nähen mit Jersey super viel Spaß macht, sind die Ausschnitte meist doch recht knifflig. Nun habe ich endlich eine Nähanleitung inklusive Fotos für Euch. Ich hoffe sie ist verständlich. Bei Rückfragen einfach mailen!


I'm assuming that you have finished your Tshirt right up to the point where all you need to do now is finish the hems on the sleeves and bottom plus add a neckband to the neckline. Let's start with hemming first, because that is quite simple! For sleeves, whether short or long, fold under the raw edge 0.40" twice. Pin. Top stitch at point 3 length all around using a twin needle. Don't forget to backstitch at the beginning and end. Then press.
*
Ich gehe davon aus, dass Ihr Euer Shirt bereits zusammengenäht habt und nur noch die Ärmel, Saum sowie Halsausschnitt genäht werden müssen. Fangen wir mit den Ärmeln an, denn das geht ganz einfach! Egal ob kurz oder lang, ich schlage die Kanten zweimal 1 cm nach innen um, stecke diese mit Nadeln ab und steppe ringsherum mit der Zwillingsnadel (Stichlänge 3). Rückstiche nicht vergessen. Dann bügeln.


Do exactly the same for the bottom hem, except fold under approx. 0.80" twice. Important - don't forget to press!
*
Für den Saum schlage ich gerne zweimal 2 cm ein und wiederhole die Schritte wie beim Ärmel. Anschließendes Bügeln nicht vergessen!


Adding the neckband

There are several ways to finish a knit neckline, but this method is the simplest and always looks professional. Fold the Tshirt in half and mark the center back with a pin. Measure circumference and jot down the number. Remember that the neckband needs to stretch in the curves in order to lay flat, therefore you'll need to deduct a couple of inches from this number. There is no hard-and-fast rule, as every knit fabric is a little different, but after much trial and error I find that deducting at least 2" from your circumference makes for a nice flat neckband later on. The width of the neckband is a matter of preference. For a regular neckline such as above a 1.5" - 1.75" width works best.

Cut the neck band according to your measured length x 1.5" (or wider) width. Be sure that you cut the neckband perpendicular to the grainline. Fold short ends right sides facing and stitch 1/4" seam. Open seam, press and fold lengthwise wrong sides facing to form a circle. Press again, so that folded edge is clearly defined. You should end up with this:


Bündchen an Halsausschnitt annähen


Es gibt mehrere Ausschnittlösungen, aber diese Methode ist die einfachste und sieht immer professionell aus. Das T-Shirt zur Hälfte falten und hintere Mitte mit einer Stecknadel markieren. Den Halsausschnitt abmessen und die Zentimeter notieren. Denkt bitte daran, dass das Bündchen in den Kurven gedehnt werden muss, damit es später flach anliegt, daher müsst Ihr von dieser Zahl mehrere Zentimeter abziehen. Es gibt keine pauschale Regel, da Stretchstoffe sich unterschiedlich verhalten, aber durch viel Ausprobieren habe ich festgestellt, dass man mindestens 3 cm (bis zu 5 cm) von der Zahl abziehen sollte. Die Breite des Bündchens ist Geschmacksache. Für einen normalen Ausschnitt wie oben funktioniert eine Breite von 3,5 cm.

Halsbündchen vertikal zum Fadenlauf schneiden. Länge x 3,5 cm (oder breiter). Die kurzen Seiten rechts-auf-rechts legen und 0,5 cm Naht nähen. Naht öffnen und bügeln. Bund längs und links-auf-links falten (Naht trifft aufeinander). Nochmals bügeln, so dass eine schöne Kante entsteht. Euer Bündchen sollte nun wie oben aussehen.


Next, divide neckline into quarters. Do the same with the neckband. Pin the neckband to the shirt, raw edges aligning. The seam on the band should match the center back. Before attaching check the overall fit by stretching the neckband between quarters. Do not stretch the shirt fabric. If your neckband is cut too large you'll end up with the dreaded "pie-crust" neckline. If it is too short the shirt fabric will pucker. NOW is the time to adjust. You can always shorten a too long neckband, but you'll have to cut anew if your original neckband is too short :-/
Once you're satisfied serge or zig-zag stitch through all layers starting from center back. Flip seam to the inside and press well.


Als nächstes den Ausschnitt und das Bündchen in Viertel teilen und markieren. Das Bündchen mit der offenen Kante nach oben zeigend am Ausschnitt feststecken, die Naht trifft auf die hintere Mitte.  Vor dem endgültigen Annähen unbedingt Paßform überprüfen. Dabei das Bündchen je Viertel dehnen (aber nicht den Stoff). Ein zu langes Bündchen resultiert in einen welligen Ausschnitt; ein zu kurzes wird den Stoff am Ausschnitt kräuseln. JETZT könnt Ihr das noch anpassen, allerdings bei einem zu kurz geratenen Bündchen müsst Ihr es leider erneut zuschneiden :-/

Wenn alles stimmt, das Bündchen mit der Overlock oder mit schmal eingestelltem Zickzack-Stich beginnend an der hinteren Mitte ringsherum annähen. Anschließend die Naht nach unten legen und in Form bügeln.


Finishing touch - top stitch with twin needle (point 3 length) starting and ending at center back. Don't forget to backstitch. Woohoo, you're done!
*
Letzter Schritt - mit der Zwillingsnadel (Stichlänge 3) beginnend an der hinteren Mitte ringsherum steppen. Rückstiche nicht vergessen. Juchhu - fertig!


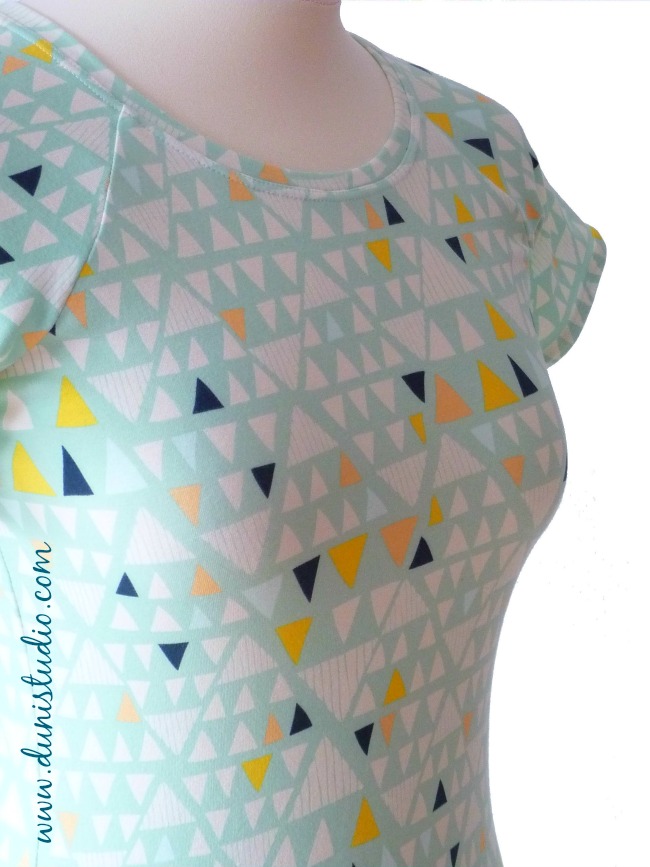
For this T-shirt I used the wonderful premium quality knit fabric Mojave Aloe by Art Gallery Fabrics
*
Für dieses Shirt habe ich den hochwertigen Jersey Mojave Aloe von Art Gallery Fabrics verwendet.


Happy Sewing!!!

Wednesday, August 27

★ Surprise x 2 ★


Hi there lovelies!              Hallo, ihr Lieben!

I've been having fun designing and sewing shirts with these adorable knit fabrics that have recently arrived in my fabric shoppe. The cool thing about knits is that they don't fray. Plus they are soft and stretchy. If you have never sewn with knits go ahead and try - they are easy to work with so long as you remember to switch your regular sewing machine needle to a ballpoint needle and set the pressure foot to medium or light, depending on how thick the knit fabric is. Here are two longsleeve shirts that I made. The left fabric is called Sweet Apple; the right side fabric used for the sleeves is called Fall Flower and are part of a collection called "Surprise Surprise".

Schon beim Auspacken der Jersey-Kollektion "Surpise Surpise" von JoliJou für Swafing kribbelte es mir in den Fingern, so schön ist sie! Beim Anblick von Sweet Apple und Fall Flowers (der türkisfarbene Stoff ganz oben) wusste ich sofort, dass daraus Langarmshirts werden. Es hat Spaß gemacht meine Ideen für die Shirts umzusetzen. Mit diesen elastischen Stoffen zu nähen ist nicht schwer, man benötigt jedoch eine Jersey-Nadel und sollte darauf achten, dass der Nähfußdruck dem Material angepasst wird. Die Surpise2 Jerseys sind aus 95% Baumwolle/5% Elasthan und Ökotex 100 zertifiziert.


Up next are these thicker sweatshirt-type fabrics perfect for Fall! They come in pink or teal and have a funky owl and star print. With the coming season in mind (actually, it has already arrived over here!) I have designed a comfy lounge pant with side pockets. I am working like crazy to make this pattern available as a PDF, so that you, dear readers and seamstresses, may make a pair for yourself :)


Ebenfalls eingetroffen sind diese etwas dickeren Sweatstoffe in Pink und Türkis mit den lustigen Eulen und Sternen. Diese sind innen schön kuschelig angerauht und perfekt für die kommende Herbst-Saison (die ist ja hier leider schon eingetroffen!). Vor einigen Wochen habe ich eine Kuschelhose entworfen und arbeite nun mit Hochdruck daran, dass Schnittmuster in PDF Format umzuwandeln, damit bald auch Ihr, liebe LeserInnen und NäherInnen, eine solche Hose nachnähen könnt :)


And last but not least, this coming Friday I will be attending a special Fall Market and Open House at Swafing, where I will have the chance to view new fabric collections, attend workshops and chat with colleagues and fellow sewing enthusiasts. This market is always well attended and very busy, so hopefully I will think about snapping a few pics!


Und eine letzte Neuigkeit! Diesen kommenden Freitag fahre ich nach Nordhorn zur Swafing Herbst-Messe. Dort erwarten mich neue Kollektionen und Hausmesse Highlights, und das ein oder andere Stöffchen wandert ganz bestimmt ins Stofflädchen :) Außerdem bietet sich die Möglichkeit an Workshops teilzunehmen. Natürlich freue ich mich bekannte Gesichter wiederzusehen und vielleicht ist ja unter meinen LeserInnen auch jemand am Freitag dort? Würde mich freuen :)

Have a wonderful day!
Habt einen wunderschönen Tag!