As a DIY blogger specialising in handmade fashion I need to think ahead to next season...trust me, fall will be here faster than you can say
tassel! The other day I saw a cute scarf online and thought to myself: I could make that! This scarf is made from a lovely soft knit (95% CO / 5% Spandex) in a solid colour. If you've never sewn with knits before, this is the perfect starter project!
*
Als DIY Blogger, auf Handmade Fashion spezialisiert, schaue ich bereits jetzt nach Trends in der kommenden Saison, so z.B. Fransen und Quasten.
Neulich entdeckte ich beim virtuellen Shoppen einen süßen Schal und es kam der Gedanke: Den mache ich mir selbst! Zumal ich das Material schon vorhanden hatte. Der Stoff ist ein weicher, unifarbener Jersey mit 95% Baumwollanteil. Falls Ihr noch nie mit Jerseys genäht habt, so ist dies das perfekte Einsteigerprojekt!
You'll need // Ihr benötigt
rick rack trim, various colours 1 m each // Zackenlitze, verschiedene Farben je 1 m
coordinating thread // farblich passendes Nähgarn
10 small tassels, various colours // 10 kleine Quasten, verschiedene Farben
ball point needle for sewing machines // Jersey Nadel für die Nähmaschine
basic sewing kit // Basic Näh-Utensilien
Step 1
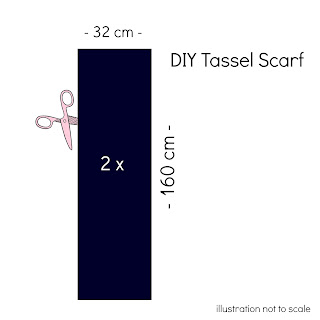
Cut two pieces of fabric 32 cm x 160 cm (approx. 12.5" x 63"). See illustration above. Sometimes, with solid coloured knits, especially dark colours it's difficult to determine which side is the right side. In this case simply check which way the selvedges roll, namely toward the wrong side.
Schritt 1
Vom Jersey zwei Streifen je 32 cm x 160 cm schneiden. Siehe obige Abbildung. Bei dunklen Unis ist es manchmal schwer zu erkennen welches die rechte Seite ist. Am einfachsten ist es zu schauen in welche Richtung sich die Webkanten (nämlich zur linken) einrollen.
Step 2
Take one piece and place it right side up. Measure 5 cm (approx. 2") up from short end. This is the placement of the first rick rack. Cut rick rack to fit across the width and straight stitch using coordinating thread. Space the other colours 1,5 cm (approx. 0.6") apart and stitch on. Repeat for the other short end. See illustration above.
Schritt 2
Nehmt nun ein Teil, rechte Seite oben. Passende Stücke Zackenlitze schneiden. Plaziert die erste Zackenlitze 5 cm von der Kante der kurzen Seite entfernt. Mit farblich passendem Garn im Geradstich steppen. Die zwei weiteren Litzen mit jeweils 1,5 cm Abstand annähen. Genauso bei dem anderen Ende vorgehen. Siehe Abbildung oben.
Step 3
Now lay the remaining piece exactly on top of the first piece, right sides facing. Pin all around leaving a 10 cm (approx. 4") gap on one long side. Straight stitch all around (seam width 0.4") starting and ending from gap. Don't forget to backstitch! Turn scarf carefully through opening and gently push out corners. Close the gap by hand. Press.
And finally, sew on by hand five tassels at each end, spacing them 7 cm (approx. 2.75") apart.
Schritt 3
Nun das zweite Teil exakt auf das erste Teil legen, rechte Seite innen. Rundherum mit Stecknadeln fixieren, dabei eine 10 cm Öffnung an einer langen Seite zum Wenden offen lassen. An der Öffnung beginnend ringsherum steppen (Nahtzugabe 1 cm). Rückstiche nicht vergessen! Schal vorsichtig durch die Öffnung wenden. Offene Naht mit Handstichen schließen. Schal bügeln.
Zum Schluß mit ein paar Handstichen jeweils fünf Quasten an den kurzen Seiten immer mit 7 cm Abstand annähen.


