Showing posts with label nähen. Show all posts

Friday, January 14

New Year, New fabrics

[Werbung/Advertisement]


I know I've been missing in action for weeks on end, but I didn't want to miss the opportunity to check in and wish my readers a happy and healthy New Year!
This year feels like a fresh beginning, especially after the last two months of 2021 were a bit of a struggle personally and professionally. Obviously we're still battling the pandemic and its consequences, such as shipping issues - partly the reason why I haven't received any of the new fabric collections (which I had announced in a previous post). As longtime readers might know, fabrics are the heart of my business. My entire market strategy revolves around fabrics, so while I understand the situation it's not any less disappointing.

Anyhow, back to new beginnings..,.
I have since made peace with the fact that my new fabrics, which were supposed to arrive in late summer will most probably arrive in springtime. Good thing they are floral! Ironically, I did receive a small shipment of summer fabrics in winter. Go figure ;-) 
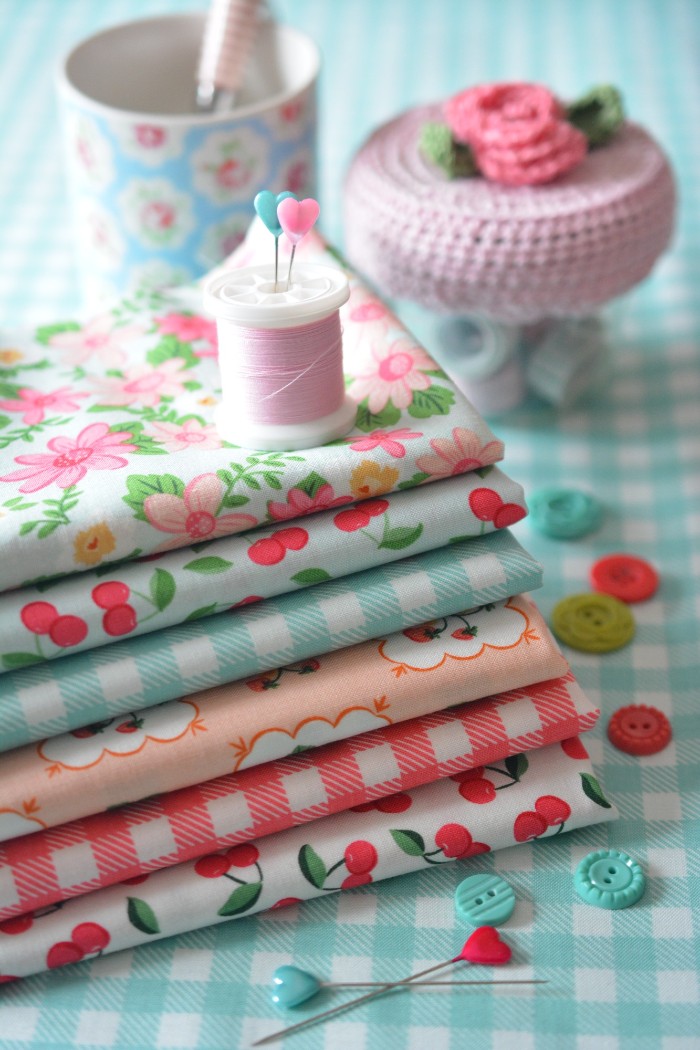
So if, like me, you are craving a pop of colour and freshness, feast your eyes on "Summer Picnic", designed by Melissa Mortenson. Inspired by a breezy summer picnic, this line features red cherry and strawberry prints along with vintage style summery flowers. It's perfect for quilting, children's apparel and home decor.

I also wanted to share some beautiful items all lovingly handmade with these fabrics. I have linked up the Instagram accounts of all three crafty ladies - there's a bunch of handmade goodness you might want to check out.

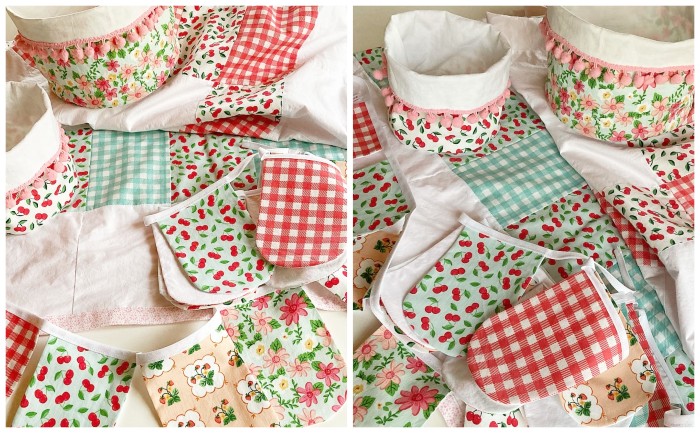
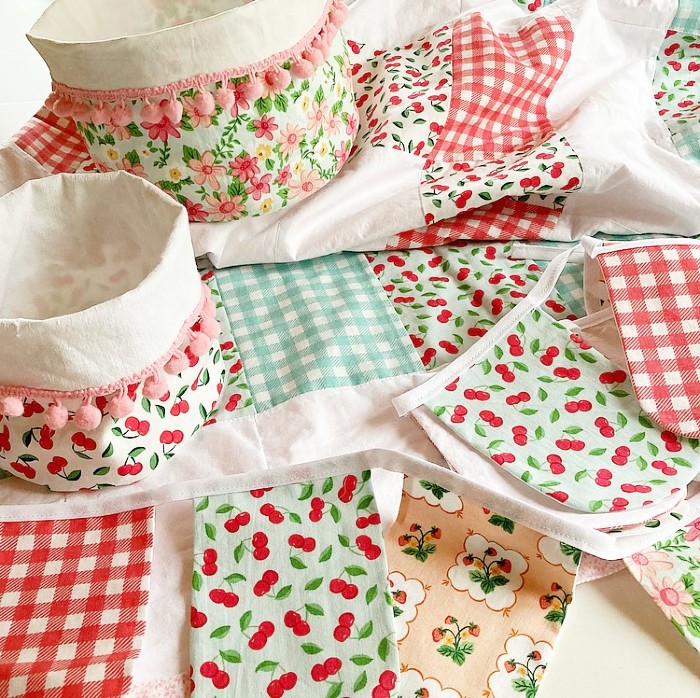
Lella of @sediart_lella went all out on the picnic theme creating this amazing picnic blanket, a cute bunting plus adorable little bread baskets trimmed with pompoms. 

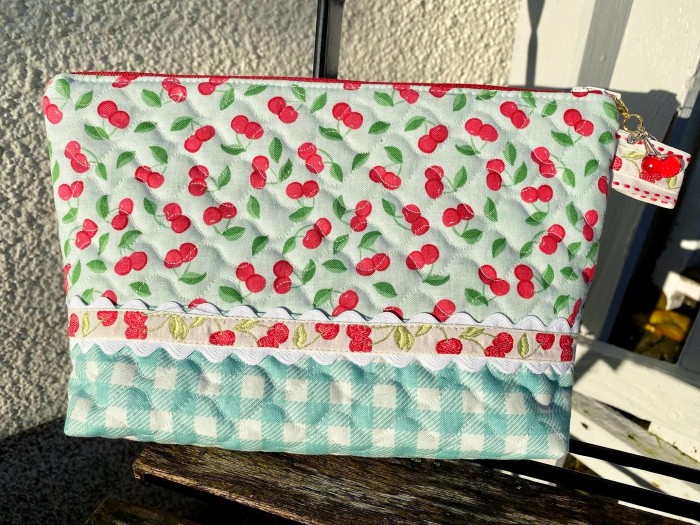
Corinna of @mietzomat made a beautifully quilted wash bag in coordinating cherry and gingham prints. There are handy compartments on the inside, and it is decorated with a perfectly matching cherry trim. This retro style bag will sure look pretty on the dresser! She is currently working on a big picnic bag as well as a quilt, which as you can see in the photo has been kitty-approved :)
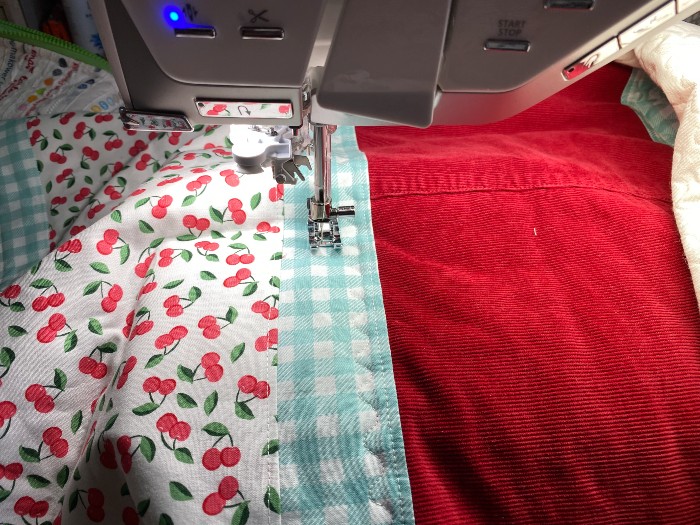
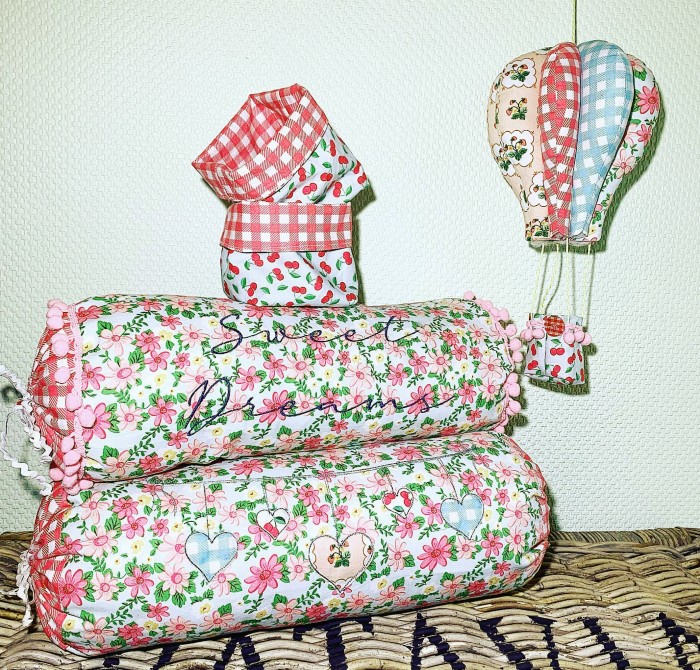
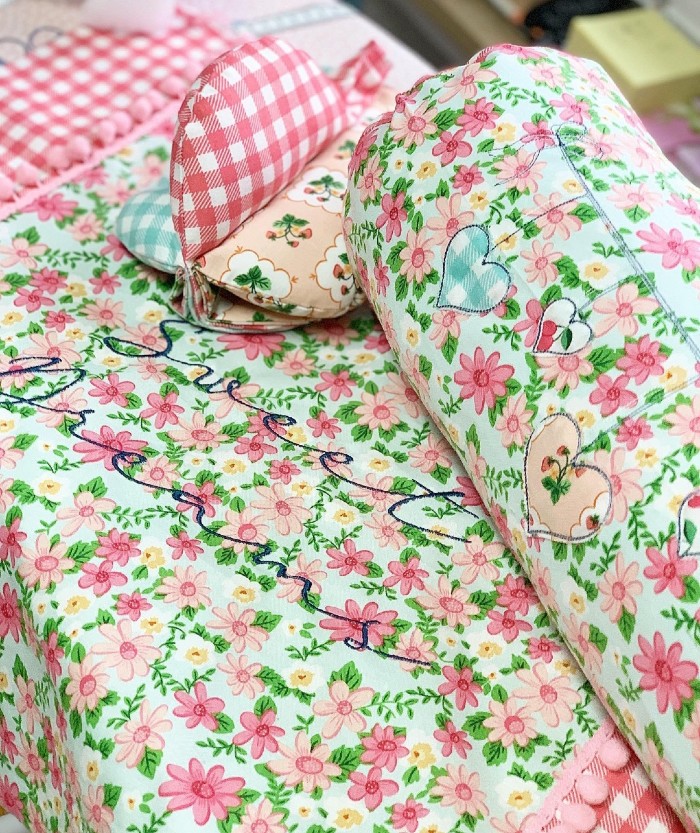
Kathy of @waldhauskitz made two adorable containers with the red cherries and gingham, a set of beautiful pillows - stitched with "sweet dreams" and cute hearts and this amazing decorative balloon that would look perfect in children's rooms. I love the mix-and-match feel of the fabrics on the balloon and all the thoughtful details.


A big THANK YOU to all three crafty sewists for sharing their unique work and inspiring us all!

The entire collection is so bright and fresh and I certainly feel cheered up just looking at it. These fabrics are premium quilting cotton at 44" wide. I sell them from units of 10 inches. All subsequent units will be cut fresh from the bolt in one continuous piece. As always, if you have any questions regarding this fabric collection or shipping, simply drop me a line at my email info(at)dunistudio.de

Attention US customers: if you prefer to shop on Etsy - there's a special deal waiting for you over there. (this does not apply to my own website). Contact me if you have any questions!

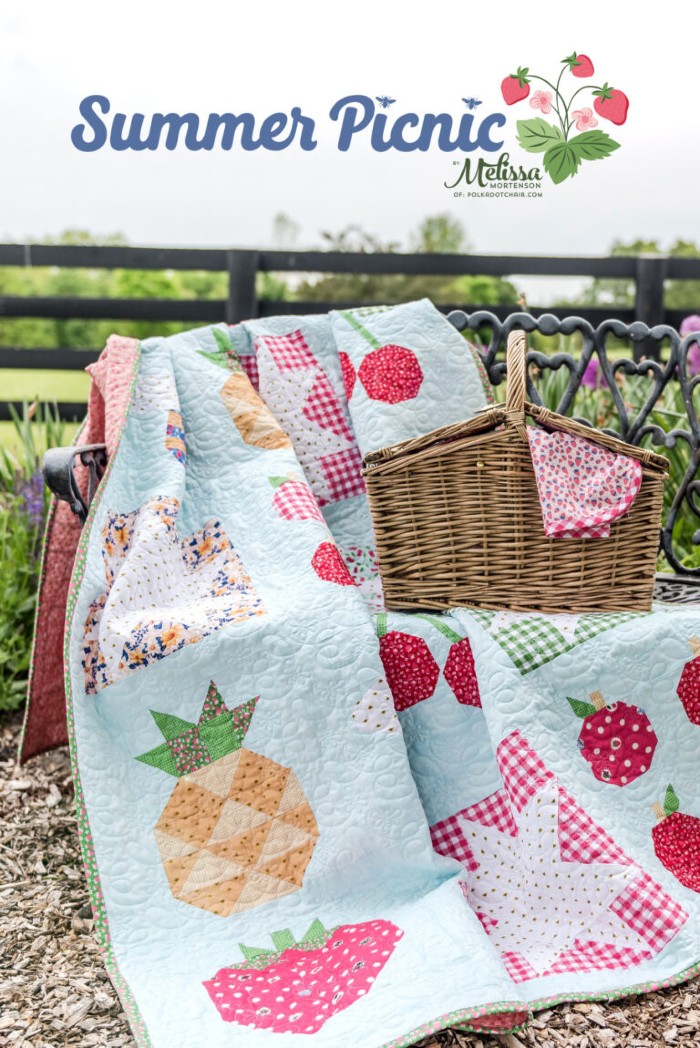
Closing this post with a photo of a gorgeous quilt designed by Melissa Mortenson.


I hope you enjoyed this post. Thank you so much for reading along. Wishing you all a wonderful weekend ahead and stay safe!


Sunday, October 28

Sew an Advent calendar

[Werbung/Anzeige/Advertisement]


Hello everybody!

for the longest time this fabric Advent calendar was on my sewing to-do-list! I finally got around to completed it in time for writing this tutorial. After all, the 1st of December isn't far off!
Last year I shared a last minute Advent calendar idea, that could be done a day ahead. This one takes a little longer, therefore I'm posting it now, so that anyone interested still has a whole month to complete it. This sewing project is intermediate level or ambitious beginner.

💗

Hallo ihr Lieben!

dieser genähte Adventskalender war schon sehr lange auf meiner To-Do-Liste. Umso glücklicher bin ich, dass ich nun endlich die Anleitung hier zeigen kann. 
Letztes Jahr hatte ich für Kurzentschlossene diese einfache Idee; für diesen genähten, wieder verwendbaren Adventskalender sollte man etwas Zeit einplanen. Dieses Nähprojekt stufe ich als mittelschwer ein. 


You will need // Ihr benötigt


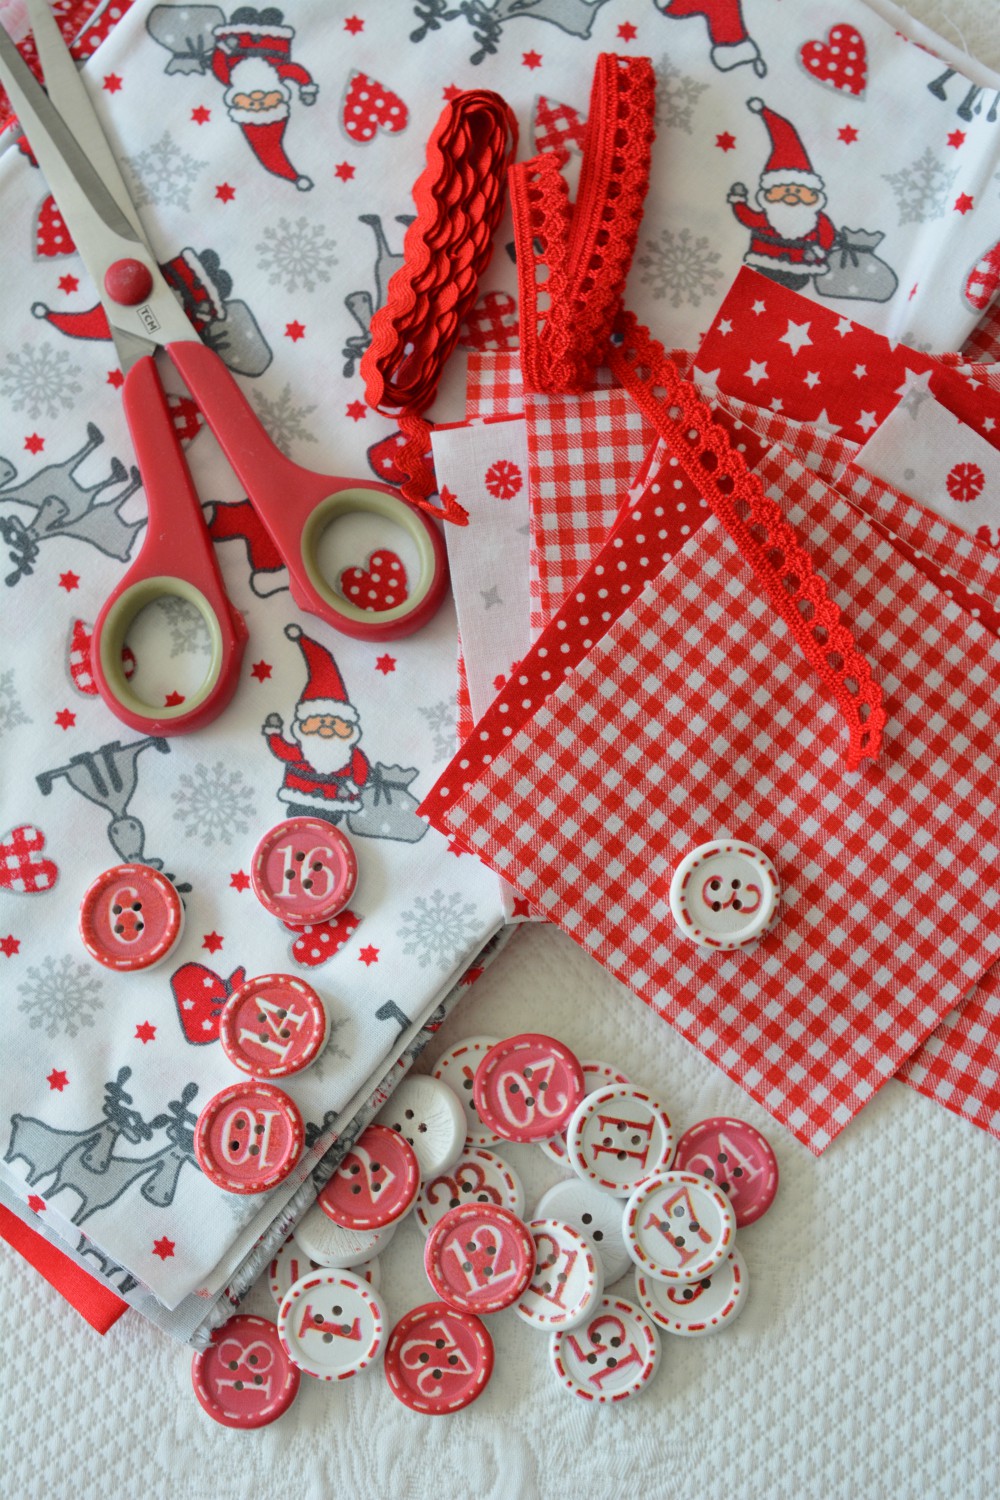
assorted Xmas themed cotton fabrics // Baumwollstoffe, weihnachtliche Motive
trims // Borten
buttons with numbers on them // Knöpfe mit Zahlen
medium weight fusable interfacing // Bügelvlies z.B. Freudenberg H630 
bias tape / Schrägband
matching thread // Nähgarn
sewing machine // Nähmaschine
basic sewing kit // Basic Nähutensilien


Step One

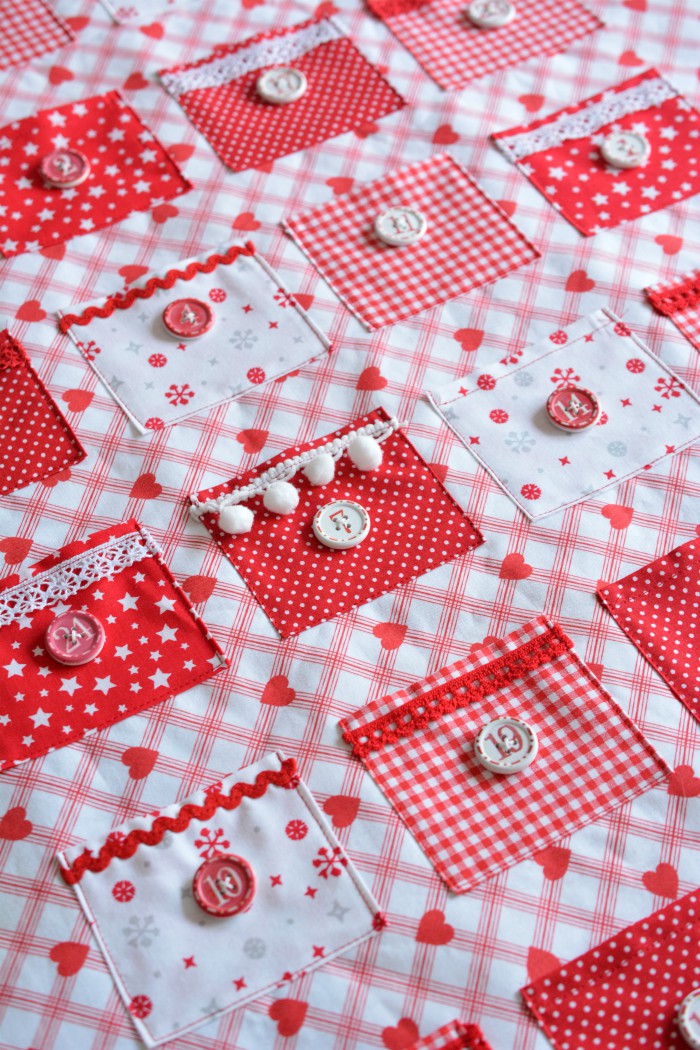
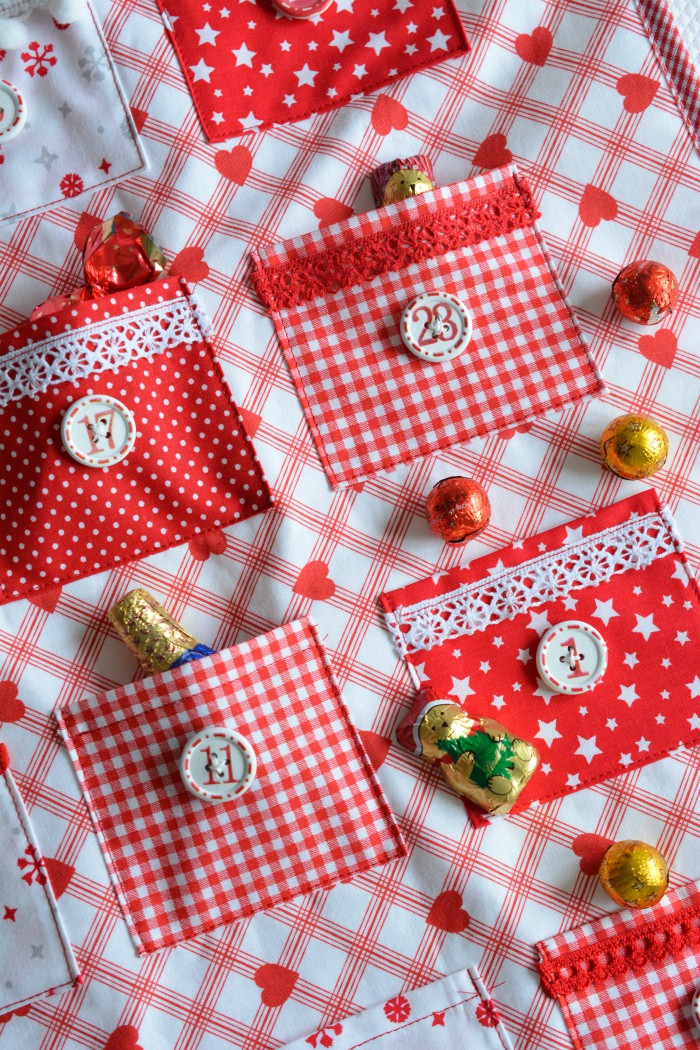
cut 24 pieces of 10 x 10 cm squares from cotton fabrics. I chose gingham, stars, snowflakes and polka dots. Fold three sides 0.5 cm to the wrong side and press. Fold top 0.5 cm to the wrong side and then again. Press.

Schritt Eins
aus den Baumwollstoffen 24 Quadrate à 10 x 10 cm schneiden. Ich habe mich für Vichy, Sterne, Schneeflocken und Punkte entschieden. Drei Seiten 0,5 cm nach innen einschlagen und bügeln. Die letzte Seite zunächst 0,5 cm und dann weitere 0,5 cm nach innen einschlagen. Bügeln.

Step Two

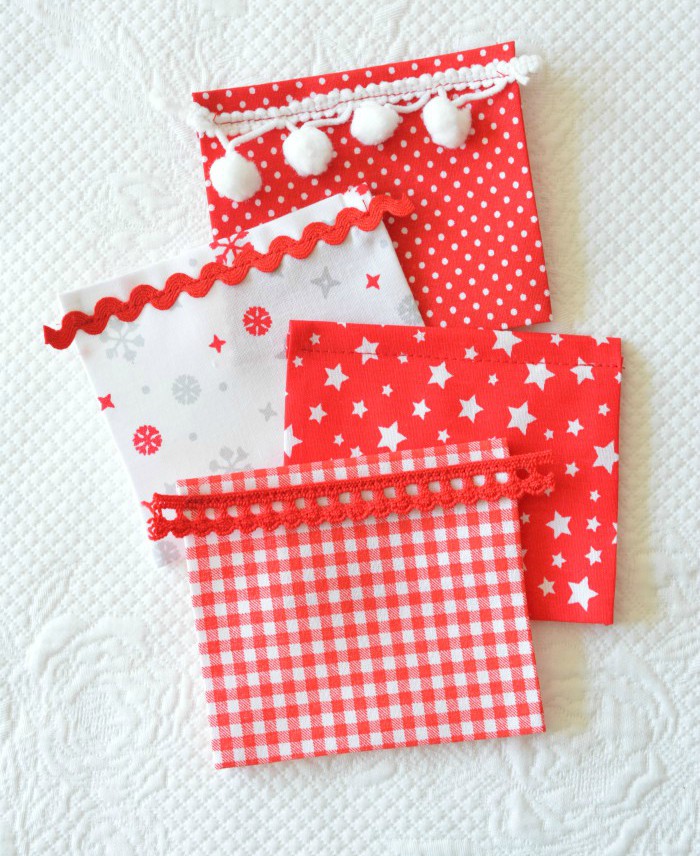
cut small pieces of trim to fit the top edge of pockets. Leave some overhang on each side - you will fold this under, once you attach the pockets to the backing fabric.
Topstitch the trim about 1 cm from the top edge of the pockets. I left some pockets without trim, as I felt it would be too overwhelming. But it's up to you :)

Schritt Zwei
von den Borten kleine Stücke etwas länger als die Fächer abschneiden. Der Überhang wird nachher beim Befestigen auf den Hintergrund eingeschlagen. Die Borten ca. 1 cm von oben feststecken und steppen. 


Step Three

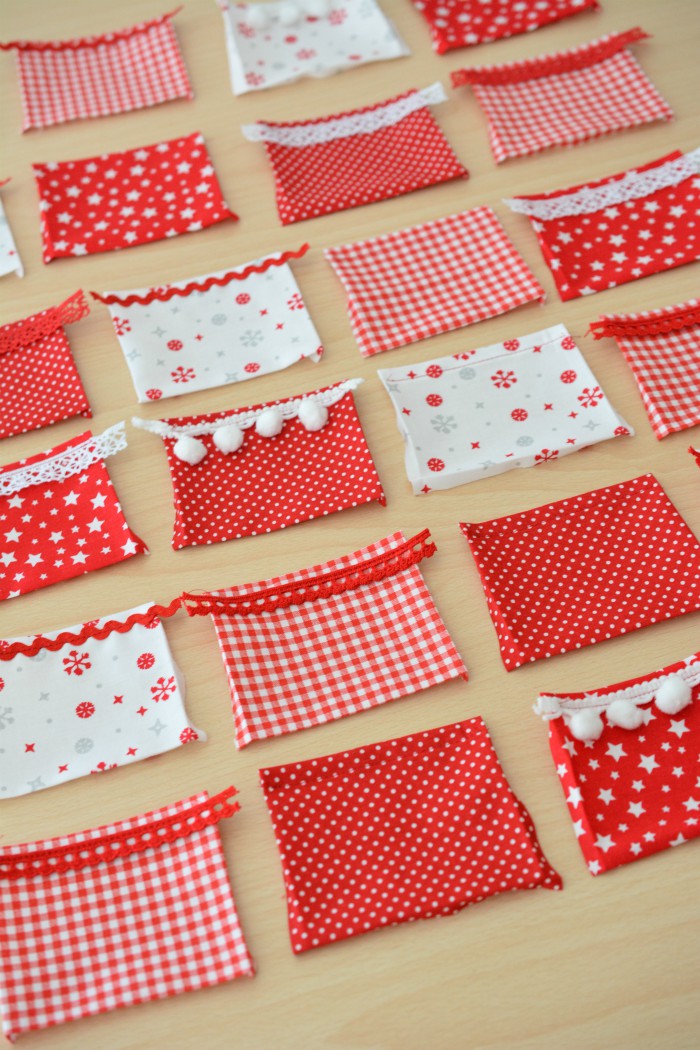
once you have finished trimming all 24 pockets you can start laying them out in the order you would like them to appear on the backing fabric. 6 rows / 4 pockets each row. It's a good idea to  mark them with a number on the back. Now sew on the button numbers by hand. Instead of consecutive order I mixed them up - this way it's more fun later on when you count down :)

Schritt Drei
alle 24 Fächer wie in Schritt Zwei beschrieben fertigen. Das Layout für die Fächer planen, so wie es später auf dem Hintergrund aufgenäht wird. 6 Reihen / je 4 Fächer. Damit man später nicht durcheinander kommt eventuell die Rückseite mit einer Zahl markieren. Nun die Knöpfe auf jeden Fach annähen. Ich habe sie natürlich absichtlich nicht der Reihenfolge angenäht :)


Step Four

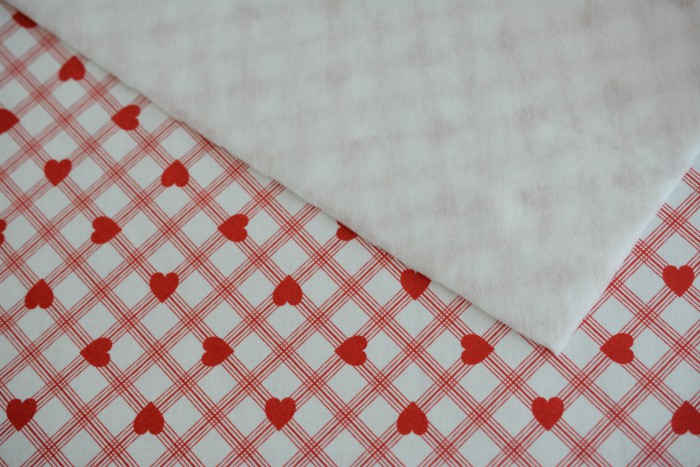
For the wall hanging, cut a large piece 80 cm x 54 cm from main fabric (I chose hearts), interfacing and lining fabric (mine is plain white). Iron the interfacing to the main fabric according to manufacturers instructions. Lay wrong side on top of wrong side of lining fabric, so that you have a quilt sandwich. Smooth out the fabrics and pin along the edges.

Schritt Vier
Für den Hintergrund jeweils ein großes Stück Hauptstoff (bei mir Herzen), Vlies und Rückseitenstoff (bei mir uni Weiß) in der Größe 80 cm x 54 cm schneiden. Das Bügelvlies auf die Rückseite des Hauptstoffes nach Herstelleranweisung bügeln. Links auf links auf den Rückseitenstoff legen und glatt streichen. Das "Quilt-Sandwich" mit Nadeln feststecken.


Step Five

now start pinning the fabric pockets to the quilt sandwich. From the left side start 7 cm down and 6 cm in. Space each pocket 2 cm apart. It's best to do this row by row. Keep each row 4 cm apart. Edgestitch the pockets on three sides (not the top opening) through all layers. Once you're done with all six rows you might need to square off the corners a little bit.

Schritt Fünf
nun die Fächer in der gewünschten Reihenfolge auf das Quilt Sandwich feststecken. Das erste Fach 6 cm von der linken Seite und 7 cm von oben feststecken. Zwischen den Fächern jeweils einen 2 cm Spalt lassen. Die Fächer knappkantig durch alle Stofflagen steppen. Am besten gelingt dies wenn man Reihe für Reihe vorgeht, dabei zwischen den Reihen einen 4 cm Spalt lassen.


Step Six

cut a 2.75 meter length of bias tape. Plus an additional 3 x 10 cm pieces. There are several ways to attach the binding, however, I find this machine binding tutorial the easiest. Thanks Jera :) You basically attach the binding from the wrong side, flip it over and topstitch it from the right side. Makes perfect corners too! When you get to topstitching the right side, fold the 3 small bias tape pieces in half and insert at the top 2 cm from each corner and one in the middle. This is so you can put a wooden stick through the loops, which keeps the Advent calendar from drooping when you fill it with goodies. You can then attach some cord to hang it up later.


Schritt Sechs
nun ein 2,75 m langes Stück Schrägband abschneiden. Sowie 3 weitere Stücke à 10 cm. Es gibt einige Wege das Quilt Sandwich einzufassen - ich bevorzuge die Methode mit der Nähmaschine, so wie Jera es in ihrem machine binding tutorial wunderbar erklärt. Es ist leider nur auf Englisch, aber gut bebildert, so dass man es leicht versteht. Im Prinzip näht man das Schrägband zuerst auf die linke Seite, dann schlägt man es auf die rechte Seite um und steppt es knappkantig ab. Nicht vergessen: vor dem Steppen die 3 kleinen Stücke zur Schlaufe legen und oben befestigen. Jeweils 2 cm von jeder Ecke und eins in der Mitte. So kann man in die Schlaufen später einen dünnen Stab stecken, damit der Adventskalender sich nicht wölbt beim Füllen. An den Stab kann man eine Kordel befestigen zum Aufhängen.


Now you're ready to fill the pockets with goodies and surprise your loved ones on December 1st!
💗
Nun könnt ihr den Adventskalender mit Süßigkeiten oder anderen Kleinigkeiten befüllen!


 photo signature_zpscqkypdzs.png

Thursday, March 17

Spring % SALE %

Heads up fabric lovers! I need to make space in my stock room and have marked down over ninety fabrics! Save 20% on fabrics, including the popular Petal and Sunshine Rose collections! Shown is just a small selection of fabrics on sale. Apart from patchwork, a couple of basic knits and kid's fabrics are on sale too! Remember, I ship worldwide and for just USD 5,- I can ship upto 2 meters of fabric. Go ahead and check out the sale section here :) 
*
Stoffliebhaber aufgepasst! Im Stofflager muss Platz geschafft werden, daher habe ich über neunzig Stoffe weiter reduziert! 20%  Rabatt auf ausgewählte Designerstoffe, einschließlich der beliebten Petal und Sunshine Rose Kollektion von Tanya Whelan! Die folgende Collage zeigt nur eine kleine Auswahl der reduzierten Stoffe. Außer Patchwork sind noch einige Jerseys sowie Kinder Stoffe im Sale! Hier geht's zur Sale Kategorie im Shop :)


And just in time for Easter sewing I received Emma's Garden, a floral line by Skipping Stones Studio for Clothworks. This collection is romantic and sweet with delicate rosebuds, lightly weathered stripes and blooming roses in pastel pink and green. So pretty! Take a look here and here.
This fabric line can be purchased from 0,25 m up. 
*
Und rechtzeitig für die Oster-Näherei ist die traumhafte florale Kollektion Emma's Garden eingetroffen! Diese Kollektion von Clothworks ist ganz romantisch mit süßen kleinen Röschen, Shabby Streifen und große, pastellige Rosenbouquets. Wunderschön! Schaut mal hier und hier.
Diese Stoffe sind ab 0,25 m bestellbar.


These sweet fabrics are perfect for Tilda sewing projects. Check out the Easter bunny I made...the pinafore and hat is made from the pink ticking and the pantaloons from the pink rosebud fabric. Btw, you wouldn't believe how long it took to sew one of these, especially the small clothes and struggling to put them on the bunny!
*
Diese Stoffe eignen sich wunderbar für Tilda Nähprojekte. Schaut mal unten...mein selbstgenähtes Hasenmädchen trägt ein Kleidchen und Hut aus dem rosa Streifenstoff und Hosen aus dem Miniröschenstoff. Übrigens, das Häschen zu fertigen hat doch recht lange gedauert, besonders die Bekleidung!


As mentioned last week I'm off to Cologne early tomorrow morning. Have a great weekend and see you back on Monday!
*
We letzte Woche angekündigt fahre ich morgen früh nach Köln. Ich wünsche Euch allen ein wunderschönes Wochenende. Bis Montag!


Happy Sewing!!


 photo signature_zpscqkypdzs.png

Friday, March 11

From idea to { handmade } item

These days consumers are so used to seeing rows upon rows of factory-made clothing that most are unaware of how much work goes into creating a handmade item. There are tons of things to consider before the sketch on paper turns into a physical item. Not to mention all the time, money and resources invested into every new creation. All this goes unseen by most consumers. So I was rather pleased when Etsy introduced a new video function in the "about" section of my shop. While I haven't got one uploaded yet, I will definitely make use of this function (weather permitting) hopefully in the near future :)


Heutzutage gibt es massenhaft industriell gefertigte Bekleidung. Dies erweckt bei manchen Verbrauchern den Eindruck, dass meine handgefertigten Teile  schnell von der Nähmaschine hüpfen. Jedoch bevor sich die Skizze zu einem tragbaren Bekleidungsstück gestaltet gibt es vieles zu erwägen. In jede neue Kreation steckt viel Zeit und Geld und bringt manchmal ganz neue Herausforderungen mit sich. Deshalb begrüße ich die von Etsy eingeführte neue Video-Funktion im Shop Profil. So kann ich allen potentiellen Kunden einen Einblick hinter die Kulissen gewähren und gleichzeitig Aufklärungsarbeit leisten. Noch habe ich kein Video gedreht, aber wenn es das Wetter erlaubt werde ich das schnellstens nachholen!


professionally finished seams
This time next week I will be in Cologne visiting the annual international trade fair for handicraft and textiles. My appointment book is full! I'm pretty excited to check out new knit fabric collections for my Priya active wear line - you might remember due to unforeseen circumstances  I was forced to put this collection on hold. In the meantime I have quietly gathered even more information and researched the market in depth. I want to go there fully prepared. My main concern is availability of fabrics. These days more often than not manufacturers simply roll out new collections, but do not offer continuous reordering. Therefore, I'm looking for timeless colors and classic patterns that I can work with for at least three seasons. 


nicely finished hems
Um diese Zeit nächste Woche bin ich wieder in Köln auf der H&H, der jährlichen, internationalen Fachmesse für Kunsthandwerk und Textiles. Mein Terminkalender ist schon voll! Ich bin gespannt auf die neuen Jerseys, speziell für meine Priya Yoga Kollektion. Vielleicht erinnert Ihr Euch - aufgrund unvorhergesehener Umstände war ich gezwungen diese auf Eis zu legen. In der Zwischenzeit habe ich weiterhin den Markt recherchiert. Mein Hauptanliegen ist die Verfügbarkeit der Stoffe. Neuerdings produzieren die Hersteller nämlich laufend neue Kollektionen jedoch ohne Möglichkeit zur Nachbestellung. Aus diesem Grund interessieren mich vornehmlich zeitlose Farben und klassische Muster. 
An dem 1. Bloggertreffen von der Initiative Handarbeit kann ich leider aus Termingründen nicht teilnehmen. Schade. Vielleicht nächstes Jahr.

 
I am experimenting with a looser fit workout top. No frills, just quality fabric, strong seams and sewn with care and love :) The whole process from sketch to finished item took around four hours. I try my best to offer reasonable prices, but I'll tell you upfront that my handmade items cost more than clothing off the rack. Would you be willing to pay more for handmade items? Side note: I received a lovely message from a customer who bought one of my items four years ago. In it she wrote that even after several washes her item still looks like new. Lovely, isn't it? And it perfectly emphasizes that you get what you pay for :)
*
Das obige Shirt ist ein Prototyp für ein leger sitzendes Top. Ohne Schnickschnack, aus hochwertigem Jersey, und mit Sorgfalt und Liebe gefertigt :) Von der Skizze bis zum fertigen Artikel dauerte es etwa vier Stunden. Und ich sage es auch gleich vorweg -  meine handgenähten Teile liegen preislich über dem Durchschnitt, sind aber vom Garn bis zum Stoff Qualitätsware. Randbemerkung: neulich erhielt ich eine nette Nachricht von einer Kundin, die vor vier Jahren einen meiner Artikel gekauft hatte. Darin schrieb sie, dass auch nach mehreren Wäschen der Artikel aussieht wie neu.  Na, das höre ich doch gern :)

Happy Friday!!

 photo signature_zpscqkypdzs.png

Friday, June 19

Hello Summer!


My favorite season is officially starting two days from now. Yay! Of course, what I'm really craving is a nice, balmy 80°F which I might be lucky enough to experience in August, but for now I'm just happy for the longer days. Anyway, I'm glad this post has finally come together, as I had been planning it for weeks or rather ever since I laid eyes upon the gorgeous Art Gallery Fabrics at the trade show back in March!
*
Meine Lieblingsjahreszeit beginnt offiziell in zwei Tagen. Ich freue mich auf milde Temperaturen und lange Sommerabende. Nun bin ich erstmal froh, dass dieser Blogbeitrag endlich zustande gekommen ist. Schließlich habe ich ihn seit Wochen geplant oder vielmehr, seit ich auf der Fachmesse im März diese wunderschönen Jerseys von Art Gallery Fabrics entdeckt hatte!


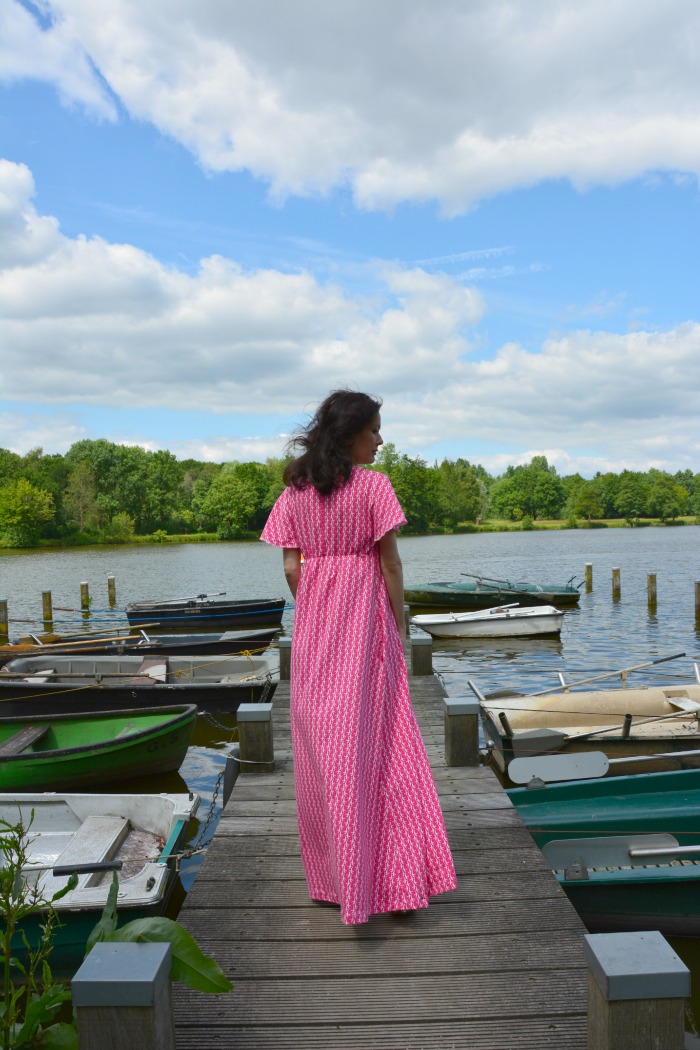
The pink swallow print knit fabric screamed "maxi dress" and I knew I was going to sew one for myself as soon as I got the bolt in. I love maxi dresses, but the ones off the rack are always way too long and I just find it too cumbersome to shorten them. Completing this dress from cutting, to sewing and fitting wasn't done in a day, but it was incredibly fun, as the light-weight fabric is easy to work with and really great quality, trust me.
Sewing with knits requires some patience, as the edges have a tendency to roll, but this is easily solved by serging them. The trickiest part of sewing with knits, in my opinion, are the necklines. You'd want to avoid the dreaded "pie-crust" effect or waviness. I've sewn with knits for quite some time and have finished several shirts with various necklines, so I'm particularly proud of the nice, even and flat open V-neck on this dress :) I will be showing you how to sew a banded neckline on a knit garment in a future post!


Einen davon, nämlich der pinkfarbene mit Schwalbendruck musste ich unbedingt zum Maxikleid vernähen. Ich liebe Maxikleider, aber die von der Stange sind immer viel zu lang und ich finde es einfach zu mühselig das Kleid nachträglich zu kürzen. Die Fertigung dieses Kleides, vom Schneiden bis zum Nähen und Anpassen dauerte zwar etwas länger, aber es hat unglaublich viel Spaß gemacht.  Der Feinjersey lässt sich gut vernähen und hat eine wirklich tolle Qualität - das könnt Ihr mir ruhig glauben.
Nähen mit Jersey erfordert etwas Geduld, da die Kanten die Tendenz haben einzurollen, daher versäubere ich sie immer mit der Overlock. Etwas kniffliger sind meistens die Halsausschnitte, denn wellige Ausschnitte sind einfach unschön und zu vermeiden. Mittlerweile habe ich den Dreh raus, denn ich habe bereits viele Shirts mit den verschiedensten Ausschnitten gefertig. In einem zukünftigen Beitrag zeige ich allen Interessierten wie man einen gleichmäßig anliegenden Ausschnitt an jedes selbstgenähte Jersey Shirt hinbekommt!


I made my very first tassel necklace to go with the dress. I used little wooden beads in pink, fuchsia, purple and added pops of yellow and orange to the mix. I also made an orange tassel pendant, but I think I will make it smaller next time. I also made matching pink rose earstuds.
 *
Passend zum Kleid habe ich meine erste Halskette mit Quaste gefertigt. Ich habe kleine Holzperlen in Pink, Fuchsia, Lila sowie Gelb und Orange aufgefädelt, aber ich denke beim nächsten Mal mache ich die orangefarbene Quaste etwas kleiner. Als i-Tüpfelchen habe ich noch pinkfarbenene Ohrstecker gefertigt.


Sometimes, when I make elaborate outfits such as this one, I like to take photos in a suitable location. Since there is no beach here far and wide I went to the nearest lake and this secluded little jetty seemed like the perfect spot. I set up my tripod and snapped away. It is not easy taking pictures of oneself with a remote control, while trying not to look too self-conscious and simultaneously not to fall off the narrow jetty (I was wearing strappy high-heeled sandals). I think the most annoying part (you can tell from the expression on my face below) was that the day started out bright, but within a half hour or so, just as I was taking these pictures, the sky clouded over and it got really windy. You probably won't believe this, but the temperature dropped to around 50°F. Then it got downright stormy so I called it quits. I fully intended to re-do the photos, but then I considered the pile of work back at my home office waiting to be finished and decided to just use those pics where I didn't look entirely windswept ;-)
 *
Manchmal, bei aufwendigen Outfits wie diese, mag ich es an einer geeigneten Location das Outfit in Szene zu setzen. Da es hier weit und breit keinen Strand gibt, bin ich zum nächsten See und dieser etwas abgelegene Steg schien mir der perfekte Ort. Ich baute also mein Stativ auf und stellte die Kamera entsprechend ein. Ich muß Euch sagen: es war nicht einfach diese Selbstportraits zu machen, dabei nicht verlegen zu gucken und gleichzeitig auch nicht vom schmalen Steg (ich trug Highheel-Sandalen) zu fallen! Aber der mit Abstand nervigste Teil (siehe Gesichtsausdruck unten) war, dass der Himmel sich in wenigen Minuten genau zum Zeitpunkt meiner "Fotosession" verdunkelte und es plötzlich sehr, sehr windig wurde. Es waren dann tatsächlich auch nur noch 12°C. Letztendlich wurde es so stürmisch, dass ich die Fotos vorzeitig beenden musste, mit dem Vorhaben, das Ganze später zu wiederholen. Allerdings erwartete mich Zuhause leider einen Haufen Arbeit und so ist mir die Lust nochmal mit Stativ & Co. rauszufahren vergangen. Also habe ich für diesen Post die wenigen Bilder verwendet, in denen ich nicht allzu zerzaust aussehe ;-)

getting stormier + colder :-(

The main thing is I totally love how this dress turned out. This is adapted from a tunic pattern with some minor alterations. It's got romantic flutter sleeves and nifty concealed side pockets in the skirt. I like that you can style it up or down. I particularly like it with my denim jacket thrown over. I also made a fun summer tote to go with the dress, but forgot to bring it along! 
 *
Naja, das Wesentliche ist, dass das Kleid genauso geworden ist, wie ich es mir vorgestellt habe. Der Schnitt ist eine abgewandelte Tunika mit verlängertem Rockteil. Das Kleid hat romantische Flügelärmel und raffinierte Seitentaschen im Rockteil. Ich mag es besonders in Kombination mit meiner Jeansjacke. Zudem hatte ich noch einen Canvasbeutel genäht, aber vergessen ihn zu fotografieren bzw. mitzunehmen. 


Happy Friday!
xoxo

Wednesday, May 27

Art Gallery Fabrics - Contemporary Elegance


Sewing with knits is gaining ever more popularity. I've recently begun stocking some exciting new prints (#2 #5 #8 in stock already!) in my fabric shoppe. Art Gallery Fabrics designs fit today's modern lifestyle and add a chic and sophisticated touch to your wardrobe! These premium quality knits are light weight, soft and smooth and have an adequate amount of stretch making them perfect for leggings, tunics, Tshirts and unique kids clothing.

Nähen mit Jerseystoffen wird immer beliebter. Dementsprechend habe ich mein Sortiment um ein paar Designs erweitert. Als Pendant zu den bunt-fröhlichen Kinderjerseys  bekomme ich in der nahen Zukunft spannende neue Designs (#2 #5 #8 sind bereits eingetroffen!). Die Designs von Art Gallery passen zum heutigen modernen Lebensstil und verleihen selbstgenähten Kleidungsstücken eine schicke und mondäne Note. Diese hochwertigen Feinjerseys aus Baumwolle mit Stretchanteil sind leicht, weich und glatt - perfekt geeignet für z.B. Leggings, Tunikas, T-Shirts und einzigartiger Kinderbekleidung.

image courtesy of AGF
Although geometric prints aren't my usual style, I totally fell in love with #5 Mojave Aloe. There's just something playful about those triangles on a lovely mint background that reminds me of long summer days full of fun and laughter. I whipped up a pair of leggings to go with my jeans shorts in anticipation of my favourite season :)


Obwohl ich eher für florale Muster bekannt bin, kann ich mich dennoch für geometrische Drucke begeistern, besonders wenn sie so verspielt daherkommen wie Stoff Nr. 5 Mojave Aloe. Da habe ich mir schnell ein paar Leggings genäht, die ich hoffentlich bald, wenn die Sonne mitspielt , zu meinen Jeans Shorts tragen kann. Denn ich bin ein Sommerkind und liebe solche legeren Outfits.


As soon as I return from my mini vacation I can't wait to start another summer sewing project with this beautiful swallow print knit fabric in bright pink (#8)! 


Sobald ich wieder zuhause bin geht's an die Nähmaschine. Ich kann es kaum erwarten diesen schönen, pinkfarbenen Jersey mit all-over Schwalben Muster zu vernähen!

image courtesy of AGF
I'm really excited about these new modern prints, and I should have all of the above in stock by late August. Art Gallery offer quite a selection of prints from graphic to whimsical, folksy to vintage and I hope my little selection has something for everyone :)
*
Ich bin wirklich begeistert von diesen modernen Jerseys und vorallem die Qualität überzeugt. Bis Ende August sollten alle oben gezeigten Stoffe im Lädchen eingetroffen sein. Art Gallery bietet ein großes Sortiment Jerseys mit grafischen, verspielten und vintage Mustern und ich hoffe, dass meine kleine Auswahl gefällt :)

Thanks for stopping by and have a great day!
*
Danke, dass Ihr vorbeigeschaut habt. Ich wünsche Euch einen schönen Tag!

Friday, May 22

Outfit post {Nautical Glamour}

Hi there lovelies!  Hallo Mädels!


I recently received another parcel from the good people over at Union Knopf. It contained lots of black, silver and gold fashion accessories, anchor appliqués, beaded bib necklaces, sequins and rhinestones. It immediately reminded me of the hugely popular 80s TV series Dynasty :)
My idea for an outfit came together quickly - nautical meets 80s glamour!
I actually had a whole different location planned for this shoot, however (as so often happens here) the sun was shining one minute and then the next it was absolutely bucketing down. We had to run for cover and this spot was it. Not the prettiest of backdrops and the light wasn't great either, but because I didn't want to wait for the rain to stop we just took a couple of photos right here.


Neulich habe ich wieder ein Päckchen von den netten Kollegen von Union Knopf erhalten. Drin waren jede Menge Strass, perlenbestickte Kragen, Anker Motive sowie schwarze, silberne und goldfarbende Fashion Accessoires. Es erinnerte mich sofort an die beliebte 80er Jahre Sendung Dynasty :) So kam mir die Idee Anker und Glitzer zu vereinen = Maritim + 80er Glanz!
Eigentlich war eine andere Location für dieses Photoshoot gedacht, aber wie so oft in dieser Gegend fing es von einer Minute zur anderen heftig an zu regnen. Also schnell ein trockenes Plätzchen gesucht - zugegeben nicht besonders schön - und ein paar Bilder geknipst, denn ich hatte keine Lust den Regen abzuwarten.


This fashion accessory is actually a beaded bib necklace. It's got tons of silver seed and facetted beads and a pretty crystal in the center on a felt backing. If you look closely the pattern resembles stripes matching my stripey nautical shirt. Since the necklace didn't work for me, I cut off the chain and stitched the collar on by hand at strategic points. This method works well with medium weight woven and knit fabrics.
*
In diesen perlenbestickten Kragen (eigentlich eine Kette) hatte ich mich sofort verliebt. Kleine silberne Rocailles, Facettenperlen und ein hübscher Kristall in der Mitte zieren ihn. Wer genau hinschaut erkennt ein Streifenmuster, welches sich gut mit dem Streifenshirt ergänzt. Als Kette gefiel er mit nicht so recht, daher habe ich den Filzkragen mit ein paar unsichtbaren Handstichen am Ausschnitt des handgemachten Shirts genäht. Mittelschwere Stoffe sind dafür am besten geeignet.


To fit the theme I chose the large silver anchor appliqué and simply ironed it to the back pocket of my vintage black palazzo pants. This was a lucky find from years ago! The pants are a wool blend and the motif adhered to it easily. When applying iron-on appliqués always cover with a thin cotton cloth and press evenly. Those round black gems with the tiny crystals surrounding it? Those are actually iron-on appliqués as well! You can iron them on clothing, bags, jeans etc.  However, I decided to make a pair of earstuds instead. For this I cut a piece of clear vellum and stuck in on the back of the motif. I then glued that to a large earstud pad and let it dry overnight.The earstuds complement the beaded collar well and they are just the right size too.


Passend zum Thema habe ich mich für den großen silbernen Anker entschieden. Das hochwertige Bügelmotiv ziert nun die rückwärtige Tasche meiner schwarzen Vintage Palazzo Hose aus Wollmischgewebe, ein Glücksgriff  aus dem Second Hand Laden. Das Motiv haftete nach nur 20 Sekunden gut auf dem Stoff. Beim Aufbügeln solcher Motive decke ich es vorher immer mit einen dünnen Baumwolltuch ab.
Die runden schwarzen Schmucksteine mit den Zierkristallen ringsherum sind ebenfalls Aufbügelmotive! Man kann sie auf Bekleidung, Jeans oder Taschen aufbügeln. Allerdings habe ich daraus Ohrstecker gebastelt :) Dafür habe ich auf die jeweilige Rückseite runde Stücke durchsichtige Folie befestigt, diese dann auf große Ohrstecker-Rohlinge mit Schmuckkleber geklebt und über Nacht trocknen lassen. Als Ohrstecker finde ich passen sie gut zu dem bestickten Kragen und haben auch genau die richtige Größe.


Thanks for stopping by and reading along! What's your take on wide-legged pants? Or are you a skinny jeans forever kinda girl?
*
Freut mich, dass Ihr wieder vorbeigeschaut habt! Wie findet Ihr weite Hosen? Oder seid Ihr ausschließlich Skinny Jeans Fan?