
*
Interessierte LeserInnen/NäherInnen wollten wissen wann ich denn endlich die Anleitung für die Papagei Tasche poste...nun, heute ist es soweit! Dies ist die letzte Anleitung meines DIY Frida Kahlo Kostüms. Danke für Eure Geduld!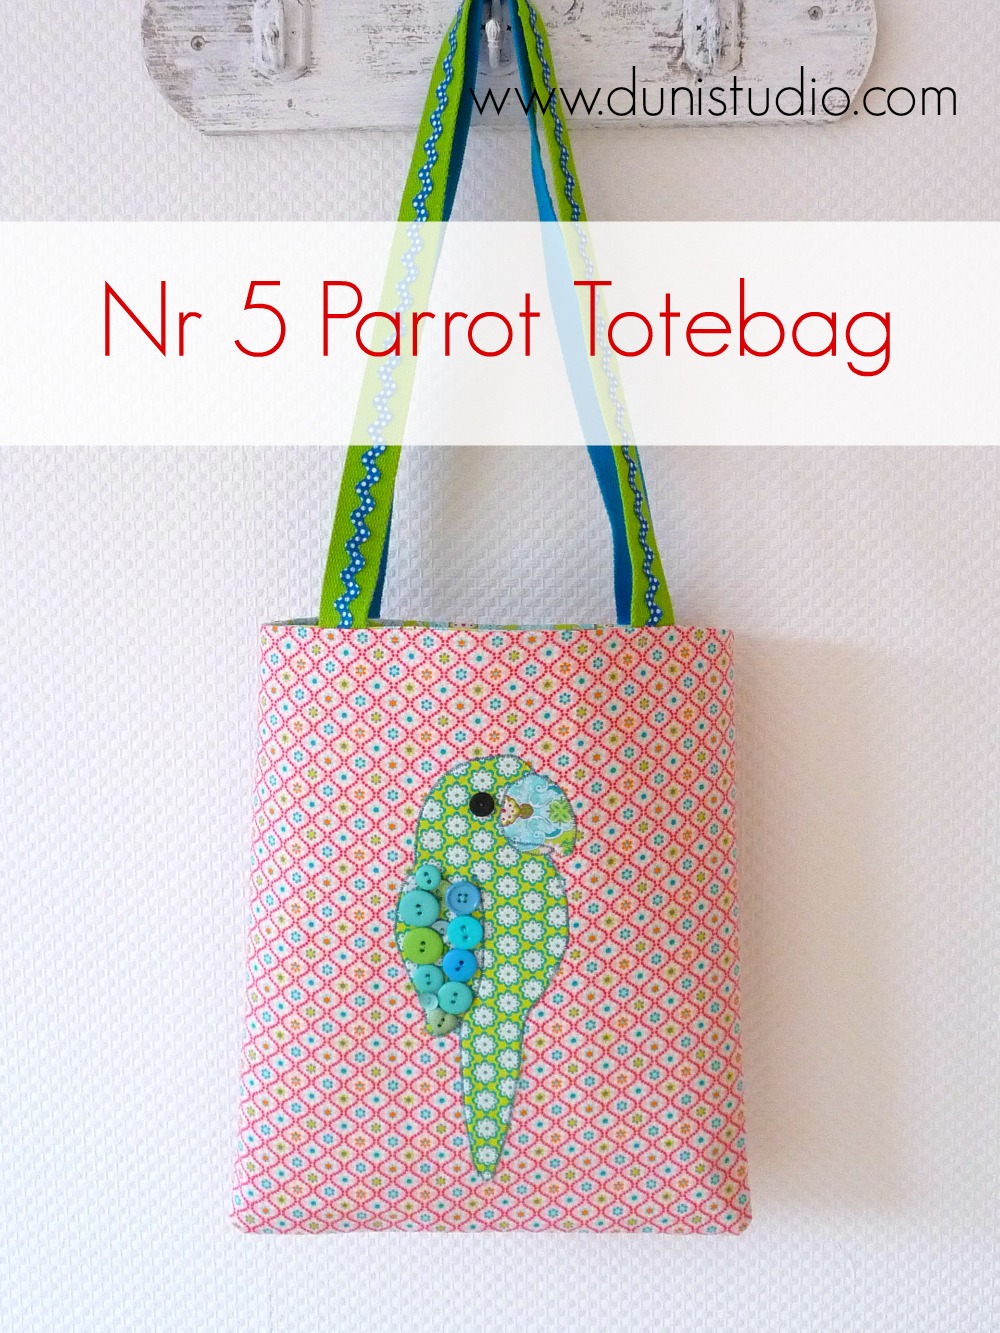
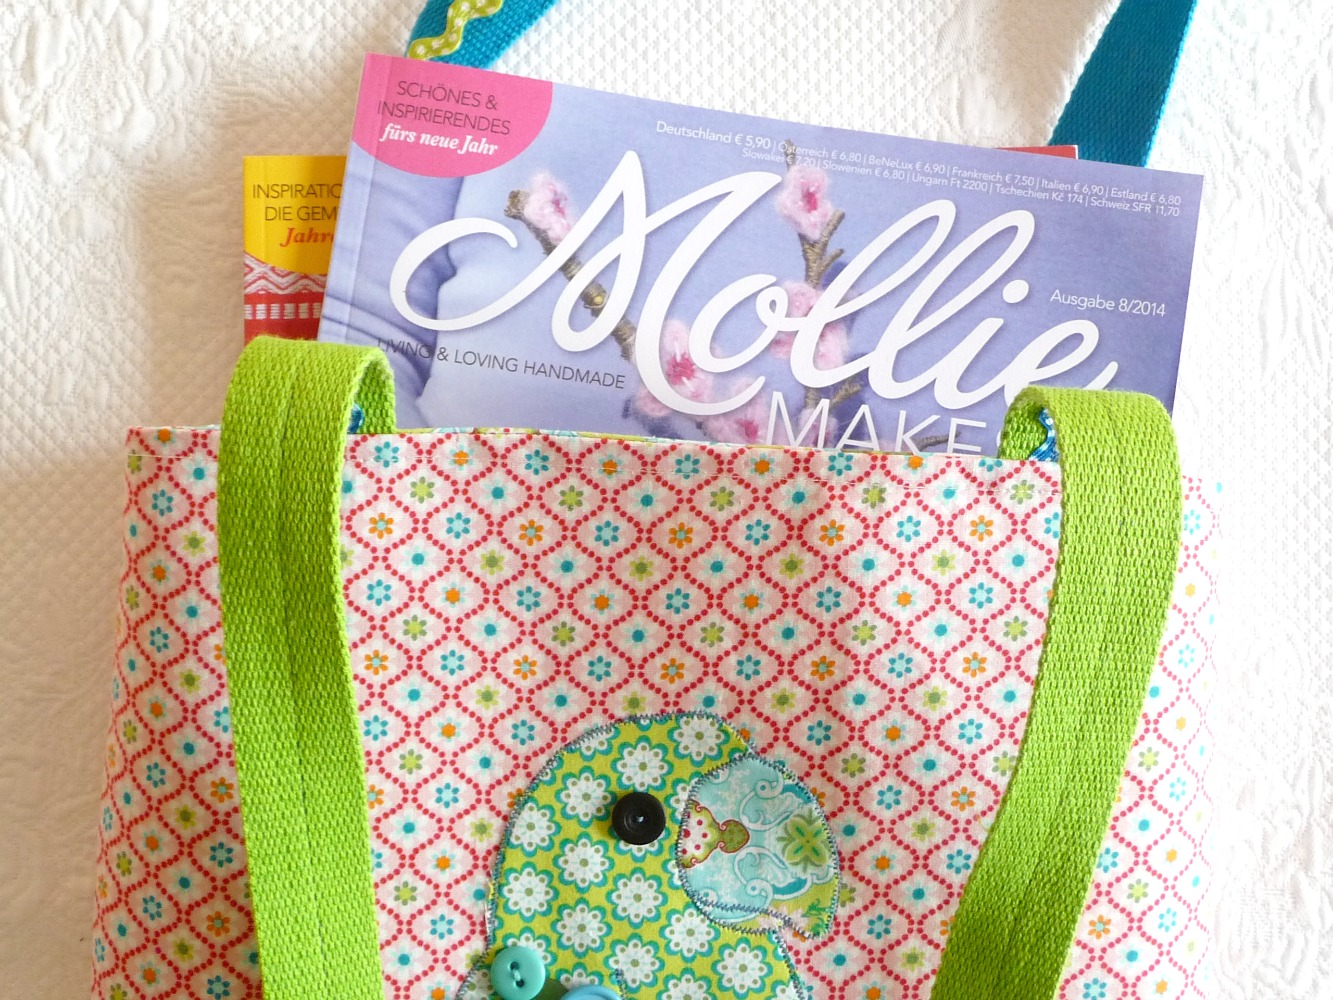
 This is a simple bag shape that I designed to fit the Mollie Makes magazine or two. The parrot appliqué requires some handsewing and patience :)
*
Diese Tasche habe ich so entworfen, dass die Mollie Makes Zeitschrift oder auch zwei perfekt reinpasst! Die Papagei Applikation bedarf etwas Geduld :)
You'll need
2 pieces 30 cm x 35 cm main fabric
2 matching pieces of Decovil stabilizer
2 pieces 30 cm x 35 cm lining fabric
2 matching pieces of H630 interfacing
contrasting fabric for the parrot
Vliesofix (fusible webbing)
assorted buttons, 1 small black one for the eye
2 x 72 cm pieces of webbing
2 x 72 pieces of rick rack trim
sewing machine + basic sewing kit
Ihr benötigt
2 Rechtecke 30 cm x 35 cm Hauptstoff
2 passende Stücke Decovil I Light
2 Rechtecke 30 cm x 35 cm Futterstoff
2 passende Stücke H630 Vlies
Kontraststoff für die Papagei Applikation
Vliesofix
Knopfsortiment, 1 kleiner schwarzer Knopf für das Auge
2 x 72 cm Webband (Träger)
2 72 cm Zackenlitze
Nähmaschine + Basic Nähutensilien
Step One // Schritt Eins
Start by ironing on the Decovil (a thin pelmet like interfacing) onto the wrong side of the main fabric pieces and the H630 interfacing onto the wrong side of the lining fabric pieces.
Next, stitch the rick rack trim on the two webbing pieces. I used contrasting ones. Set aside.
Sew lining pieces together right sides facing at the sides and bottom using a 1 cm seam allowance. Leave a 12 cm gap at the bottom. Snip off corners. Iron seams open.
*
Zunächst das Decovil auf die linke Seite der Hauptstoffteile und das H630 Vlies auf die linke Seite der Futterteile nach Herstelleranweisung bügeln. Dann, die Zackenlitze mittig auf die zwei Webbänder (Träger) steppen. (Meine sind verschieden farbig, da es von jedem Band nur jeweils eine Farbe gab). Beiseite legen.
Futterteile rechts auf rechts legen und Seitennähte und Boden der Futterteile steppen (1 cm Naht). Unten eine 12 cm Öffnung zum Wenden lassen. Ecken kurz vor der Naht abschneiden. Nähte auseinander bügeln.
Step Two // Schritt Zwei
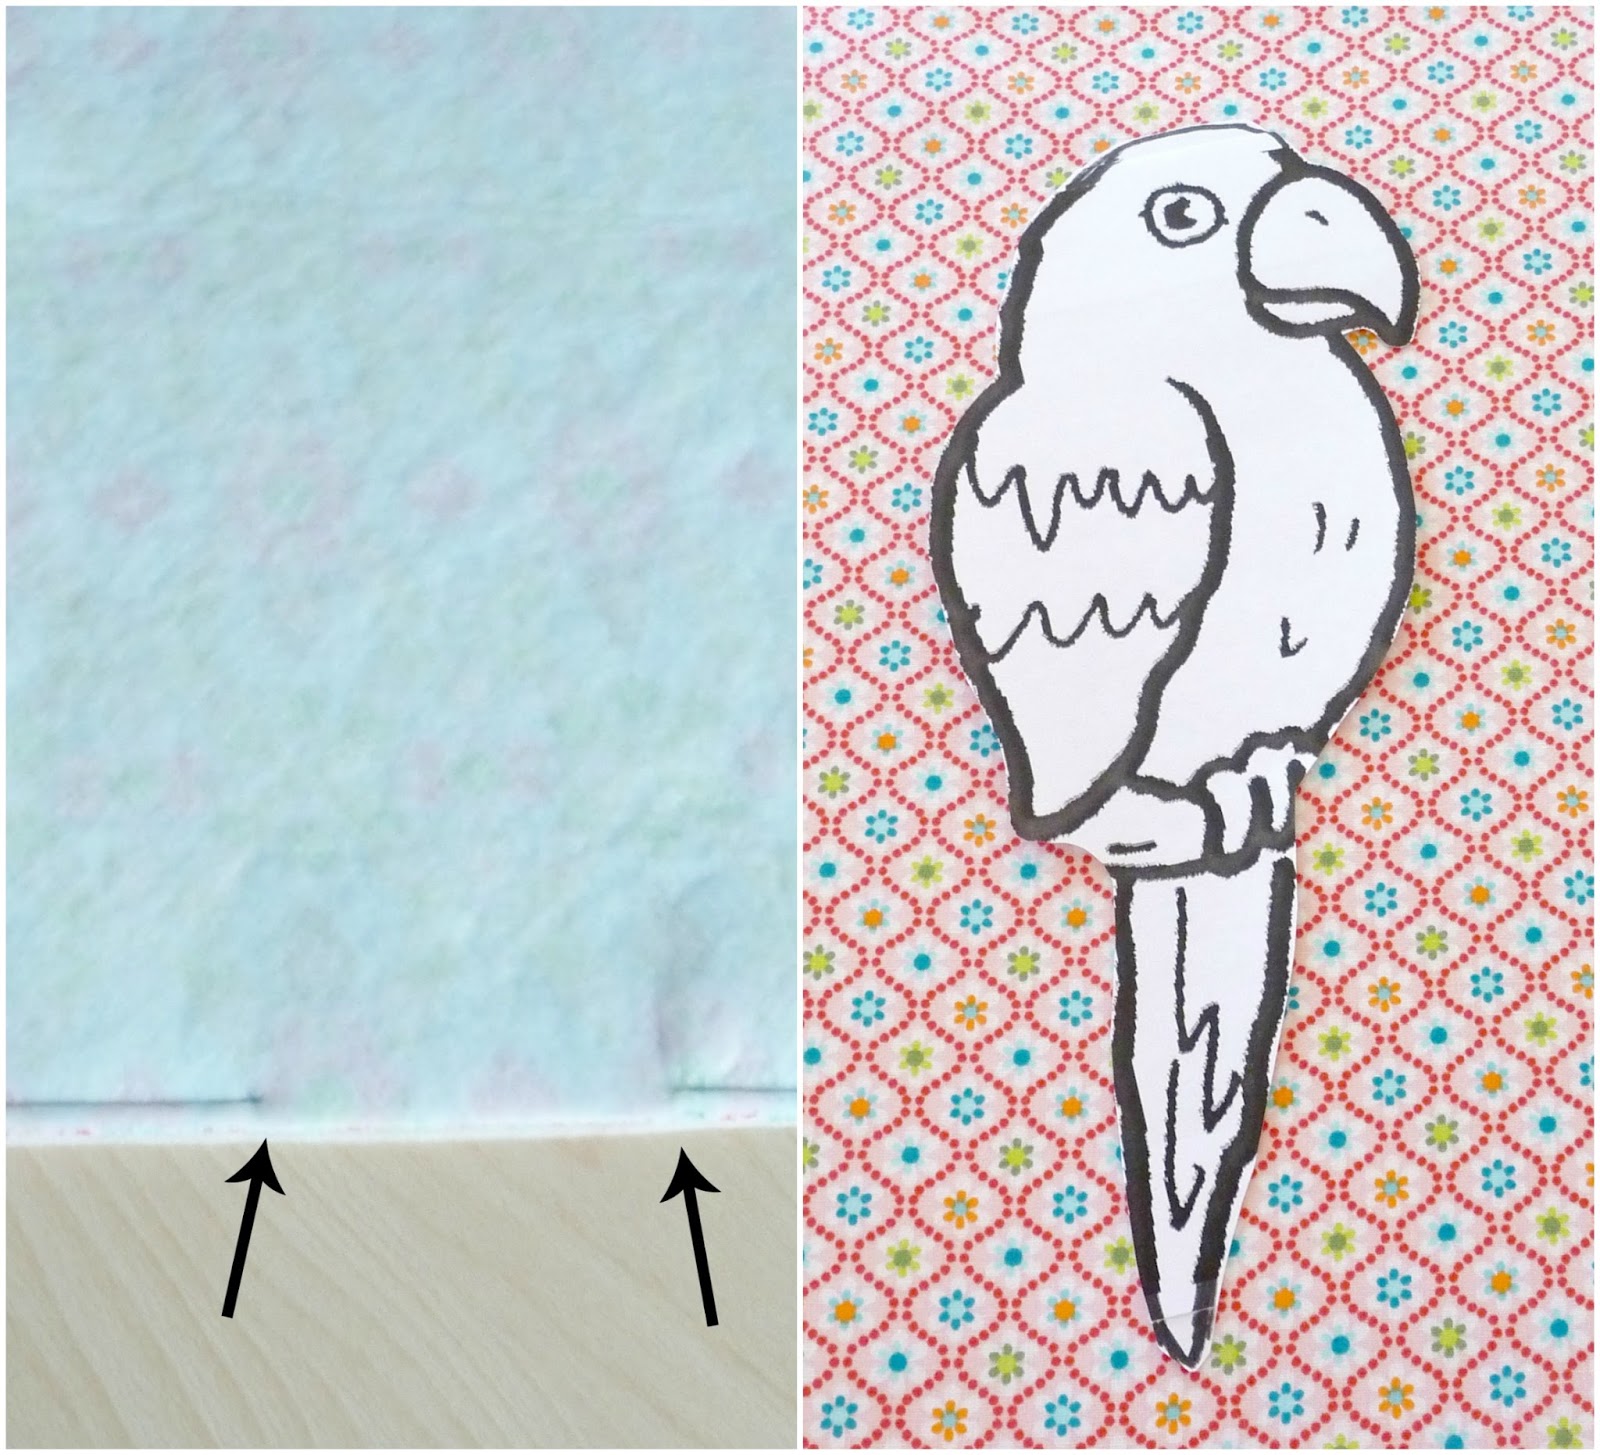
Now go to your computer and google "free parrot drawing for coloring" or "free parrot drawing for kids" and print out your preferred parrot image. Remember it should fit on the front panel of the tote. Cut out the parrot image only (ignore any leaves, trees or branches).
Iron a suitably sized piece of fusible webbing onto the wrong side of the contrasting fabric. Trace the parrot template and cut out. Pull off the backing of webbing and iron the parrot onto the middle of the front panel (main fabric piece).
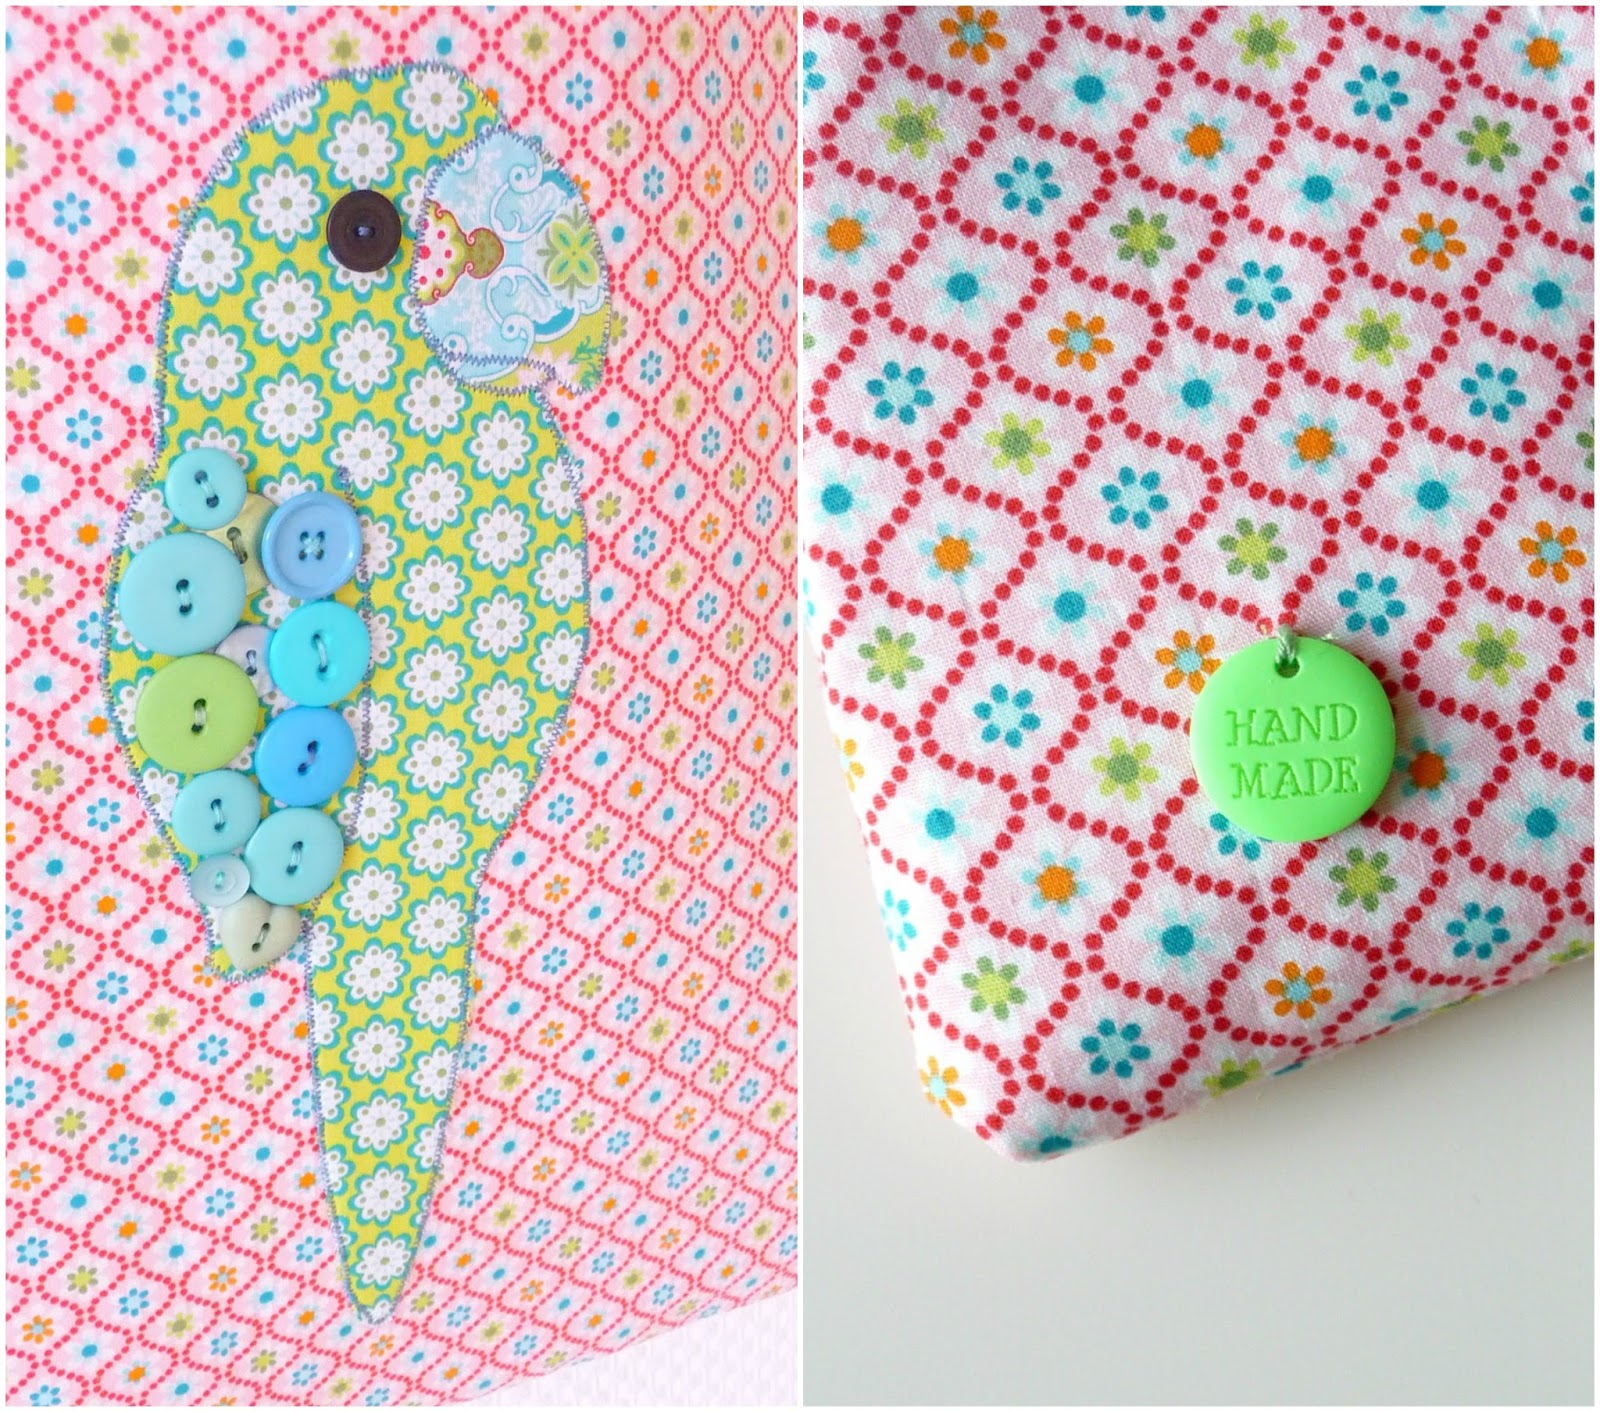
Using a tiny zigzag stitch on your machine (try out on a scrap of fabric first) sew along the contours of the parrot and important areas, such as the beak and wings. Go slowly!
Now sew on the button eye and fill in the wing(s) with colorful buttons. Optional - sew a handmade tag on the back bag piece.
Nun bei Google die Stichwörter "Papagei kostenlose Malvorlage" oder "Papagei malen Kinder" ein und schon bekommt Ihr seitenweise Papagei-Bilder. Euer Wunschbild ausdrucken und auschneiden (Bäume, Blätter, Äste etc. ignorieren). Ein passendes Stück Vliesofix auf die Rückseite des Kontraststoffes bügeln. Papagei als Vorlage zum Nachzeichnen verwenden. Ausschneiden, Folie abziehen und mittig auf ein Hauptstoffteil bügeln. Mit der kleinsten Zickzack-Einstellung der Nähmaschine (vorher an einem Reststück ausprobieren) entlang der Umrisse und wichtige Linien wie Schnabel und Flügel langsam! nähen. Den kleinen schwarzen Knopf als Auge annähen und den Flügel mit farblich passenden Knöpfen plastisch hervorheben. Wer möchte näht noch ein "Handmade" Tag an das rückwärtige Hauptteil.
Step Three // Schritt Drei
Next, baste the handles to the main fabric pieces, 7 cm from each side.
Then sew the main fabric pieces together at the sides and bottom, right sides facing. Make sure the handles are tucked inside, safely out of the way of your seams. Snip corners as before. Iron seams open and turn bag right side out.
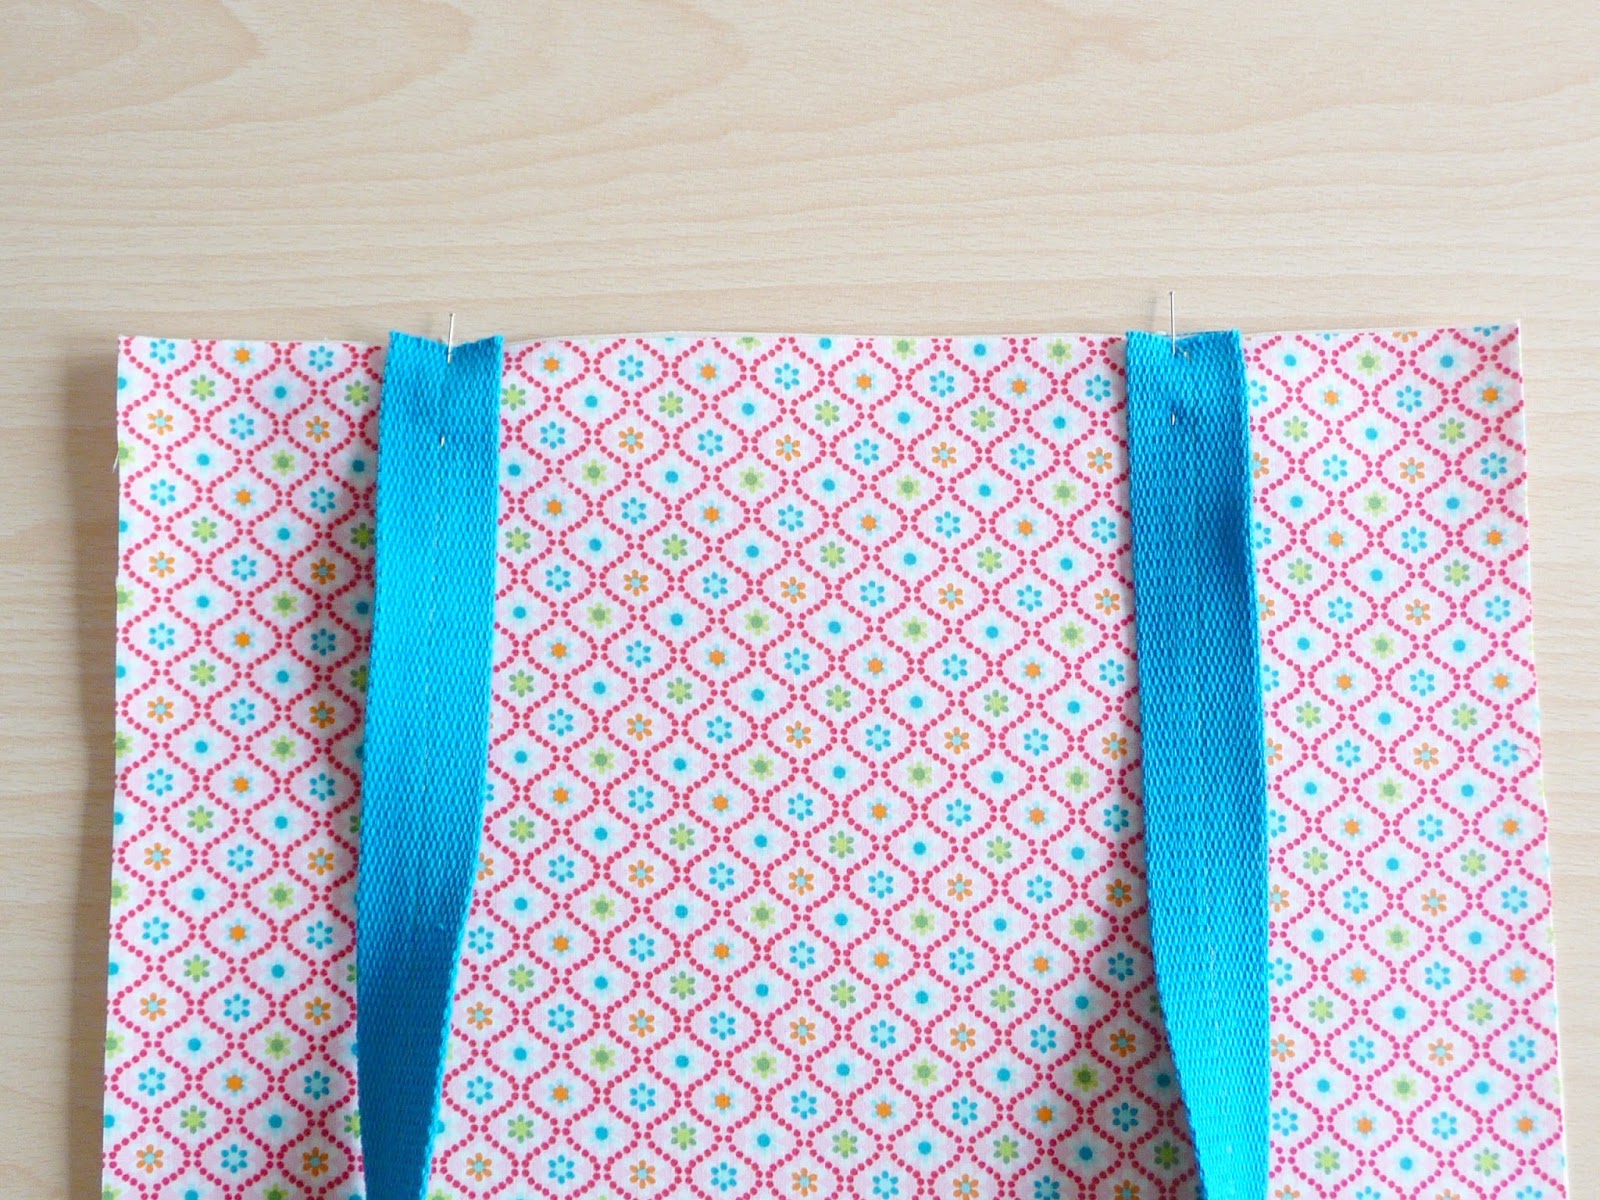
Als nächstes die Träger an den Hauptstoffteilen 7 cm von jeder Seite heften (rechts auf rechts). Dann die Stoffteile rechts auf rechts legen und Seiten- und Bodennaht (1 cm) steppen. Darauf achten, dass die Träger nicht im Weg sind. Ecken kurz vor der Naht abschneiden. Nähte auseinander bügeln und Tasche wenden.
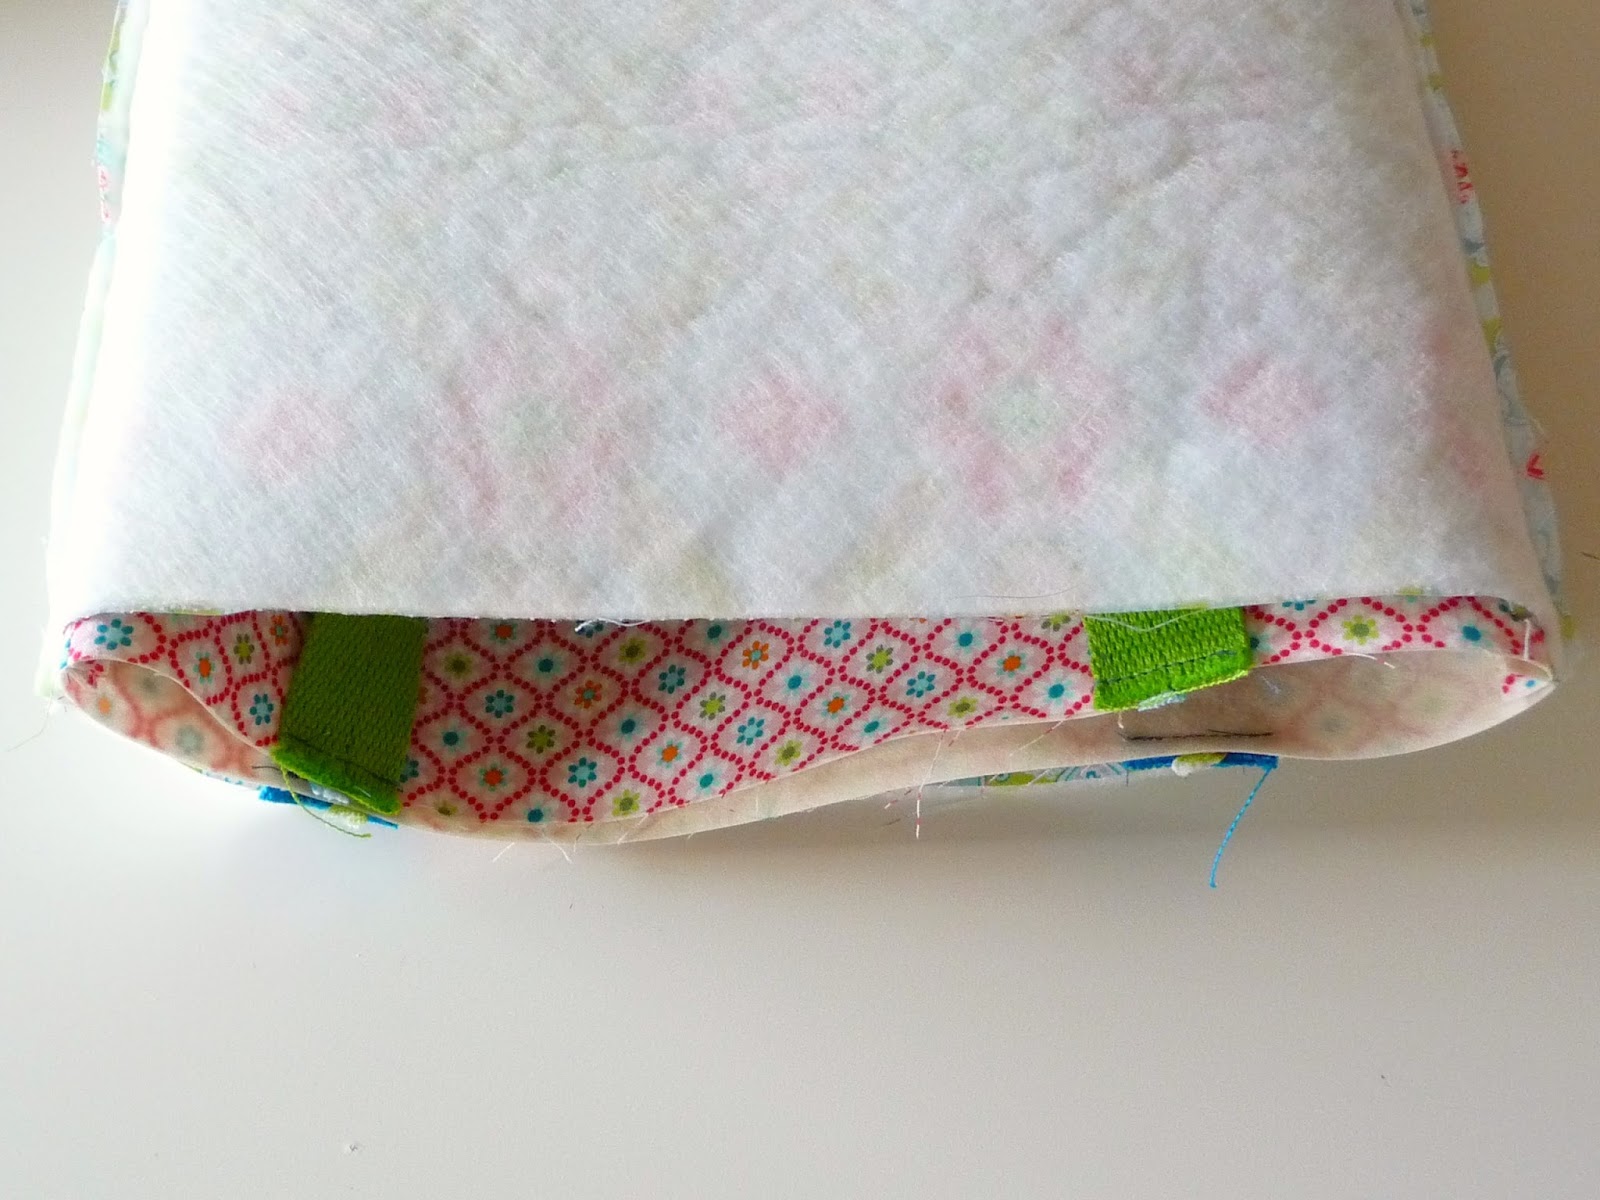
Main bag inside lining bag, handles tucked inside // Außentasche in Futtertasche, Träger innenliegend
Congratulations, you're done!
*
Nun die Außentasche rechts auf rechts in die Futtertasche stecken, Träger innenliegend. Seitennähte treffen aufeinander. Obere Kante mit Nadeln fixieren und 1 cm breit absteppen. Die Außentasche vorsichtig durch die Öffnung der Futtertasche ziehen. Loch mit ein paar Handstichen schließen. Futtertasche in die Haupttasche stecken und die gesamte Tasche gut bügeln, dabei die Knöpfe aussparen. Zuletzt rundum an der oberen Kante knappkantig absteppen. Glückwunsch, Ihr habt's geschafft!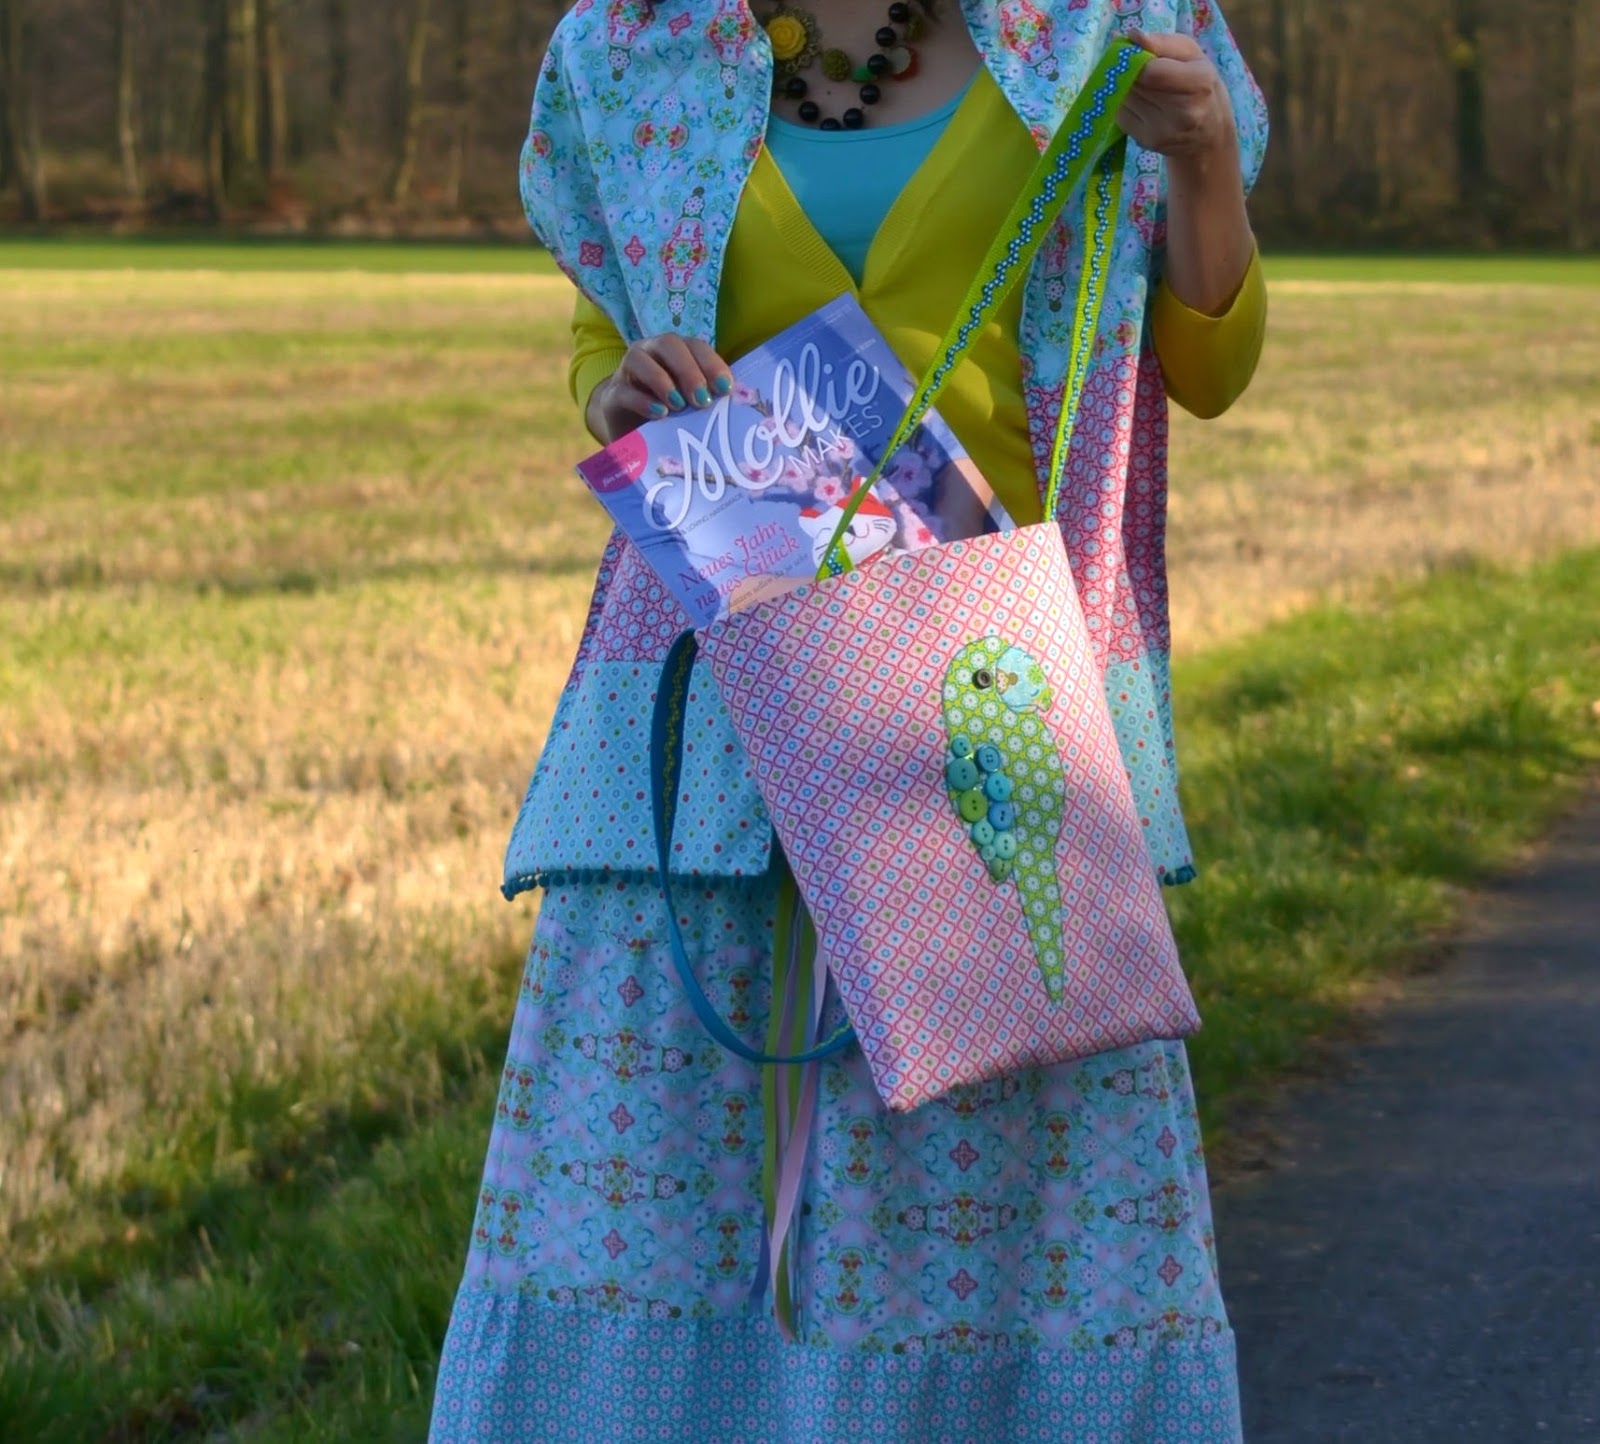
P.S. Kommentare habe ich für diesen Post abgeschaltet, aber falls Ihr Fragen habt, könnt Ihr mir gerne eine Mail schreiben oder einen Kommentar im Hauptpost hinterlassen.


