Showing posts with label Christmas stocking. Show all posts

Friday, December 14

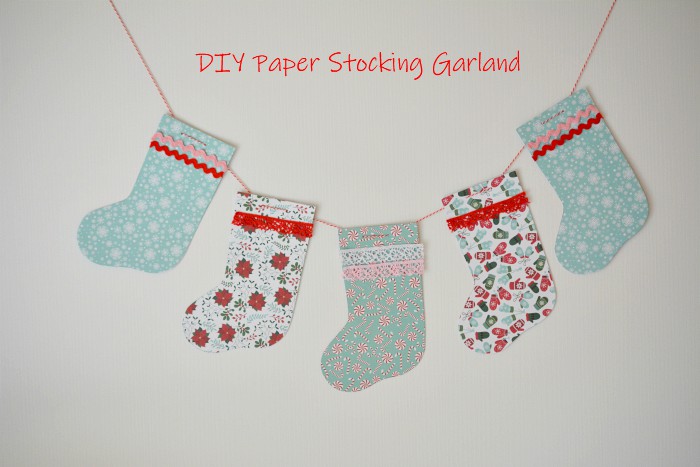
Paper Stocking Garland - Easy Craft

[Werbung/Anzeige/Advertisement]


Hello lovelies! 💗 Hallo ihr Lieben!

Here's a fun little paper craft project just in time for the holidays. It's been really dark these past few days, so the pics aren't the best quality. 

Hier zeige ich euch eine einfache und schnelle Deko-Idee. Leider war es in den letzten Tagen so dunkel, dass die Bildqualität nicht die Beste ist.


You will need // Ihr braucht

Assortment of Christmas-themed cardstock // Scrapbook Papier mit weihnachtlichen Motiven
Various bits of trims // kleine Stücke Spitze, Zackenlitze etc. zum Verzieren
Thin double-sided tape // Dünnes doppelseitiges Klebeband
Twine // Bastelgarn
Scissors // Schere
Needle with large eye // Nadel mit großem Öhr
Pencil // Bleistift
Awl // Ahle
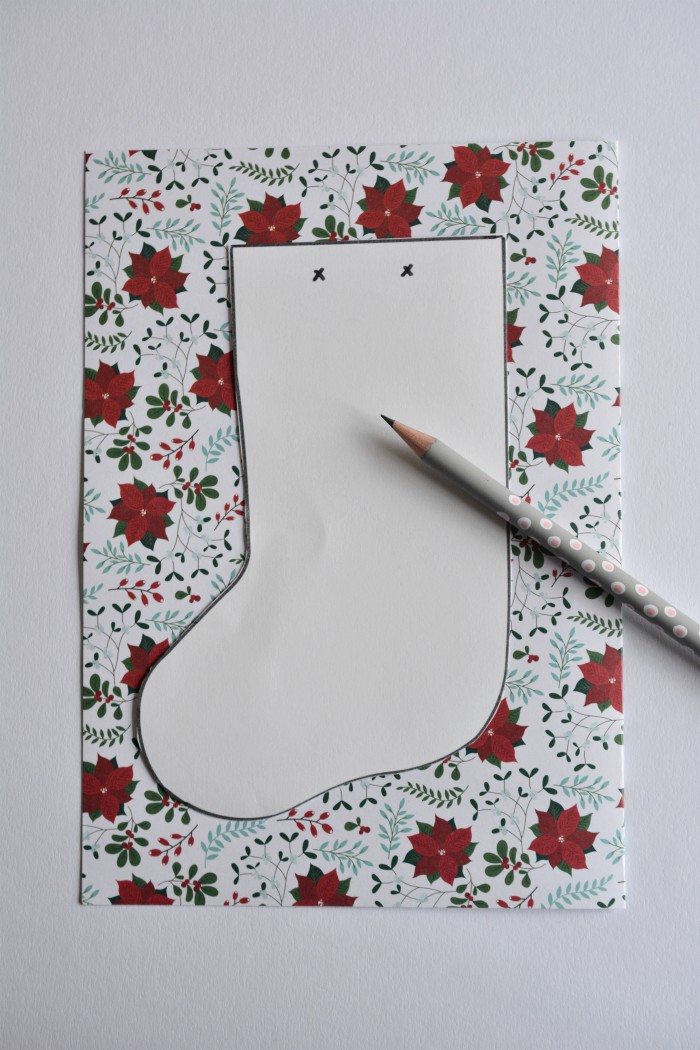


Download mini stocking template (see link above) and print. Cut out the shape. Use this template to trace as many stockings as you wish your garland length to be. Then cut them out. Since I don't have a lot of space for hanging mine is a small one with just five stockings. 


Die Vorlage downloaden (siehe Link oben) und ausdrucken. Entlang der schwarzen Linie ausschneiden. Diese Vorlage mit Hilfe des Bleistifts auf das Papier übertragen und soviel Socken ausschneiden wie die Girlande lang sein soll. Da ich nicht viel Platz zum Aufhängen habe, habe ich eine Mini-Girlande mit nur fünf Socken gebastelt.
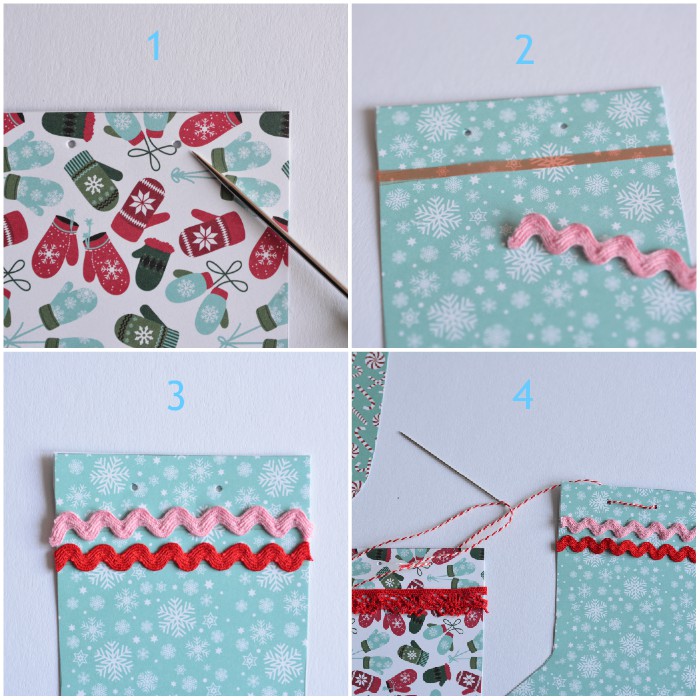


Step One
Mark the holes on each stocking. Then use the awl to gently punch the two holes.

Step Two
About 1 cm beneath the holes stick a strip of double-sided tape. Peel off the backing. Attach a bit of trim to it and press well. 

Step Three
You can customize your stocking as you wish, for example, add one or two more rows of trim.

Step Four
Thread the needle with a long piece of twine. Starting from one end, thread needle through the first hole from the back and down through the second hole. Up through the back of the next stocking and down again through the second hole until you have threaded all stockings. Space them apart equally.


Schritt Eins
Die Position der Löcher markieren. Dann mit der Ahle je zwei Löcher pro Socke machen.

Schritt Zwei
Circa 1 cm unter den Löcher ein Stück doppelseitiges Klebeband befestigen. Dann ein gleich langes Stück Borte, Spitze etc. abschneiden und fest andrücken. 

Schritt Drei
Je nach Wunsch könnt Ihr die Socken mit weiteren Borten verzieren.

Schritt Vier
Das Bastelgarn in die Nadel einfädeln und von einer Seite beginnend von hinten durch das erste Loch führen, dann von vorne durch das zweite Loch, dann in das erste Loch von hinten von der zweiten Socke und wieder von vorne durch das nächste Loch...bis alle Socken aufgefädelt sind. Die Socken gleichmäßig auf der Schnur verteilen.
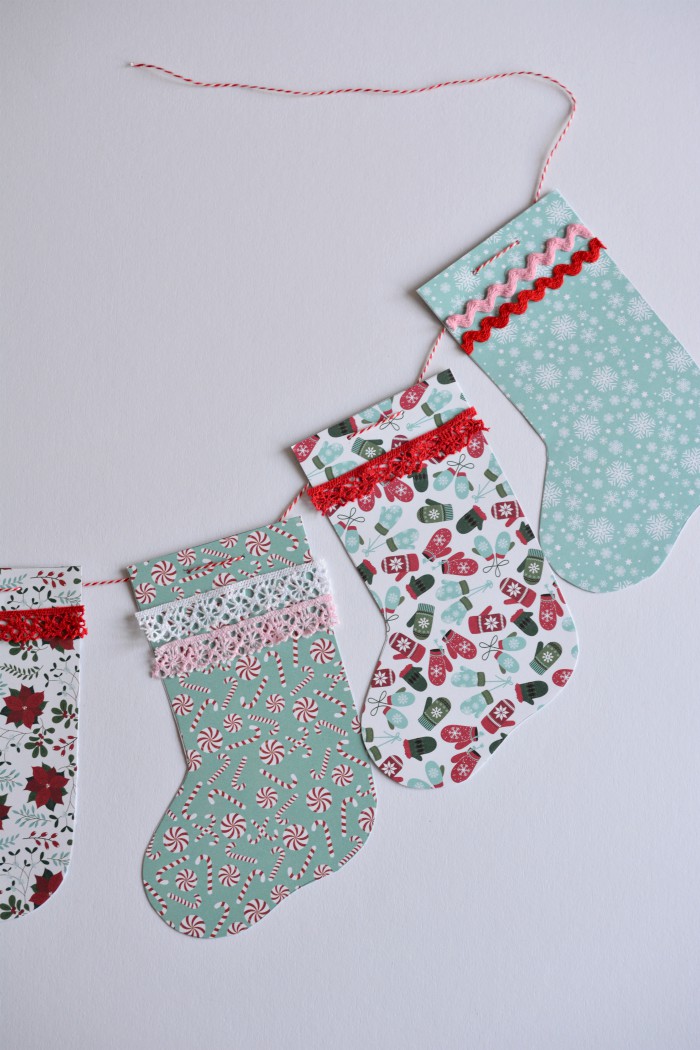

And now the garland is ready for hanging in your favorite place!
💗
Und nun ist die Papiergirlande fertig zum Aufhängen!

 photo signature_zpscqkypdzs.png

Wednesday, September 11

DIY Shabby Chic Christmas Stocking - Tutorial

I know, I know - we've only just celebrated the end of summer, so how can I be thinking of crafting for Christmas already? Suffice it to say that I make good use of any spare time I have plus I live in Europe and the daylight hours are getting noticeably shorter already. It's difficult to take good pictures mid-winter. And let's not forget Christmas is only 104 days away!
*
Ich weiß, ich weiß - wir haben gerade erst das Sommerende gefeiert und ich beschäftige mich schon mit der Weihnachtsbastelei?! Nun, ich nutze gerne jede freie Zeit, die ich habe :) Außerdem werden die Tage deutlich kürzer und wie jeder Blogger weiß, ist es schwierig mitten im Winter schön helle Fotos zu bekommen. Und Weihnachten kommt immer schneller als man denkt: und zwar in 104 Tagen schon!


This is a simple tutorial that beginners can try! Instead of traditional fabrics I decided to make a shabby chic stocking, but you can choose any fabrics you like!
*
Dies ist ein einfaches DIY auch für Nähanfänger geeignet! Anstelle von traditionellen Weihnachtsstoffen habe ich für dieses Projekt meine geliebten Rosen - und Pünktchenstoffe gewählt. Das kann jeder für sich entscheiden!


You'll need // Material

printed cotton fabrics for main & lining
medium weight iron-on interfacing
a piece of ribbon for hanging
some lace for embellishing
basic sewing kit
sewing machine & thread
//
Zwei verschiedene Baumwollstoffe für Außen & Futter
mittelschweres aufbügelbares Vlies
Bändchen zum Aufhängen
etwas Spitze zum Verzieren
Stecknadeln
Nähmaschine und Garn


As you can see from the above photos, I designed my stocking template myself using straight lines and a french curve for the foot part of the stocking. It's not difficult to draw this stocking shape yourself. If you would like to have the exact same measurements as mine feel free to drop me a line at duni.buesken[at]gmx.de. A similar stocking pattern can be downloaded for free here.

*
Für den Nikolausstiefel habe ich mein eigenes Schnittmuster entworfen. Wenn man außer einem normalen Lineal auch ein Kurvenlineal besitzt ist es wirklich nicht schwierig. Für die genauen Maße könnt Ihr mir gerne mailen: duni.buesken[at]gmx.de. Alternativ gibt es hier ein kostenloses Muster zum Download, welches so ähnlich ist.


Step One // Schritt Eins

Using the stocking template cut two pieces main fabric, lining and interfacing. Iron the interfacing onto the wrong side of the main fabric pieces.

Mit Hilfe des Schnittmusters je zwei Teile Oberstoff, Futter und Vlies schneiden. Vlies auf die linke Seite der Oberstoffteile bügeln.


Step Two // Schritt Zwei

Make a loop from the ribbon and attach it approx. 3.25 " down from top edge. Sew on a piece of lace approx. 2" down from top edge on both lining pieces. Layer the lining pieces on the main fabric pieces right sides together. Stitch the top edge (approx. 0,5 " seam allowance). Separate lining and main pieces and iron seam flat.

Das Bändchen zur Schlaufe legen und ca. 8 cm vom oberen Rand an ein Futterteil heften. Die Spitze an beide Futterteile ca. 5 cm vom oberen Rand annähen. Je ein Futterteil rechts auf rechts auf die Außenteile legen und oberen Rand 1 cm breit absteppen. Futter und Oberstoffteile auseinander ziehen und Naht flach bügeln.


Step Three // Schritt Drei

Lay the entire pieces (main and lining) right sides together, making sure seams meet. Pin all around leaving an approx. 4" gap in the lining piece for turning. Stitch along the entire circumference of lining and main piece (0,5" seam allowance). Turn stocking carefully through gap. Close gap with a few stitches. Notch the rounded curves as shown. Iron.

Die gesamten Teile (Außenteil und Futterteil) rechts auf rechts zusammenlegen, dabei darauf achten, dass die Nähte aufeinandertreffen. Rundherum mit Stecknadeln feststecken und 1 cm absteppen, dabei im Futterteil eine ca. 10 cm Öffnung frei lassen. Stiefel vorsichtig durch die Öffnung ziehen. Das Loch mit ein paar Handstichen schließen. Anschließend die Rundungen wie gezeigt kurz vor der Naht einschneiden. Bügeln.


Step Four // Schritt Vier

Push lining back into main stocking and iron again. Turn down top edge approx. 3 " to show the lining and lace embellishment. Now it's ready to hang up and enjoy!

Das Futter zurück in den Stiefel schieben und nochmal überbügeln. Ca. 7 cm umschlagen, so dass die Spitze sichtbar ist. Fertig zum Aufhängen!


Happy Sewing!