Wednesday, November 30

Rustic pine cone candle holders


It's been a while since I've shared an easy DIY idea. Last Christmas I had a rustic theme going on. I made kraft paper & fabric tags, rustic Christmas tree decorations and rustic Advent candles. I received such positive feedback to these tutorials that I decided to share another rustic idea!
*
Letztes Jahr habe ich euch einige rustikale Weihnachtsideen gezeigt, z.B. die Kraft-Papier Anhänger mit Stoff, die Mini-Weihnachtsbäume sowie die rustikalen Adventskerzen. Zu diese DIY-Ideen habe ich viel positives Feedback erhalten; deshalb gibt es heute wieder eine rustikale Deko!

You'll need / Ihr benötigt

pine cones (4" high) / Tannenzapfen (10 cm hoch)
40 mm wide ribbons with wire edge / 40 mm Bänder mit Drahtkante
candle holders with pin / Adventskranzstecker
tee lights / Teelichter
scissors / Schere
drill / Bohrer
mini styrofoam rings / Mini-Styroporringe (optional)


Step 1
Remove the center stalk of the pine cone and drill a tiny hole down the center to fit the pin of the candle holder. Since I'm not good with power tools I asked my husband to do it when he got home from work. 

Step 2
Since most pine cones aren't even on the bottom you'll need to 'sit' it in something like a ramekin dish. I happened to have mini styrofoam rings in my craft stash so I used those. I simply wrapped some of the ribbon around them for a cohesive look.

Step 3
Cut as many 2 - 3" pieces of ribbon as required. Use the shorter pieces for when you reach the top of the cone.

Step 4
Loosely fold over the ribbon pieces and slide in between the scales of the pine cone. This is why it's important that the ribbon comes with a wire edge, the regular ones won't hold. Lastly, pop the tee light onto the candle holder pin and stick it into the top of the cone.


Schritt 1
Den "Stiehl" ganz oben entfernen und ein winziges Loch bohren, tief genug, dass der Stecker reinpasst. Diesen Schritt hat meine bessere Hälfte übernommen, da ich mit Bohrern nicht so gut umgehen kann ;)

Schritt 2
Die Zapfen sind meistens nicht eben, daher empfehle ich sie später in kleine Backförmchen zu stellen, oder wie hier auf Mini-Styroporringe, die ich mit Band umwickelt habe, zu setzen. Dies dient lediglich der Stabilität.

Schritt 3
Nun Bänder in 6 - 8 cm Stücke schneiden. Die Kürzeren eignen sich für den oberen Teil der Tannenzapfen. Die Stücke locker zur Hälfte falten und zwischen die "Schuppen" schieben. Aus diesem Grund ist es wichtig, dass das Band eine Drahtkante hat, ansonsten würde es nicht halten.

Schritt 4
Zuletzt das Teelicht auf den Stecker setzen und diesen in das gebohrte Loch stecken. Vorsichtig auf den vorbereiteten Ring setzen oder wie oben empfohlen in eine kleine Backform.


Happy crafting!
Viel Spaß beim Basteln!

 photo signature_zpscqkypdzs.png

Monday, November 28

Monday Moodboard [and Christmas giveaway winner]

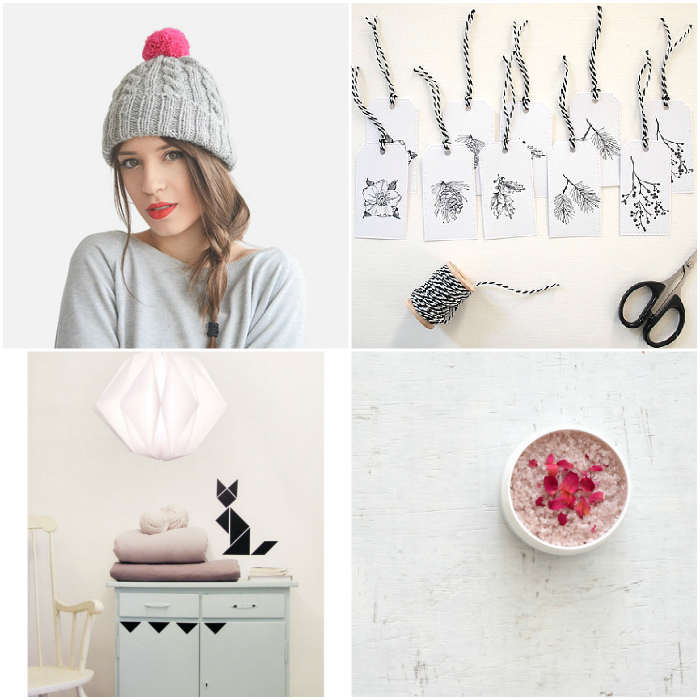
Hello everybody! Still looking for gifts for your friends and female family members? I found some cute items on Etsy that might inspire you. Only 26 days left till Christmas!
*
Hallo ihr Lieben! Ich hoffe ihr hattet einen schönen 1. Advent. Falls die eine oder andere Leserin noch nach einem Geschenk sucht...bei Etsy habe ich ein paar schöne Sachen gefunden :) Klickt euch mal durch!


1 -- 2 -- 3 -- 4


Thank you to everyone who participated in my Christmas giveaway! This past Saturday I entered all your names in the random generator. And the winner is...
*
Vielen Dank an alle, die bei meiner Weihnachts-Verlosung mitgemacht haben! Am vergangenen Samstag habe ich eure Namen in den Zufallsgenerator eingegeben. Gezogen wurde...

Daniela (Mayodans Garden & Crafts)

 Congratulations! Herzlichen Glückwunsch!

Thank you for stopping by today - have a great day :)
Vielen Dank, dass ihr vorbeigeschaut habt. Ich wünsche euch einen guten Start in die neue Woche :)
 photo signature_zpscqkypdzs.png

Friday, November 25

A - Z of essential oils { Lavender }

Hello and happy Friday! I have skipped a few letters of the alphabet since G for Geranium, because the oils beginning with H, I, J and K are rare and/or not suitable for aromatherapy at home or health care. Today I will continue this essential oil guide with the letter L. Lavender! One of my personal favorites. Lavender is a delight to use and no home should be without it!
Lavender essential oil is a natural antibiotic, antiseptic, anti-depressant, sedative and de-toxifier and  is very effective in the treatment of burns, scalds, insect bites and bruises. Also, it stimulates the immune system and promotes healing. It truly is an indispensable oil :)
*
Hallo zusammen! Wie ihr sicherlich bemerkt habt habe ich einige Buchstaben des Alphabets seit G für Geranium übersprungen, weil die Öle, die mit H, I, J und K beginnen eher selten in der Aromatherapie angewendet werden. Heute setze ich diese Serie mit dem Buchstaben L fort und da wären wir auch schon bei meinem persönlichen Favorit: Lavendel! Lavendel duftig herrlich und findet in vielen Bereichen Anwendung. Lavendel sollte in keiner Hausapotheke fehlen. Das ätherische Öl ist ein natürliches Antibiotikum, Antiseptikum, Antidepressivum, Beruhigungs- und Entgiftungsmittel und ist sehr wirksam bei der Behandlung von Verbrennungen, Verbrühungen, Insektenstichen und Prellungen. Außerdem stimuliert es das Immunsystem und fördert die Heilung. Es ist wirklich ein unverzichtbares Öl :)


Lavender essential oil is extracted from the flowers of the lavender plant through steam destillation. It has a fresh, clean aroma and blends well with other essential oils. It is one of the few oils that can be applied directly to the skin (in small amounts). 
Due to its antiseptic and antibacterial quality I never go anywhere without applying two drops of Lavender to a clean hanky. This is especially useful when traveling on trains or planes. While people around me are coughing and sneezing I can cover my nose/mouth with the hanky, breathe and remain calm. (normally it freaks me out when someone sneezes without covering his/her mouth).
*
Das ätherische Öl wird aus den Lavendelblüten gewonnen. Es hat ein frisches Aroma und lässt sich gut mit anderen ätherischen Ölen mischen. Es ist eines der wenigen Öle welches direkt auf die Haut aufgetragen werden kann (in kleinen Mengen).
Ich verlasse das Haus nie ohne ein sauberes Taschentuch mit zwei Tropfen Lavendel drin! Die antiseptische und antibakterielle Wirkung ist besonders nützlich wenn man im Zug oder Flugzeug sitzt und der Sitznachbar hustet oder niest. Ich bedecke dann einfach Nase / Mund mit dem Taschentuch und kann ruhig ein und ausatmen. 

Application / Anwendung

Quick treatment for bruises
Dilute 2 drops Lavender, 2 drops Rosemary + 1 drop Geranium in 1 teaspoon almond oil and gently apply to affected area.

Cuts and wounds
First bathe the area in warm water to which you have added 5 drops Lavender + 2 drops Teatree. Next put 3 drops Lavender on a piece of gauze and tape to the cut. Renew twice a day.

*

Schnelle Hilfe für Prellungen
1 Teelöffel Mandelöl mit 2 Tropfen Lavendel, 2 Tropfen Rosmarin + 1 Tropfen Geranium mischen. Vorsichtig in die Stelle einmassieren.

Schnittverletzungen
In eine Schüssel mit warmen Wasser 5 Tropfen Lavendel und 2 Tropfen Teebaumöl geben und die Wunde damit auswaschen.
Dann 3 Tropfen Lavendel auf Verbandsmull geben und Schnittwunde damit bedecken. Zwei Mal am Tag erneuern.
 
 **while beneficial, essential oils do not substitute the diagnosis or treatment of a qualified medical practitioner.
**ich weise ausdrücklich darauf hin, dass ätherische Öle die Diagnose oder Behandlung eines qualifizierten Arztes keinesfalls ersetzen.

 photo signature_zpscqkypdzs.png