Showing posts with label tutorial. Show all posts

Tuesday, July 7

Easy One Sheet Mixed Media Booklet

Colorful one sheet mini booklet

Hi everyone!

Weeks ago I had prepared this blog post, but not quite finished editing it. So, it's been sitting in draft and then this happened. I've scheduled this post for today, but I won't be able to reply to any comments as I am currently in the clinic. Just fyi. 

Anyway, on to a happier topic!

I've been making these little mini booklets for years. They are a simple and fun paper craft with endless variations. All you require is one sheet of paper. I like using drawing paper of 160 gsm weight. I tried a heavier weight, but then it gets tricky when folding. Besides, since I apply mixed media techniques it's going to get a little fatter anyway. 

creating background on one sheet

I started by creating a textured background on my A4 size sheet paper. I covered the entire sheet, alternating applications both vertically and horizontally for a non-directional result. For full instructions on how to fold this sheet into a booklet you can watch the video below. And if you're there, I would so appreciate a "thumbs up", as my channel that I have worked so hard to build hasn't seen much traffic since I've been absent.
Thank you so much 💕


I like to decorate my booklet covers with some collage fodder. I had some pre-made mushrooms in my stash which added a pop of color to the blue-green background. I created two tags to slide into the openings and used a simple binder clip to close the booklet. Now it's ready to be filled with journaling, photos, doodles, tiny art or whatever else you desire! 

Mushroom collage fodder for embellishment

Thank you for stopping by and reading along! And thank you for your kind comments re my health issues. I am doing everything in my power to recover and get better, so that I can get back to blogging again. Just know I appreciate all of you 😊 Hugs!!

Please pin / share this tutorial


Sunday, November 10

Tilda fabrics, Paper Goods & New Sashiko Threads

[Werbung/Anzeige/Advertisement]

Tilda Old Rose

Hello dear readers!

This year has gone by so fast; I can't believe Christmas will be here in 6 weeks. Looking back I have  spent a good chunk of my precious time in doctor's offices, so a lot of my planned projects had to be put on hold. I am one step closer to figuring out what is causing my persistent symptoms, so there's that. A while ago I decided to focus less on the physical pain and more on the things that bring me joy. The Tilda fabrics seen in the picture above definitely make my heart skip! There are matching buttons in two sizes and woven jacquard ribbon with rose motif as well. I made some Christmas decor using the small red rose and the large grey rose fabric.


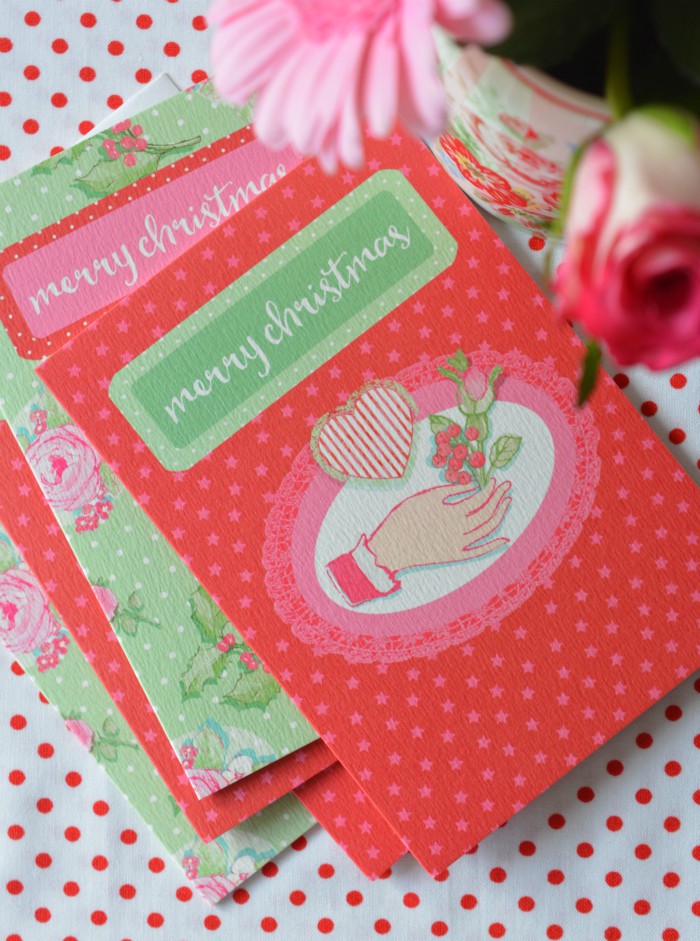
If you are looking for unique Christmas cards, check out these vintage-style card sets from April Rose. They come in sets of 8, with two designs and include a white envelope. There are four sets to choose from! Premium quality printed in England.

April Rose Card Sets

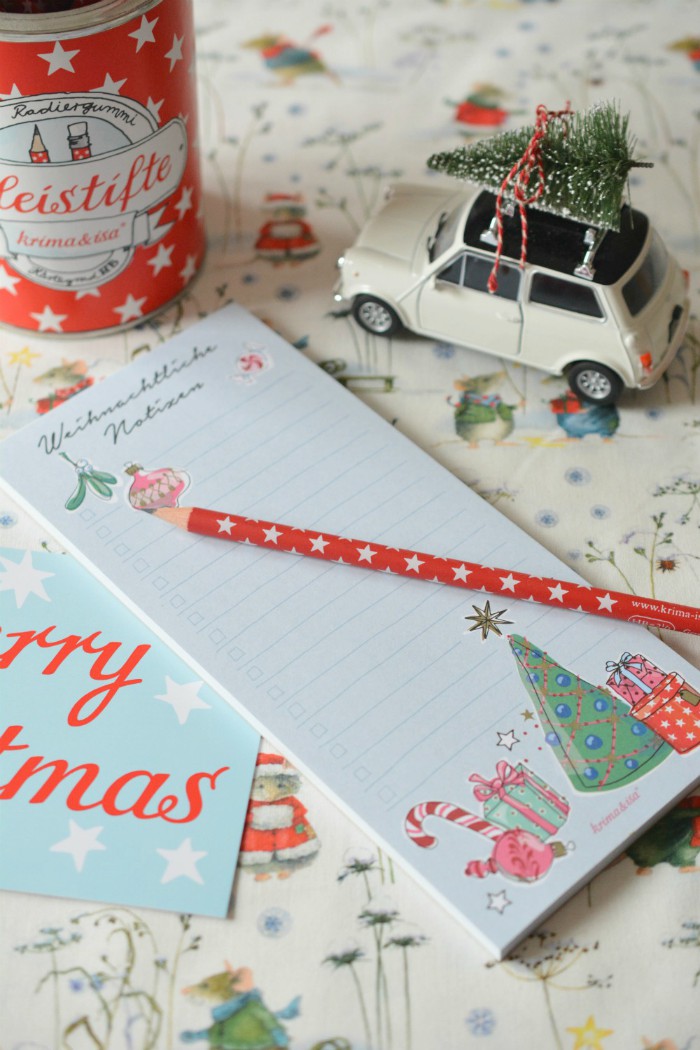
Jot down your Christmas gift or to-do list on these fun and practical Christmas-themed note pads from German paper goods supplier Krima & Isa. Matching pencils available too! Apart from these, there's a fun range of Christmas postcards, gift bags, tags, ribbons and advent stickers.

Krima & Isa

***

New in are these sweet and romantic fabrics from well-known Japanese fabric supplier Lecien. I had ordered these a long time ago, and I have to admit it's becoming increasingly difficult to acquire these fabrics. The bulk of fabrics usually go to the huge craft stores - independent stores like mine are at the bottom of the list. I'm lucky if I even get half of what I ordered. Nevertheless I love these floral prints from the Antique Flower 2019 collection!

Antique Flower in Pastel

Speaking of Japan, some of you might be familiar with Sashiko, the simple stitching tradition of northern Japan. Sashiko means "little stabs" creating little stitches that look a bit like rice grains. Originally this technique was used to mend and recycle garments with white thread. Nowadays Sashiko has developed into richly patterned and often brightly colored designs. I have been studying and practicing the art of Sashiko embroidery for several months now. I am still learning, but I find the results of the mostly geometric patterns quite satisfying. And now that we've entered the winter season, those long evenings at home are perfect for some meditative Sashiko stitching! You can find the original Sashiko threads in several colors in my shop. I especially like that they come on practical cones. To get started all you need is a long needle with a large eye and some fabric with an open weave, like linen, jeans fabric, cotton flannel etc. You don't require a hoop for this embroidery technique.

I am working on traditional pattern - Shippou

Mini Tutorial using Sashiko Thread


Apart from traditional Sashiko stitching, the thread is suitable for crossstitch, crochet and other crafts, such as tiny tassels or these wrapped beads - Here's my little tutorial for making a Sashiko thread bead necklace!


You will need:


wooden beads with large hole (as used for Makramee)
Sashiko thread
needle with large eye
glue
cord
small wooden beads (optional)

Cosmo Sashiko Thread

How to:


Thread the needle with a very long piece of Sashiko thread, double it up and tie a knot at the end. Dab a little bit of glue on the inside of the wooden bead and press the knotted end of the thread into it. Then start "wrapping" the bead with the thread, carefully pulling it through the hole. Make sure that all areas of the bead are covered. Weave the end through two or three threads on the inside and snip off. You can add a tiny bit of glue to secure on the inside. Make two more. 
Cut a piece of cord to the length you wish your necklace to be. Thread your Sashiko beads and (optional) smaller wooden beads and tie the ends. And you're done! Enjoy :)


 photo signature_zpscqkypdzs.png

Friday, December 14

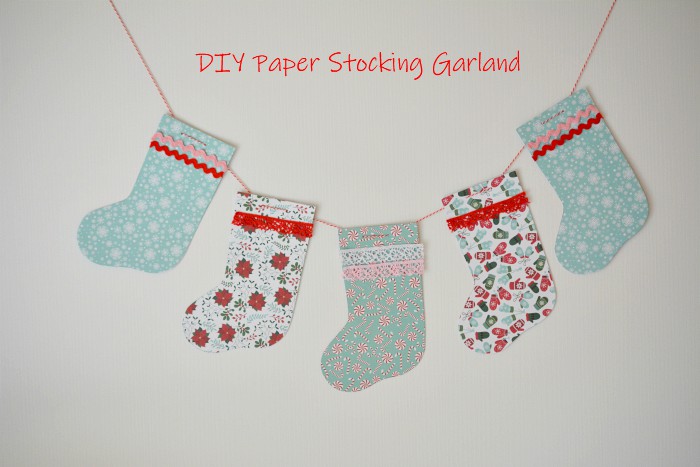
Paper Stocking Garland - Easy Craft

[Werbung/Anzeige/Advertisement]


Hello lovelies! 💗 Hallo ihr Lieben!

Here's a fun little paper craft project just in time for the holidays. It's been really dark these past few days, so the pics aren't the best quality. 

Hier zeige ich euch eine einfache und schnelle Deko-Idee. Leider war es in den letzten Tagen so dunkel, dass die Bildqualität nicht die Beste ist.


You will need // Ihr braucht

Assortment of Christmas-themed cardstock // Scrapbook Papier mit weihnachtlichen Motiven
Various bits of trims // kleine Stücke Spitze, Zackenlitze etc. zum Verzieren
Thin double-sided tape // Dünnes doppelseitiges Klebeband
Twine // Bastelgarn
Scissors // Schere
Needle with large eye // Nadel mit großem Öhr
Pencil // Bleistift
Awl // Ahle


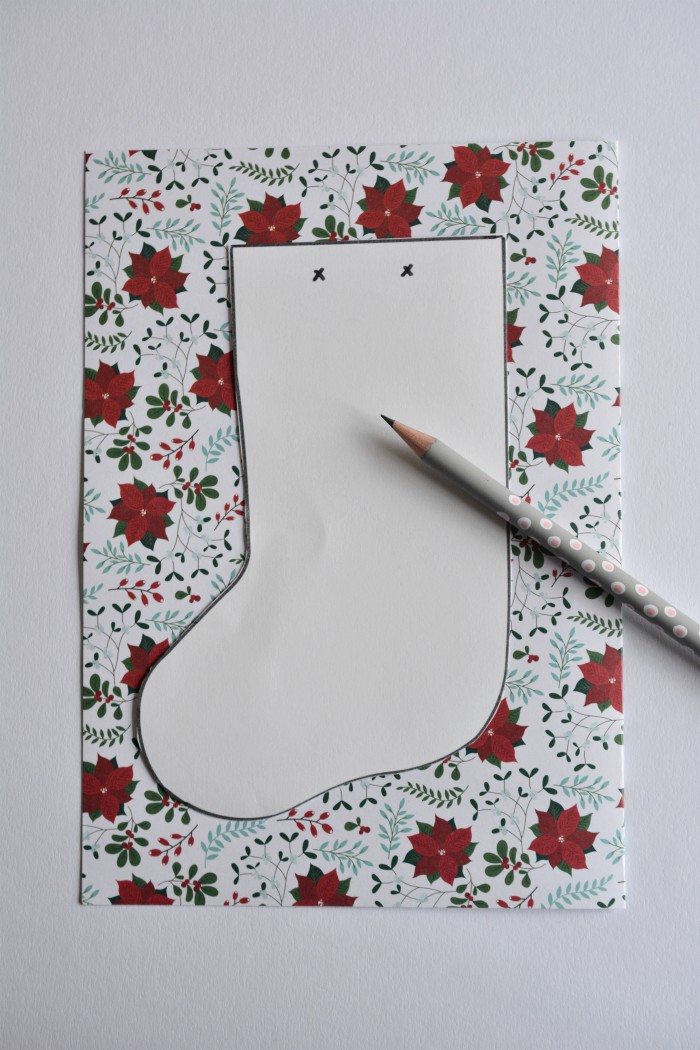
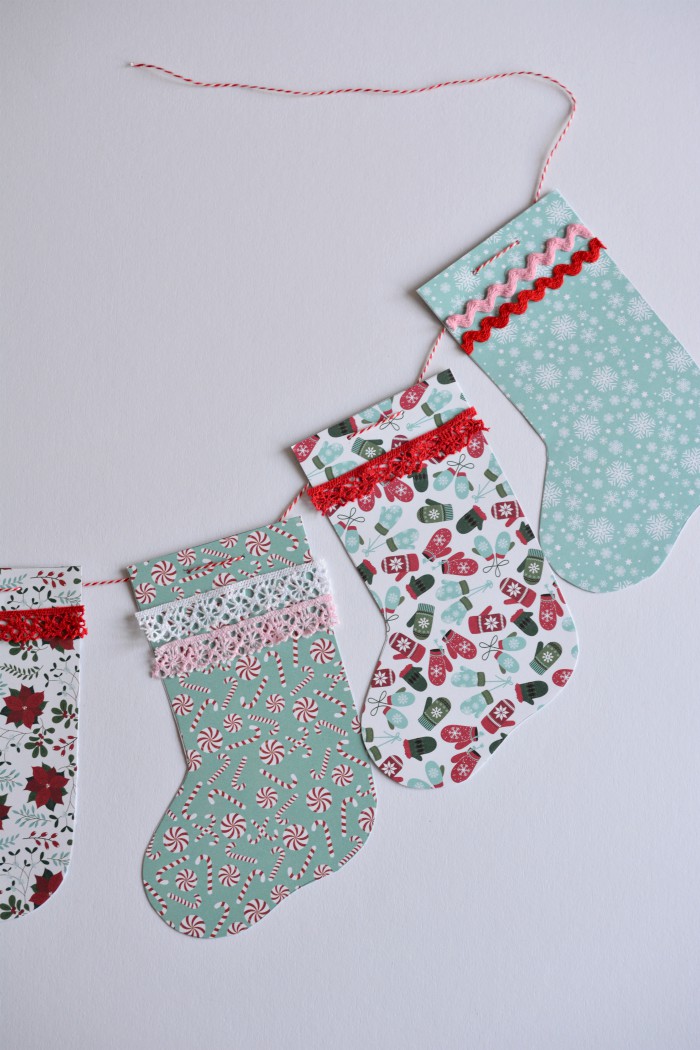
Download mini stocking template (see link above) and print. Cut out the shape. Use this template to trace as many stockings as you wish your garland length to be. Then cut them out. Since I don't have a lot of space for hanging mine is a small one with just five stockings. 


Die Vorlage downloaden (siehe Link oben) und ausdrucken. Entlang der schwarzen Linie ausschneiden. Diese Vorlage mit Hilfe des Bleistifts auf das Papier übertragen und soviel Socken ausschneiden wie die Girlande lang sein soll. Da ich nicht viel Platz zum Aufhängen habe, habe ich eine Mini-Girlande mit nur fünf Socken gebastelt.


Step One
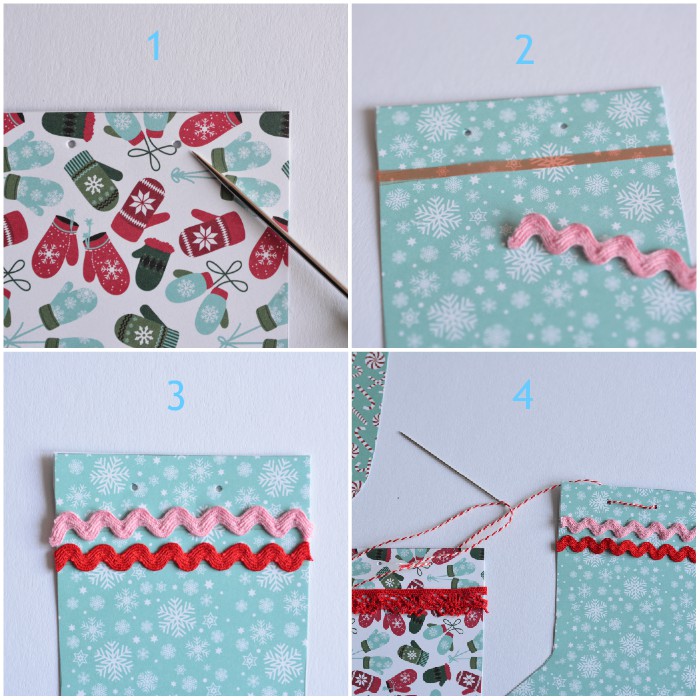
Mark the holes on each stocking. Then use the awl to gently punch the two holes.

Step Two
About 1 cm beneath the holes stick a strip of double-sided tape. Peel off the backing. Attach a bit of trim to it and press well. 

Step Three
You can customize your stocking as you wish, for example, add one or two more rows of trim.

Step Four
Thread the needle with a long piece of twine. Starting from one end, thread needle through the first hole from the back and down through the second hole. Up through the back of the next stocking and down again through the second hole until you have threaded all stockings. Space them apart equally.

☃

Schritt Eins
Die Position der Löcher markieren. Dann mit der Ahle je zwei Löcher pro Socke machen.

Schritt Zwei
Circa 1 cm unter den Löcher ein Stück doppelseitiges Klebeband befestigen. Dann ein gleich langes Stück Borte, Spitze etc. abschneiden und fest andrücken. 

Schritt Drei
Je nach Wunsch könnt Ihr die Socken mit weiteren Borten verzieren.

Schritt Vier
Das Bastelgarn in die Nadel einfädeln und von einer Seite beginnend von hinten durch das erste Loch führen, dann von vorne durch das zweite Loch, dann in das erste Loch von hinten von der zweiten Socke und wieder von vorne durch das nächste Loch...bis alle Socken aufgefädelt sind. Die Socken gleichmäßig auf der Schnur verteilen.


And now the garland is ready for hanging in your favorite place!
💗
Und nun ist die Papiergirlande fertig zum Aufhängen!

 photo signature_zpscqkypdzs.png

Sunday, October 28

Sew an Advent calendar

[Werbung/Anzeige/Advertisement]


Hello everybody!

for the longest time this fabric Advent calendar was on my sewing to-do-list! I finally got around to completed it in time for writing this tutorial. After all, the 1st of December isn't far off!
Last year I shared a last minute Advent calendar idea, that could be done a day ahead. This one takes a little longer, therefore I'm posting it now, so that anyone interested still has a whole month to complete it. This sewing project is intermediate level or ambitious beginner.

💗

Hallo ihr Lieben!

dieser genähte Adventskalender war schon sehr lange auf meiner To-Do-Liste. Umso glücklicher bin ich, dass ich nun endlich die Anleitung hier zeigen kann. 
Letztes Jahr hatte ich für Kurzentschlossene diese einfache Idee; für diesen genähten, wieder verwendbaren Adventskalender sollte man etwas Zeit einplanen. Dieses Nähprojekt stufe ich als mittelschwer ein. 


You will need // Ihr benötigt


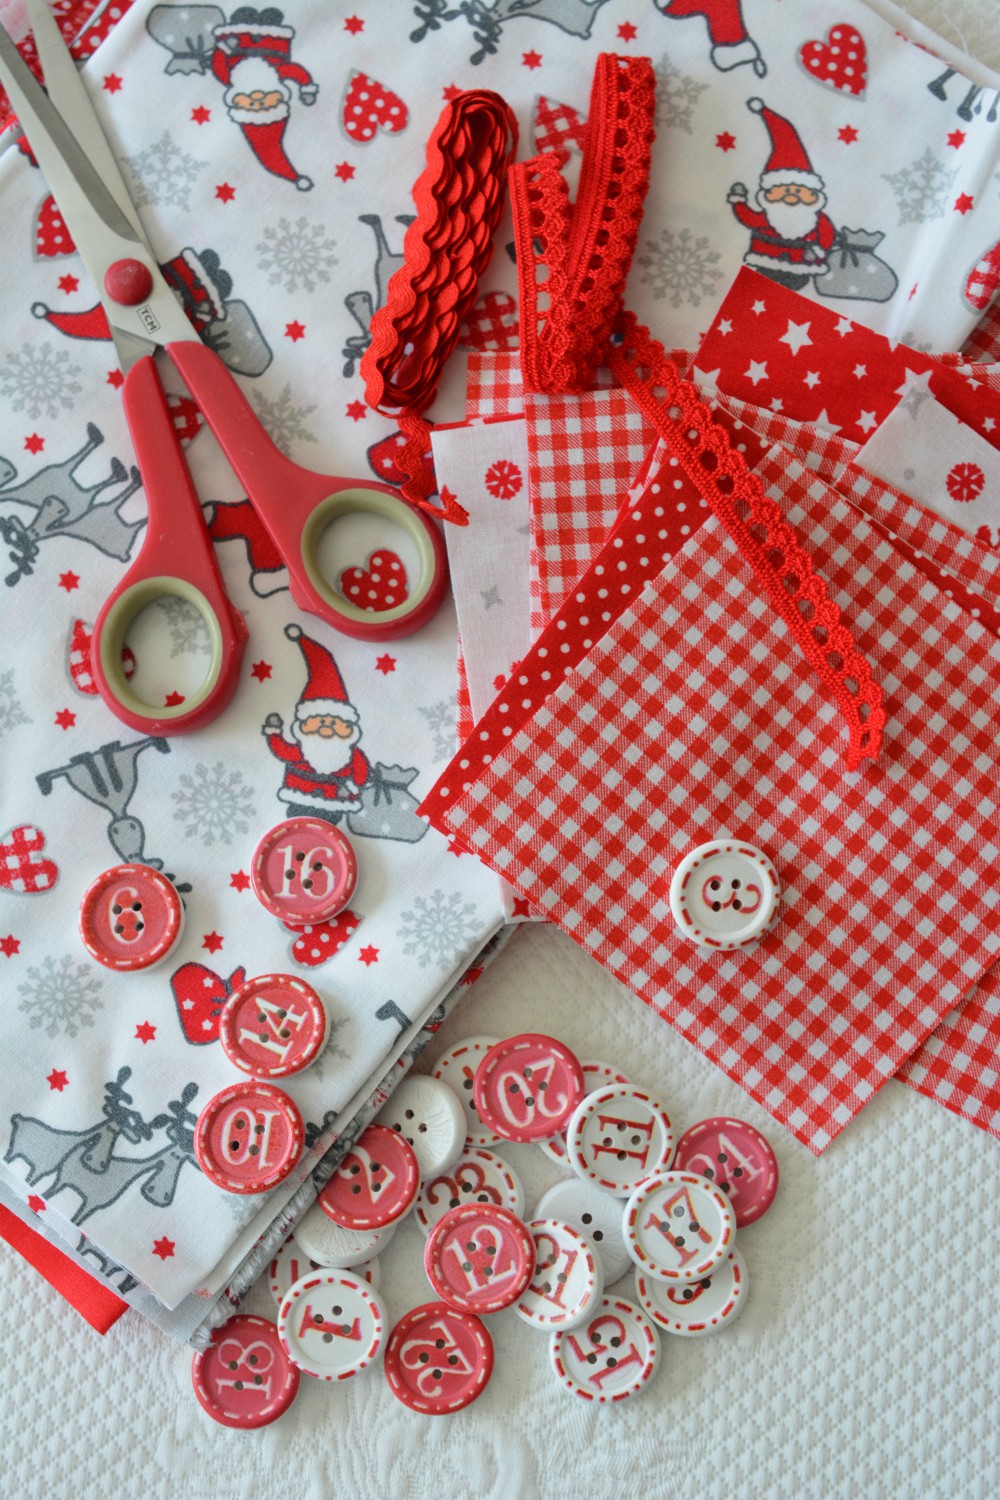
assorted Xmas themed cotton fabrics // Baumwollstoffe, weihnachtliche Motive
trims // Borten
buttons with numbers on them // Knöpfe mit Zahlen
medium weight fusable interfacing // Bügelvlies z.B. Freudenberg H630 
bias tape / Schrägband
matching thread // Nähgarn
sewing machine // Nähmaschine
basic sewing kit // Basic Nähutensilien


Step One

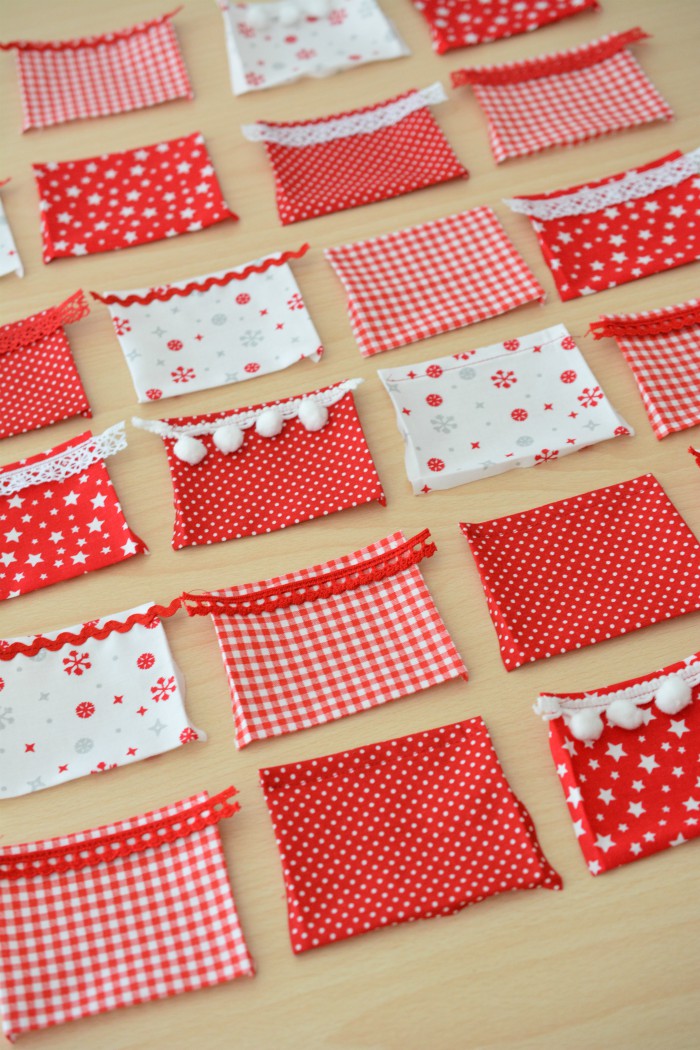
cut 24 pieces of 10 x 10 cm squares from cotton fabrics. I chose gingham, stars, snowflakes and polka dots. Fold three sides 0.5 cm to the wrong side and press. Fold top 0.5 cm to the wrong side and then again. Press.

Schritt Eins
aus den Baumwollstoffen 24 Quadrate à 10 x 10 cm schneiden. Ich habe mich für Vichy, Sterne, Schneeflocken und Punkte entschieden. Drei Seiten 0,5 cm nach innen einschlagen und bügeln. Die letzte Seite zunächst 0,5 cm und dann weitere 0,5 cm nach innen einschlagen. Bügeln.

Step Two

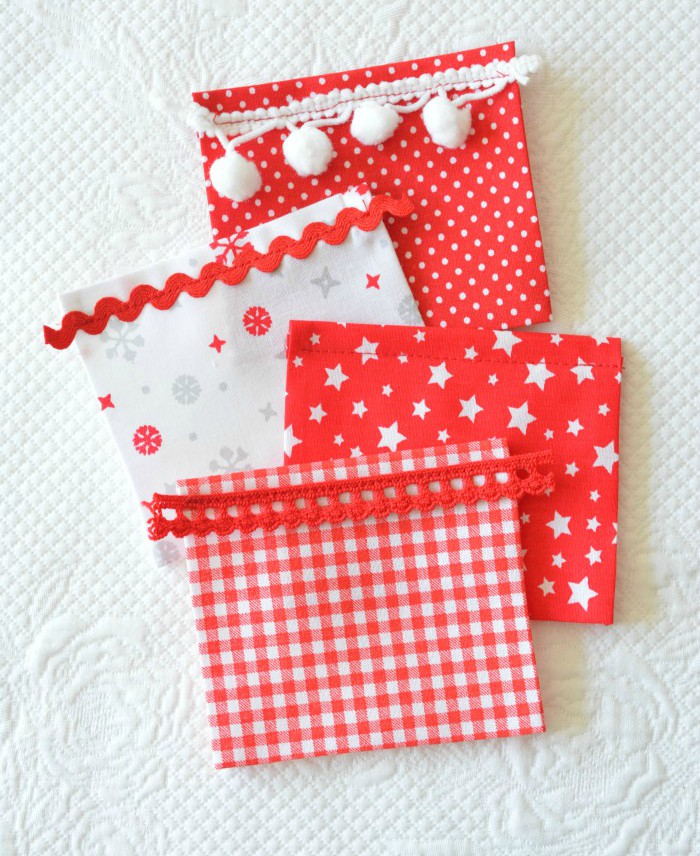
cut small pieces of trim to fit the top edge of pockets. Leave some overhang on each side - you will fold this under, once you attach the pockets to the backing fabric.
Topstitch the trim about 1 cm from the top edge of the pockets. I left some pockets without trim, as I felt it would be too overwhelming. But it's up to you :)

Schritt Zwei
von den Borten kleine Stücke etwas länger als die Fächer abschneiden. Der Überhang wird nachher beim Befestigen auf den Hintergrund eingeschlagen. Die Borten ca. 1 cm von oben feststecken und steppen. 


Step Three

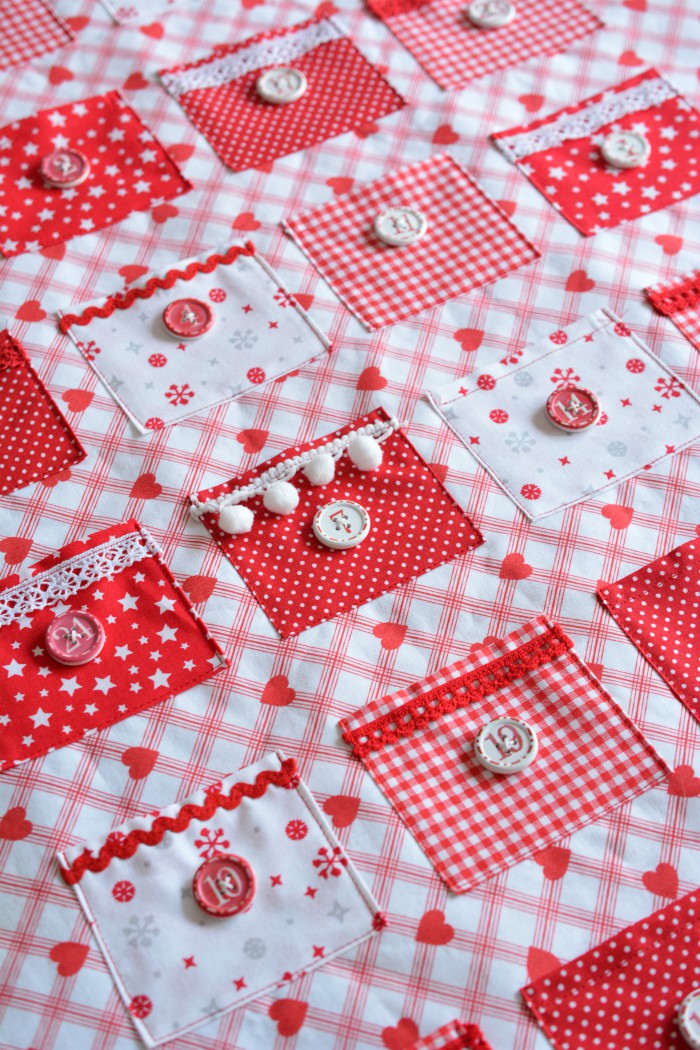
once you have finished trimming all 24 pockets you can start laying them out in the order you would like them to appear on the backing fabric. 6 rows / 4 pockets each row. It's a good idea to  mark them with a number on the back. Now sew on the button numbers by hand. Instead of consecutive order I mixed them up - this way it's more fun later on when you count down :)

Schritt Drei
alle 24 Fächer wie in Schritt Zwei beschrieben fertigen. Das Layout für die Fächer planen, so wie es später auf dem Hintergrund aufgenäht wird. 6 Reihen / je 4 Fächer. Damit man später nicht durcheinander kommt eventuell die Rückseite mit einer Zahl markieren. Nun die Knöpfe auf jeden Fach annähen. Ich habe sie natürlich absichtlich nicht der Reihenfolge angenäht :)


Step Four

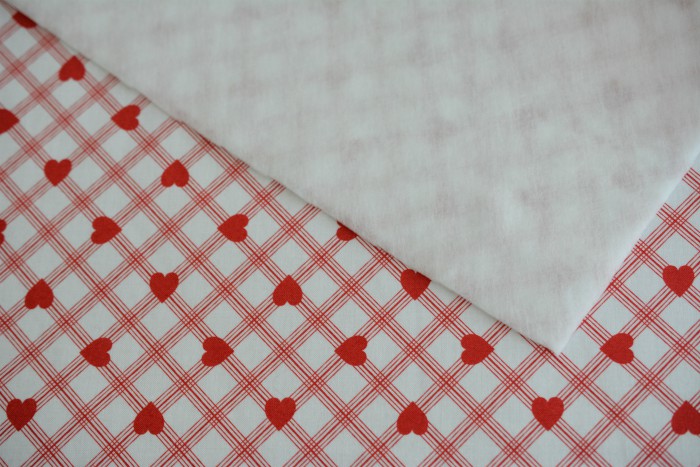
For the wall hanging, cut a large piece 80 cm x 54 cm from main fabric (I chose hearts), interfacing and lining fabric (mine is plain white). Iron the interfacing to the main fabric according to manufacturers instructions. Lay wrong side on top of wrong side of lining fabric, so that you have a quilt sandwich. Smooth out the fabrics and pin along the edges.

Schritt Vier
Für den Hintergrund jeweils ein großes Stück Hauptstoff (bei mir Herzen), Vlies und Rückseitenstoff (bei mir uni Weiß) in der Größe 80 cm x 54 cm schneiden. Das Bügelvlies auf die Rückseite des Hauptstoffes nach Herstelleranweisung bügeln. Links auf links auf den Rückseitenstoff legen und glatt streichen. Das "Quilt-Sandwich" mit Nadeln feststecken.


Step Five

now start pinning the fabric pockets to the quilt sandwich. From the left side start 7 cm down and 6 cm in. Space each pocket 2 cm apart. It's best to do this row by row. Keep each row 4 cm apart. Edgestitch the pockets on three sides (not the top opening) through all layers. Once you're done with all six rows you might need to square off the corners a little bit.

Schritt Fünf
nun die Fächer in der gewünschten Reihenfolge auf das Quilt Sandwich feststecken. Das erste Fach 6 cm von der linken Seite und 7 cm von oben feststecken. Zwischen den Fächern jeweils einen 2 cm Spalt lassen. Die Fächer knappkantig durch alle Stofflagen steppen. Am besten gelingt dies wenn man Reihe für Reihe vorgeht, dabei zwischen den Reihen einen 4 cm Spalt lassen.


Step Six

cut a 2.75 meter length of bias tape. Plus an additional 3 x 10 cm pieces. There are several ways to attach the binding, however, I find this machine binding tutorial the easiest. Thanks Jera :) You basically attach the binding from the wrong side, flip it over and topstitch it from the right side. Makes perfect corners too! When you get to topstitching the right side, fold the 3 small bias tape pieces in half and insert at the top 2 cm from each corner and one in the middle. This is so you can put a wooden stick through the loops, which keeps the Advent calendar from drooping when you fill it with goodies. You can then attach some cord to hang it up later.


Schritt Sechs
nun ein 2,75 m langes Stück Schrägband abschneiden. Sowie 3 weitere Stücke à 10 cm. Es gibt einige Wege das Quilt Sandwich einzufassen - ich bevorzuge die Methode mit der Nähmaschine, so wie Jera es in ihrem machine binding tutorial wunderbar erklärt. Es ist leider nur auf Englisch, aber gut bebildert, so dass man es leicht versteht. Im Prinzip näht man das Schrägband zuerst auf die linke Seite, dann schlägt man es auf die rechte Seite um und steppt es knappkantig ab. Nicht vergessen: vor dem Steppen die 3 kleinen Stücke zur Schlaufe legen und oben befestigen. Jeweils 2 cm von jeder Ecke und eins in der Mitte. So kann man in die Schlaufen später einen dünnen Stab stecken, damit der Adventskalender sich nicht wölbt beim Füllen. An den Stab kann man eine Kordel befestigen zum Aufhängen.


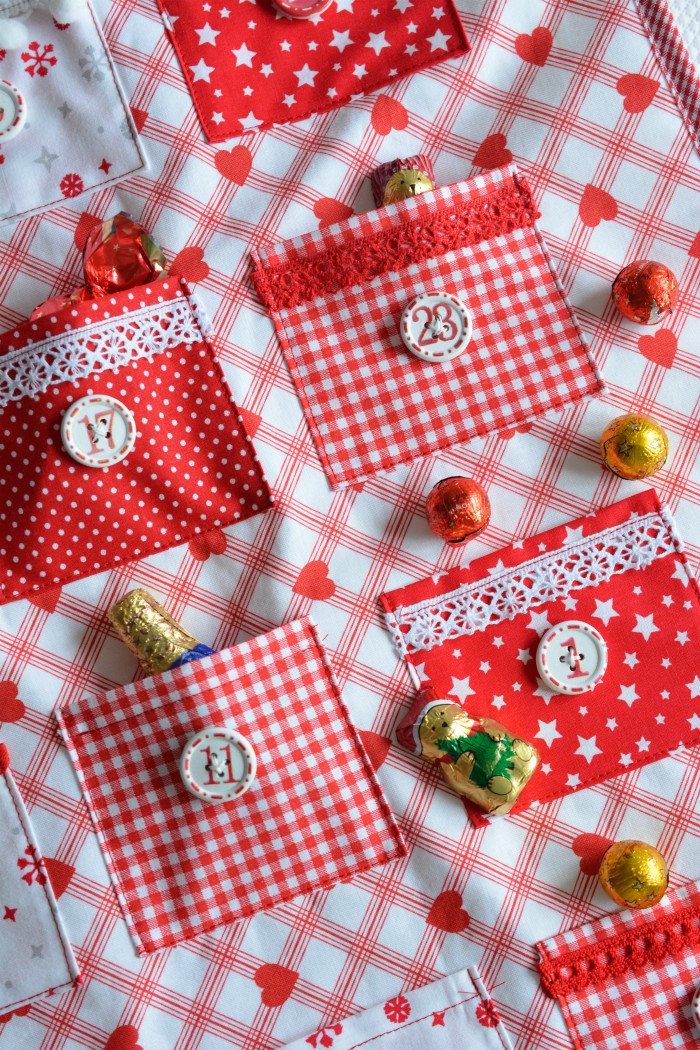
Now you're ready to fill the pockets with goodies and surprise your loved ones on December 1st!
💗
Nun könnt ihr den Adventskalender mit Süßigkeiten oder anderen Kleinigkeiten befüllen!


 photo signature_zpscqkypdzs.png

Sunday, October 7

Guest Room Fabric & Easy DIY Idea


[Werbung/Anzeige/Advertisement]


Hello everyone!

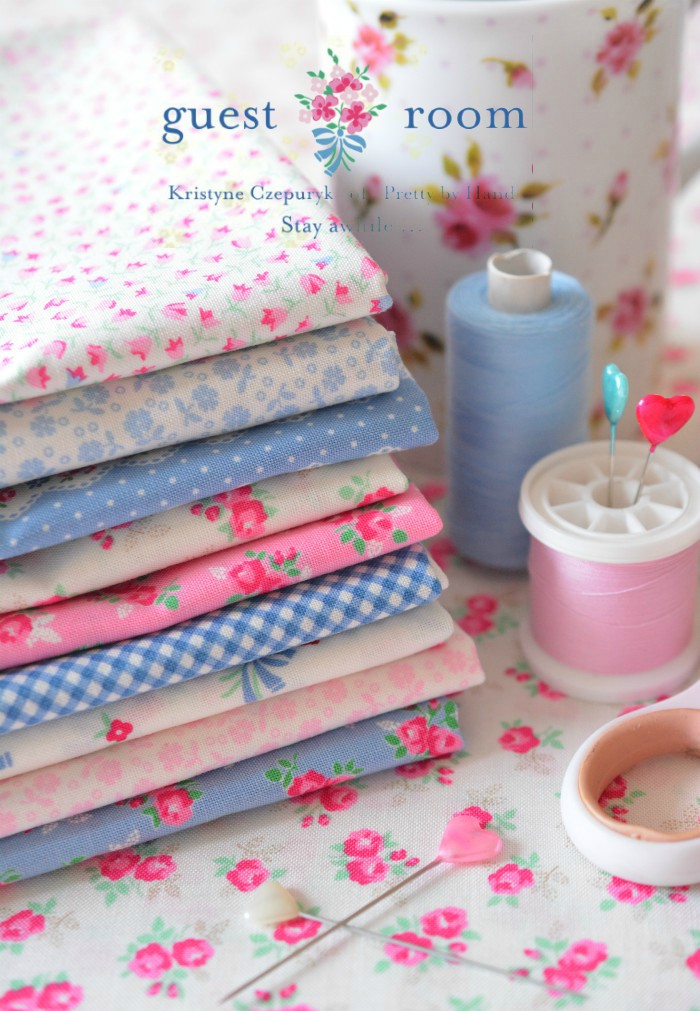
I recently received this sweet floral fabric collection from Canadian designer Kristyne Czepuryk called "Guest Room" featuring pretty roses, whimsical posies, tiny ginghams, a charming floral stripe and pin dots. I'm particularly loving that chambray blue and can imagine making all sorts of pretties with these premium cotton fabrics. The small scale prints are great for making dolls clothes and other smaller items, such as pin cushions. 
🌸
Hallo, ihr Lieben!

Ich habe vor kurzem diese süße Stoffkollektion namens "Guest Room" von der kanadischen Designerin Kristyne Czepuryk erhalten. Die Kollektion beinhaltet nostalgische Röschen, kleine Bouquets mit Schleife, süße ton-in-ton Blümchen, Vichy und Polkadots in aufeinander abgestimmten Farben. Besonders das Kornblumenblau gefällt mir! Die Stoffe sind einfach bezaubernd und eignen sich für vielerlei Nähprojekte, z.B. Nadelkissen, Täschchen und Puppenkleidung!


Today I'd like to share a simple DIY idea using these fabrics. The entire project is done by hand, but don't worry, you can finish it in one afternoon :)

Heute zeige ich euch ein kleines DIY. Das Projekt wird ganz von Hand genäht, aber keine Sorge, es ist an einem Nachmittag geschafft :)

You will need // Ihr braucht

7 different cotton scraps // 7 verschiedene Baumwollstoffreste
one 5.5" hoop // Einen 14 cm Stickrahmen
1.5" hexagon template // 4 cm große Hexagon Vorlage
Piece of solid color fabric larger than hoop // ein Stück Stoff in Uni, größer als der Rahmen
textile glue // Textilkleber
fabric marker pen // Stoffmarkierstift
thread // Garn
hand sewing needle // Handnähnadel
embroidery thread // Stickgarn (optional)
fabric scissors // Stoffschere
iron and board // Bügeleisen und Brett


Step One:


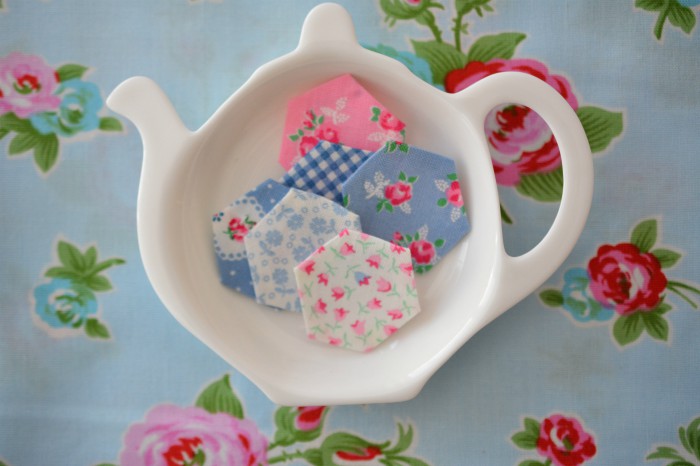
Use paper hexagon template and fabric marker to trace shape onto the back of seven fabric scraps. Carefully cut out.

Step Two:


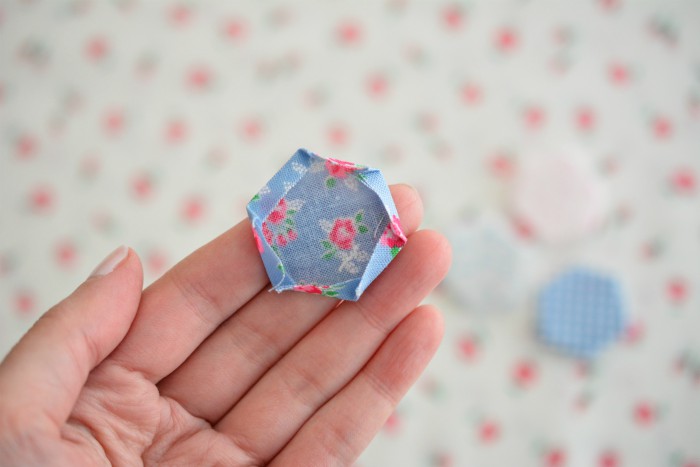
Take one fabric hexagon and fold a scant 1/4 " to the wrong side. Press with hot iron and continue folding all sides. Repeat with the rest of the fabric hexies.
Instead of sewing I'm using the glue method - add a drop of textile glue onto a toothpick and dab into the overlapping corners only. Press firmly and let dry.

Step Three:


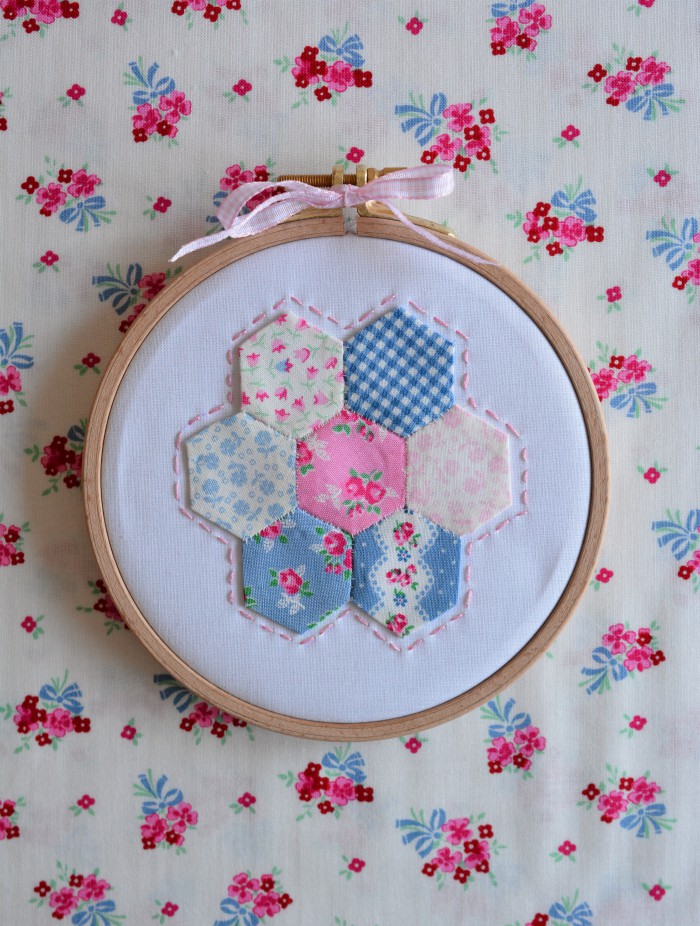
Thread your needle with one long strand of thread, and starting with the center hexagon, sew another hexagon to one side (right sides together) using the whipstitch method. Use small, even stitches. Continue adding hexies to the center one. Once all remaining hexies are attached to the center one, start closing the sides. You should now have a flower shape. Press with hot iron.

Step Four:


Place your solid color fabric into the frame and make sure it is smooth before tightening the screw. Cut away the overlapping fabric at the back. Dab a little textile glue onto the back of the hexagon flower. Make sure you get some on the edges. Center the flower onto the solid fabric. Textile glue doesn't dry immediately, so you have a minute to adjust the placement. Once you're satisfied press gently with your finger. Let dry. 

Optional: If you wish, you can use embroidery thread to stitch along the outline of the flower - I made a couple of wonky stitches, please ignore ;-)


Schritt Eins:


Mit dem Stoffmarkierstift auf der Rückseite der Stoffreste und mit Hilfe der Papiervorlage die Hexagons nachzeichnen und vorsichtig ausschneiden.

Schritt Zwei:


Nun ein Stoffhexie nehmen und die Ränder knapp 0,4 cm nach links falten und mit einem heißen Bügeleisen flach bügeln. Dies bei des restlichen Stoffhexies wiederholen. Für diese winzigen Hexies habe ich Textilkleber verwendet, um die überlappenden Ecken zu fixieren. Dafür habe ich den Kleber auf einen Zahnstocher gegeben und in die Ecken getupft. Danach von der rechten Seite überbügeln.

Schritt Drei:


Die Nähnadel mit einem langen Faden einfädeln. Das mittige Hexie nehmen und eine Kante mit einem zweiten Hexie rechts auf rechts mit einem Überwendlingsstich zusammennähen. Dabei kleine, gleichmäßig Stiche machen. So fortfahren bis alle sechs Hexies mit dem mittigen verbunden sind. Anschließend die offenen Seiten auf die gleiche Art zusammennähen. Nun habt ihr eine Hexie-Blume. Mit dem Bügeleisen flach bügeln.

Schritt Vier:


Das Stück unifarbenen Stoff in den Stickrahmen spannen, dabei darauf achten, dass er schön glatt ist. Etwas Textilkleber auf die Rückseite, besonders die Ränder der Hexie-Blume tupfen und mittig auf den unifarbenen Stoff platzieren. Der Kleber trocknet nicht sofort, so dass man noch eine Minute Zeit hat die Blume richtig zu platzieren. Mit dem Finger andrücken. Trocknen lassen. 

Optional: wer möchte kann nun mit etwas Stickgarn die Hexie-Blume umranden. Bei mir sind ein paar Stiche verrutscht - bitte ignorieren ;-)


Happy Crafting!
🌸
Viel Spaß!

 photo signature_zpscqkypdzs.png

Saturday, March 17

Easy diy Fabric Box


Sewing fabric boxes isn't an original idea, but they are fun to make, especially if you use pre-cut fabric squares from a 5 " Charm Pack, like I did! This makes a neat little box to store craft supplies. Filled with folded up fat quarters, thread and a sewing kit it also makes a cute gift for a sewing friend!
*
Dies ist keine originelle Idee, aber Stoffkörbchen nähen macht einfach Spaß und geht schnell, vor allem wenn man vorgeschnittene Stoffquadrate verwendet, wie z.B. aus diesem hübschen Charm Pack. Das fertige Körbchen ist ca. 11 x 11 cm. Befüllt mit Fat Quarters und Kurzwaren ist es eine nette Geschenkidee für die nähende Freundin!


You will need

Charm Pack 5 x 5"
fusible interfacing, like Pellon to add stability
thread
bias tape
sewing machine
basic sewing utensils

Ihr braucht

Charm Pack 12,7 x 12x7 cm
Decovil I Light, für die Stabilität
Garn
Schrägband
Nähmaschine
Nähutensilien


How to:

  1. Select 5 squares from your charm pack stack for outer box.
  2. Cut 5 x 5" squares from Pellon and iron on wrong side of fabric squares.
  3. Sew the four box panels together, right sides facing, using a 1/4" seam allowance. At the bottom of each seam stop sewing at 1/4". Press seams open.
  4. Attach bottom panel right sides facing, making sure corner seams meet all four points. Pin all around.
  5. Starting in the center of one side seam stitch all around, pivot at corners. Go slowly!
  6. Select 5 squares from your charm pack for inside box.
  7. Repeat steps 3 - 5.
  8. Turn outer box right side out and push out corners. Slip in inside box, left sides facing, seams aligning. Pin all around and use a narrow 1/8" to stitch layers together.
  9. Starting in the center of one side pin the bias tape all around. When you come to the starting point, fold under the opposite end and overlap. Pin and stitch through all layers, catching both sides of the tape.
So geht's:
  1. 5 Quadrate für die Außenseite aussuchen.
  2. 5 Stück Decovil auf die Größe der Quadrate zuschneiden und auf die linke Seite bügeln.
  3. Vier Panele rechts auf rechts zusammennähen (1 cm Naht), dabei am unteren Ende ca. 1 cm aufhören zu nähen. Nähte auseinander bügeln.
  4. Unteres Panel rechts auf rechts feststecken, dabei treffen die Nähte auf die 4 Ecken. 
  5. An einer Seite mittig anfangen und langsam um das Quadrat nähen, in den Ecken Nadel stecken lassen, Fuß anheben, Quadrat drehen, Fuß senken und weiternähen.
  6. 5 Quadrate für das Futter aussuchen.
  7. Schritte 3 - 5 wiederholen.
  8. Box vorsichtig auf Rechts drehen, Ecken rausdrücken. Futter links auf links in die Box schieben, Nähte treffen aufeinander. Obere Kante feststecken und knappkantig steppen.
  9. Schrägband an einer Seite mittig befestigen. Um die obere Kante legen und feststecken. Das Ende einschlagen und etwas überlappend über den Anfang legen. Knappkantig durch alle Lagen steppen, dabei darauf achten, dass beide Seiten des Schrägbandes genäht werden.

Happy Sewing

 photo signature_zpscqkypdzs.png

Tuesday, January 2

Happy Hoop Art


Kicking the year off with a fun do-it-yourself project! This cute hoop art is wonderfully versatile - choose any color yarn for the pompoms and tassels. I went with grey, pink and mint and I chose the word "Happy", because I decided that's my motto for this year. You can choose any other word (or words) and if you plan to hang this in a nursery you can, of course, add your baby's name.
*
Das neue Jahr  2018 fängt bei mir gleich mit einem süßen DIY-Projekt an! Dieser Wandbehang mit Pompoms und Quasten lässt sich beliebig in der Farbe variieren. Ich habe mich für Grau, Rosa und Mint entschieden. Und da mein Motto dieses Jahr "Happy" lautet, musste es natürlich als Schriftzug in die Mitte. Ihr könnt selbstverständlich ein anderes Wort aussuchen oder z.B. einen Namen. 


You will need

wooden hoop (any size you like)
wool yarn (three colors)
white or natural solid color cotton fabric, enough to cover hoop
felt tip marker suitable for textiles (color your choice)
iron, ironing board and piece of parchment paper 
stiff cardboard (from a cereal box)
scissors
super glue

Ihr braucht

Stickrahmen (Größe nach Wunsch)
Wolle (drei Farben)
Baumwollstoff - Weiß oder Naturfarben uni
Textilmalstift mit Rundspitze (Farbe nach Wunsch)
Bügeleisen, Bügelbrett, Backpapier
Stück Pappe
Schere
Starker Kleber


  • Choose your word and font (bold works best), type it in your computer, size it to fit the inside diameter of hoop and print. This is your template.
  • Steam iron your piece of cotton fabric. Place the cloth over the template and the hoop over the fabric to determine placement. Make small markings top and bottom to aid placement later. 
  • The fabric marker will bleed a little into the fabric, so outline the letters first, then fill in.
  • Next place the piece of fabric on the ironing board, cover with parchment paper and press the iron (no steam) on the word.This will set the paint color. Let dry.

  • Wort (oder Name) sowie Schriftart aussuchen (ich empfehle Fettdruck). Wort im Computer schreiben, Größe an den Innendurchmesser des Stickrahmens anpassen und ausdrucken.
  • Baumwollstoff glatt bügeln. Ausgedrucktes Wort unter den Stoff legen und Rahmen darüber legen. Kleine Markierung oben und unten mittig des Rahmens machen - für die spätere Platzierung.
  • Da die Textilfarbe des Stifts etwas ausläuft, zunächst die Buchstaben des Wortes umranden, dann ausfüllen.
  • Zuletzt das beschriftete Stoffstück auf das Bügelbrett legen, Backpapier darüber legen und mit dem Bügeleisen (ohne Dampf) die Farbe auf dem Stoff fixieren. Trocknen lassen.

Meanwhile, make the pompoms! You will need one large, two medium and three small pompoms.
Make your pompoms the same way as in this tutorial.

*
In der Zwischenzeit die Pompoms fertigen! Für dieses Projekt, ein großes, zwei mittlere und drei kleine Pompoms fertigen. Wie das geht zeige ich in dieser Anleitung. 


Lastly, make the three tassels! The middle one is longer than the other two, therefore cut two pieces of cardboard -(example: mine are 4" and 5.5"). Follow the steps above.
  • Wind yarn around piece of cardboard until you're satisfied with the thickness. Slip a length of yarn through the top part and tie loosely. 
  • Cut through yarn at the bottom and lay the tassel flat. Tie off and knot the center.
  • Fold over, so that all yarn is now facing down. Cut a piece of yarn and tie and knot the top about 1" from the top. 
  • Even out the bottom edge and cut off any stray yarn.
*

Zum Schluß die Wollquasten fertigen! Die mittlere ist etwas länger als die anderen beiden, daher zwei Stück Pappe schneiden - (meine sind 10 cm und 13 cm lang). Schritte wie in der Collage folgen.

  • Wolle längs um die Pappe wickeln bis die gewünschte Dicke erreicht ist. Ein Stück Wollfaden abschneiden und unter die oberen Fäden schieben. Locker zu binden.
  • Unten aufschneiden und Quaste mittig mit dem Faden fest binden und knoten.
  • Alle Fäden nach unten zusammen legen. Ein weiteres Stück Wolle abschneiden und ca. 2 cm von oben fest umwickeln und verknoten.
  • Quaste unten begradigen und überstehende Wollfäden abschneiden

Assembly
  • Tie the tassels at the bottom center of outer hoop ring, the longer one in the middle. Make sure the knots are at placed at the back.
  • Tie the pompoms the same way: Medium, large, small on the left side of outer hoop ring / Small, medium, small on the upper right side of hoop ring.
  • Place fabric over inner hoop ring and slip under outer hoop ring. Straighten fabric as necessary. Tighten the screw at the top to secure everything.
  • Cut away excess fabric, leaving about 1/2 ". Spread a little super glue on the inside frame and press fabric down, hold for a few seconds. Release and let dry
  • Final step - cut a piece of wool yarn, loop through top screw and hang your cute handmade hoop art in your favorite place!


Zusammenfügen
  • Die Quasten unten mittig an den äußeren Stickrahmen fest binden; die längere in der Mitte. Dabei die Knoten nach hinten schieben.
  • Die Pompoms ebenfalls an den äußeren Rahmen binden: Mittel, Groß, Klein auf die linke Seite / Klein, Mittel, Klein auf die obere rechte Seite.
  • Stoff über den inneren und unter den äußeren Stickrahmen legen. Anhand der Markierungen in die richtige Position rücken. Die Schraube oben festdrehen, so dass alles fixiert ist.
  • Überschüssigen Stoff bis auf 1,5 cm abschneiden. Etwas Kleber rückseitig auf den inneren Rahmen geben, Stoff ein paar Sekunden gut andrücken. Trocknen lassen.
  • Letzter Schritt: ein Stück Wollfaden abschneiden, durch die obere Schraubhalterung schlingen und Stickrahmen im Lieblingsraum aufhängen!

Happy New Year! Frohes Neues Jahr!


 photo signature_zpscqkypdzs.png