Showing posts with label handmade. Show all posts

Tuesday, October 7

Why I make my own Painted Papers

handmade collage papers

Hello lovely, crafty people!

Painted papers or collage papers, as they are commonly known, are an integral part of mixed media art. When I first started out on my art journey I did buy a commercially printed collage pack and quickly found out what a mistake that was. Not only were the designs printed on cheap paper, on closer look the motifs seemed generic and uninspired. Worse still, on even closer inspection some of the printed text didn't make any sense at all and was simply horrible. I quickly discovered that I could actually make my own collage. Not only that, but I already had perfect papers at home - old book pages and sheet music - ready to be transformed. Once I got going I never looked back!

mark making

You, too, can make your own stack of painted papers and you don't require a lot of paints or tools. A block of regular white paper, a couple of your favorite acrylic paints, a few paint pens, maybe a stamp or two and if you are feeling very adventures you might try stencilling. An old wine cork dipped in paint is great for making big dots. The eraser on the end of a pencil makes small ones. While these dots aren't perfectly round or a line drawn without a ruler might turn out wonky, I find this adds a certain handmade charm and more importantly makes these papers uniquely your own.

neutral painted papers

For variation I paint or print on tissue paper, brown paper bags, that I have cut open, sketching sheets and old book pages that make interesting background effects. As shown above, I made a set of neutrals that are a good starting point in mixed media artwork.
A black stamp pad, paint pens in black in various sizes, text stamps all look good on a neutral background, while white or cream looks good on brown paper. I find simple motifs work best.

colorful gel printed papers

I later invested in a gel plate since I was planning to make a whole lot of painted papers!  Although it looks easy, working with a gel plate takes a bit of experimentation and you will eventually get nice prints through trial and error. In the above picture I used just a handful of colors and a couple of stamps. Mine seem to turn out best when I use less paint and choose simple stamping motifs. I'd like to point out that it is absolutely not necessary to own a gel plate to be able to create beautiful papers. In the below video I demonstrate just how easy it is to make a set of papers without one.


And did you know that my underpapers, e.g. usually printer paper, that I use to roll off the excess paint from my brayer or wipe off the ink from my stamps never get thrown away? I simply make more marks on them with paint pens! I think these look pretty amazing too.

Painted papers

Thank you for stopping by today and I hope you enjoyed reading my post. Have you ever made your own collage papers with or without a gel plate? What's your take on gel printing. I'd love to hear. Let me know in the comments! Have a beautiful day.

Friday, September 26

[Mini Workshop] Memory Booklet ♥

mixed media memory booklet

Hello lovelies,

The secret is out. I have been working on something special behind the scenes...my very own mini workshop! I came up with the concept of this cute memory booklet after spending many evenings brainstorming beginner-friendly ideas that would appeal to anyone who loves mixed media art as well as art journaling, and who cherishes the idea of creating a mini photo album of a meaningful event, be it a trip, a special birthday or holiday! 

I truly enjoyed filming and editing this mini workshop from start to finish and since my booklet is filled with photos of one of my favorite city trips to Amsterdam, I often ended up walking down memory lane long after the camera stopped rolling 😀

Piqued your interest? Follow this link for more information.

And a quick reminder that I also offer over 20 absolutely FREE mixed media art tutorials over on my YouTube channel. Click on the button in the sidebar to view.

I'm sharing a few process photos below:

Memory booklet work in progress
Create a tip-in page

Memory booklet stencilling
Stencilling

Memory booklet intro
Create the intro page

By the way, in my workshop we'll be making the booklet from scratch! Don't worry, it is super simple and only requires two A5 sheets of mixed media paper plus a cover paper. In the workshop I guide you through the binding process, which is also very easy. 

The watchtime for this mini workshop is around 30 minutes structured into five manageable video clips. Plus I've also included a bonus video, where I share how to create a color-coordinated stack of collage papers with and without a gel plate. Super fun and easy!

A note about my painting style. If you have been following me on Instagram and elsewhere, you will know that my style is loose and expressive. I lean into this style in my workshop to some degree. Mainly it's about showcasing your favorite photos using collage and paper embellishments with a bit of stamping, stencilling and, of course, journaling. 

The beauty of this workshop is that it is customizable to your own style. Feel free to choose your own color palette, collage papers, stickers and embellishments!

Click on the button in the sidebar for more info and please share with friends 😊

Memory booklet by Duni


Monday, November 4

How to make Tissue Paper collage with simple tools


Hi crafty friends!
A big part of my mixed media art is incorporating collage, especially tissue papers. I've made a bunch of these in different colors for my various projects. Today I'm sharing an easy way to create your own collage with simple tools. Best part - you don't require a gel plate (these are quite expensive, I know...)!


The above photo shows an example of the simple tools I use to make my collage papers:

- a sheet of tissue paper, which I cut to a convenient A5 size
- acrylic paints in your choice of colors
- stencil to fit A5 size
- make up sponge for applying the paint
- chunky acrylic permanent paint pen
- small sponge brush
- masking tape to stick the tissue paper to a hard surface


In the above example I have dipped the sponge brush in black paint and simply made marks with the tip. You can make thin or wide marks or even use the side of the sponge brush to make larger marks. I often add pieces of these graphic marks to my art work (see below).


The chunky paint pen is such a fun tool to use. It has a chisel tip and comes in a big color range. I drew fat circles on my tissue paper. Keep in mind, that these paper need to dry completely, before you can use them in your mixed media projects. Below I am sharing even more ways to make handmade collage:


Using a make up sponge and a couple of stencils you can create endless patterns. After use, I always thoroughly wash the make up sponge and stencil with water and some mild soap, as I want to prevent a build-up of paint.

If you're looking for inspiration to use these handmade collage papers you can check out my new video!


Friday, August 30

DIY Vintage Style Accordion Book


Hi crafty friends!

For the longest time I wanted to make an altered accordion booklet. Well, last weekend I set some time aside to finally make one! Patience is required to make one of these, as a lot of prep work has to be done and the drying time between each layer takes some time. I wanted mine to have a vintage feel with soft colors and plenty of floral motifs. And as an animal lover I wanted to add animal images as well.


I pulled out a bunch of art supplies...acrylic inks, paints, stamp pads, assorted collage papers, pens, stamps and stencils. I usually decide which ones to use, while I am doing the actual crafting. That's the beauty of mixed media art!


One of the first things I did was make lots of floral ephemera. I stamped a whole bunch of floral images on white drawing paper, then I colored these in with gouache paints, and once dry I fussy cut them all out. This was quite a task, but I love how these turned out!


I started by randomly stamping a grid pattern on all the pages of the booklet. While the ink was drying I then altered a mini envelope (see top left corner). I would later add this to one of the pages. It's a fun touch and you can keep some special and personal notes in there. While this isn't a full tutorial - that would take hours - you can watch the demo below:


https://youtu.be/8VPJBnTDthk

If you are watching this on YouTube, a "like" or share would be massively appreciated ♥ Happy Friday!


Friday, March 11

Moda Fabrics Grace Collection

[Werbung/Advertisement]

Hi everybody,
I hope you are doing well. It seems there is a heaviness in the air with all that's going on in the world right now, but I wanted to remind you that it is okay to take a break from the troubling news for your own sanity. 
Perhaps my post today will lift your spirit a little. 

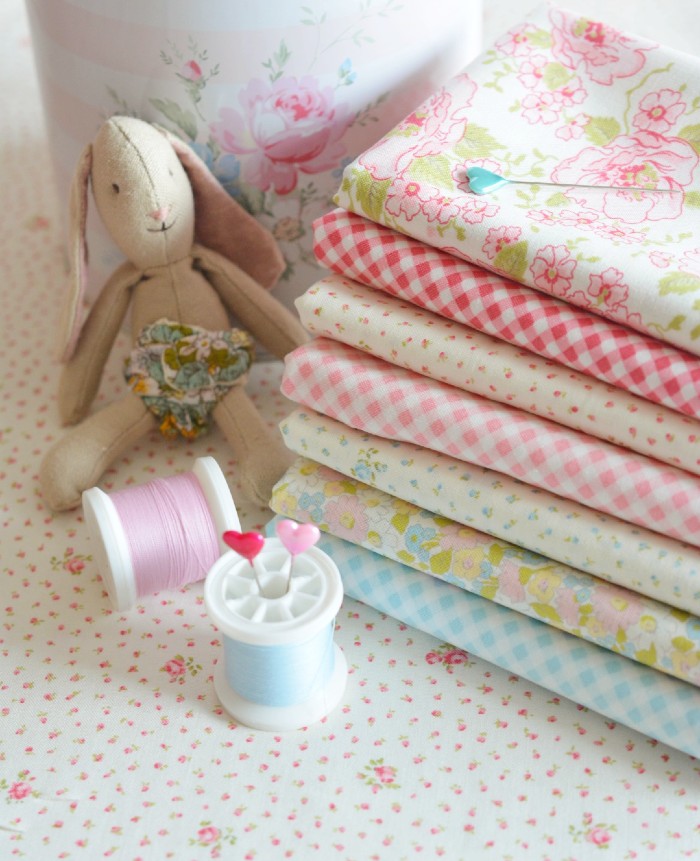
I finally received 🌸 Grace 🌸 by Brenda Riddle for Moda fabrics. These pretty cottage style floral prints herald springtime and include a soft color palette of blush, duck egg blue, willow, sunbeam yellow paired with an airy linen white. They are like a breath of fresh air! The pastel colors lend themselves beautifully to Easter sewing crafts 🐣

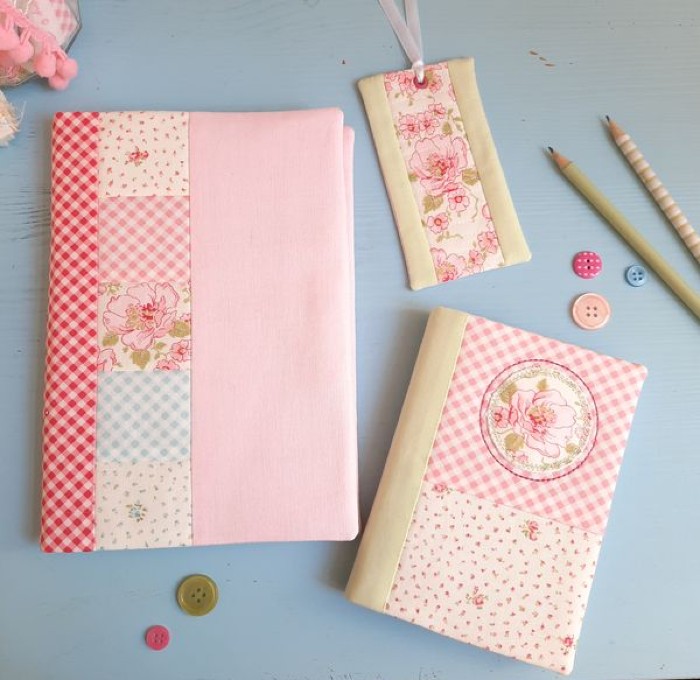
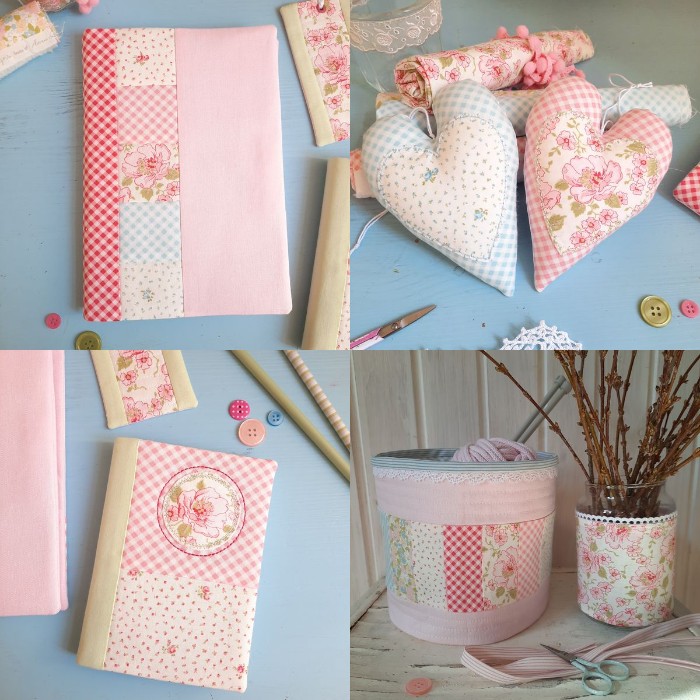
Below I'd like to share some of the gorgeous items all handmade by the talented Alex of @die_ahlecks
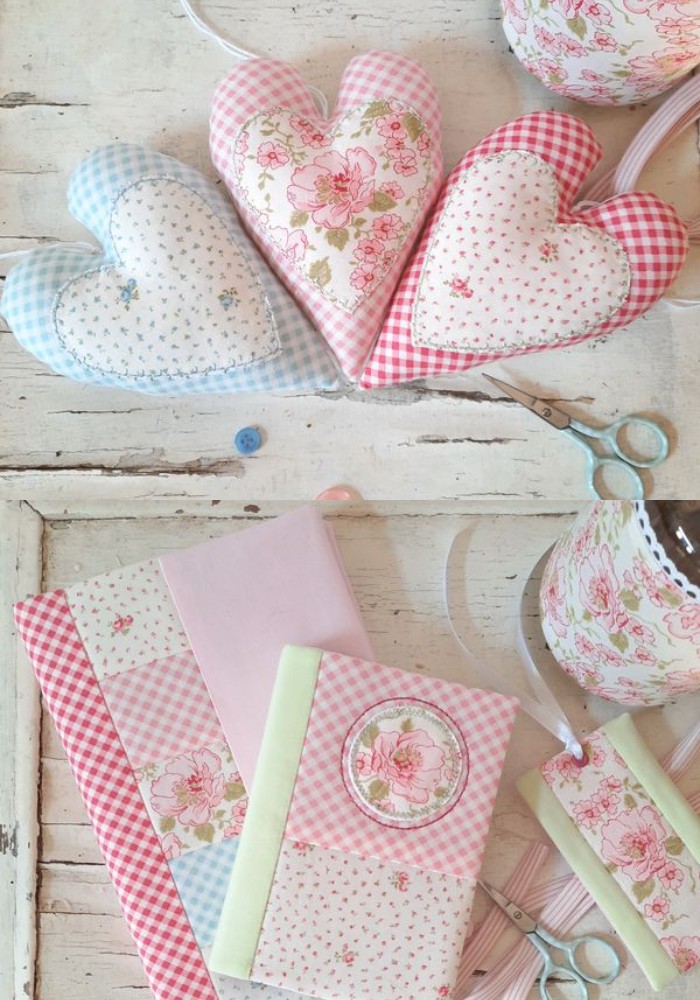
who joined my sewing team recently. Check out these adorable notebook covers with matching bookmark. And aren't those hearts adorable? The basket is such a pretty storage idea and vase cover is a nice way to spruce up a simple vase.


Sweet fabric hearts are perfect gift idea


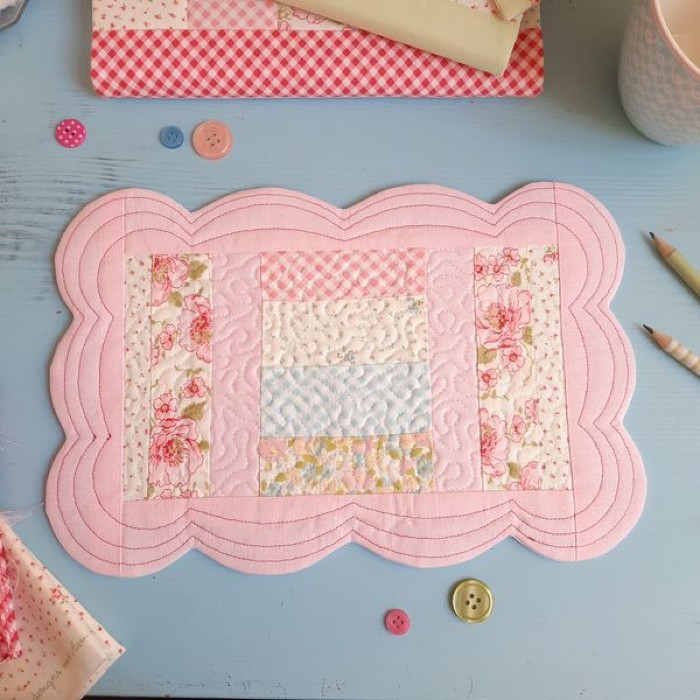
I love this quilted place mat!


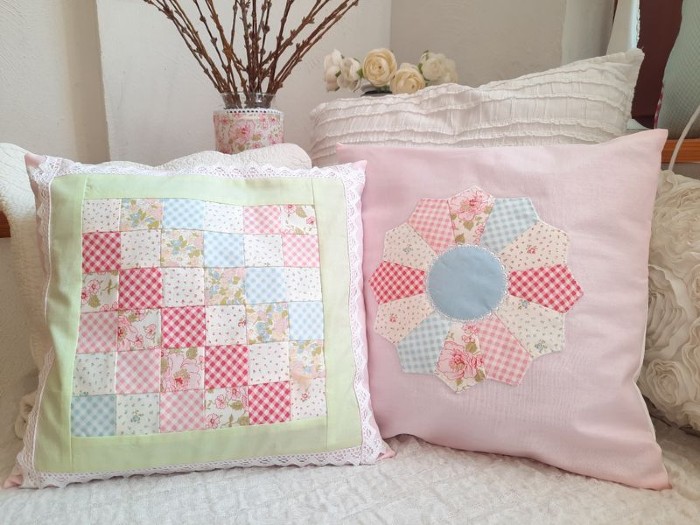
Finally, a stunning set of patchwork pillow covers - the left one done with traditional patchwork squares, the right one done with a Dresden plate. I'm in awe of the Alex's craftsmanship. 


If you've read this far I hope you feel inspired to try your own springtime sewing - all of the above fabrics are available at my website Duni's Studio. They are premium quality cotton at 115 cm (44") wide and I sell them from 25 cm (10") upwards. Until next time, love

Friday, January 14

New Year, New fabrics

[Werbung/Advertisement]


I know I've been missing in action for weeks on end, but I didn't want to miss the opportunity to check in and wish my readers a happy and healthy New Year!
This year feels like a fresh beginning, especially after the last two months of 2021 were a bit of a struggle personally and professionally. Obviously we're still battling the pandemic and its consequences, such as shipping issues - partly the reason why I haven't received any of the new fabric collections (which I had announced in a previous post). As longtime readers might know, fabrics are the heart of my business. My entire market strategy revolves around fabrics, so while I understand the situation it's not any less disappointing.

Anyhow, back to new beginnings..,.
I have since made peace with the fact that my new fabrics, which were supposed to arrive in late summer will most probably arrive in springtime. Good thing they are floral! Ironically, I did receive a small shipment of summer fabrics in winter. Go figure ;-) 
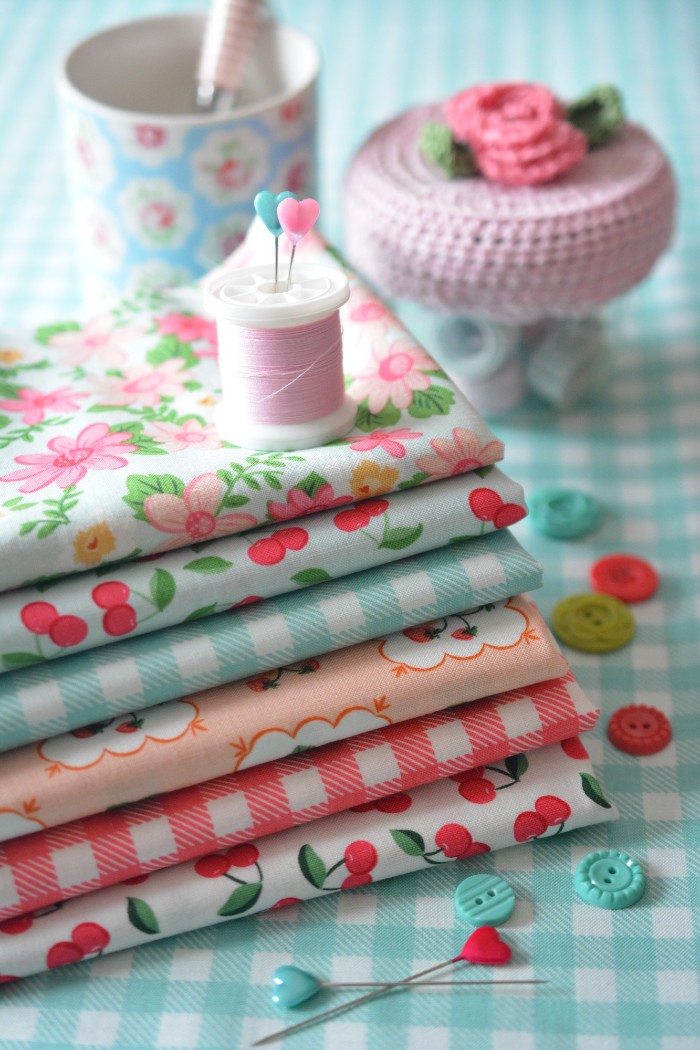
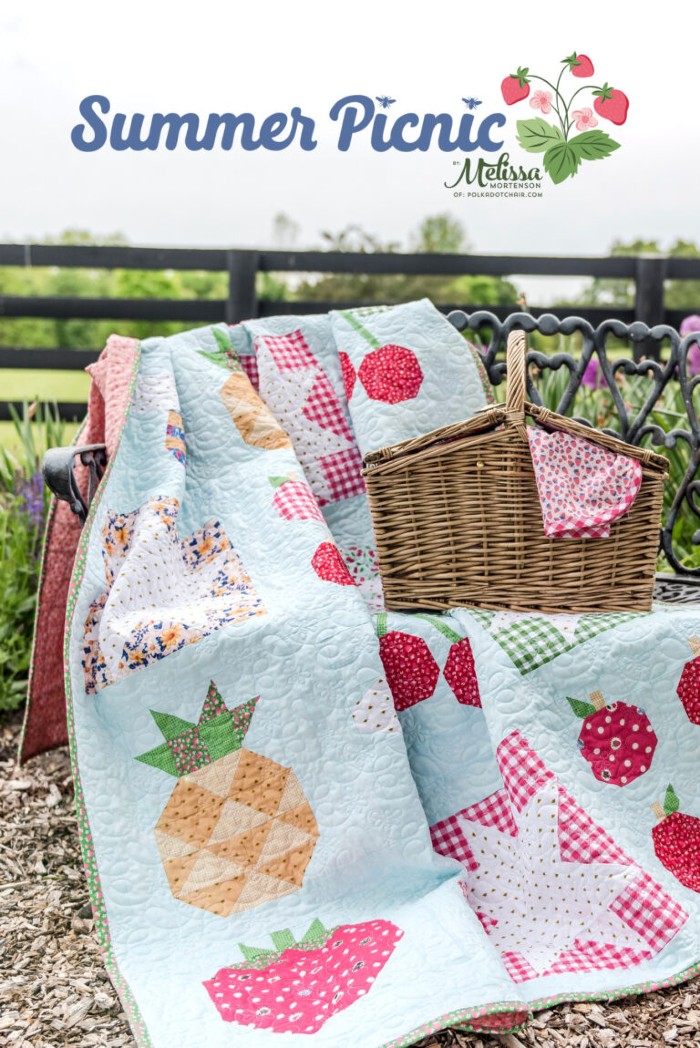
So if, like me, you are craving a pop of colour and freshness, feast your eyes on "Summer Picnic", designed by Melissa Mortenson. Inspired by a breezy summer picnic, this line features red cherry and strawberry prints along with vintage style summery flowers. It's perfect for quilting, children's apparel and home decor.

I also wanted to share some beautiful items all lovingly handmade with these fabrics. I have linked up the Instagram accounts of all three crafty ladies - there's a bunch of handmade goodness you might want to check out.

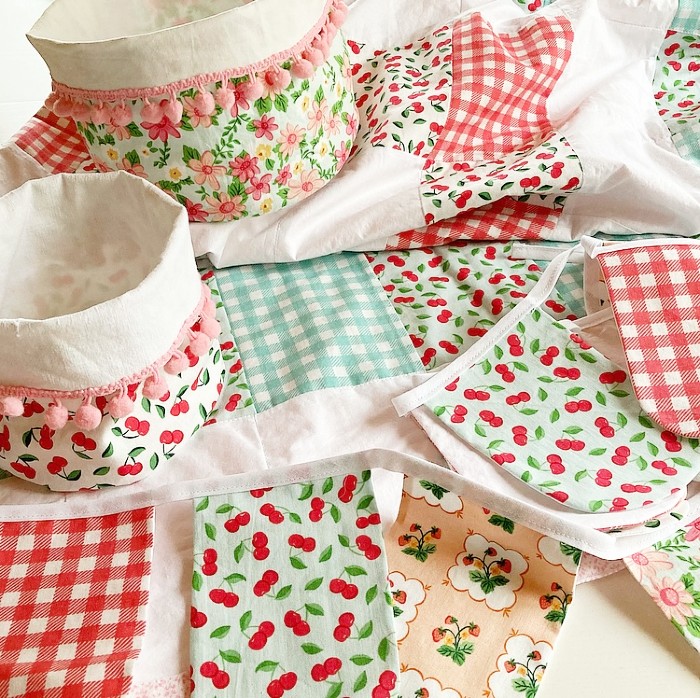
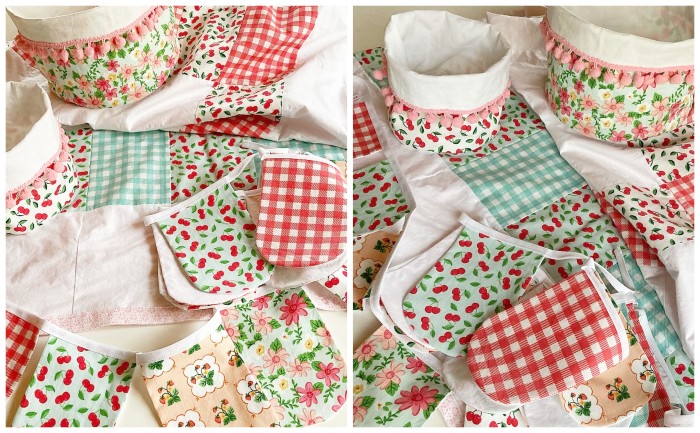
Lella of @sediart_lella went all out on the picnic theme creating this amazing picnic blanket, a cute bunting plus adorable little bread baskets trimmed with pompoms. 


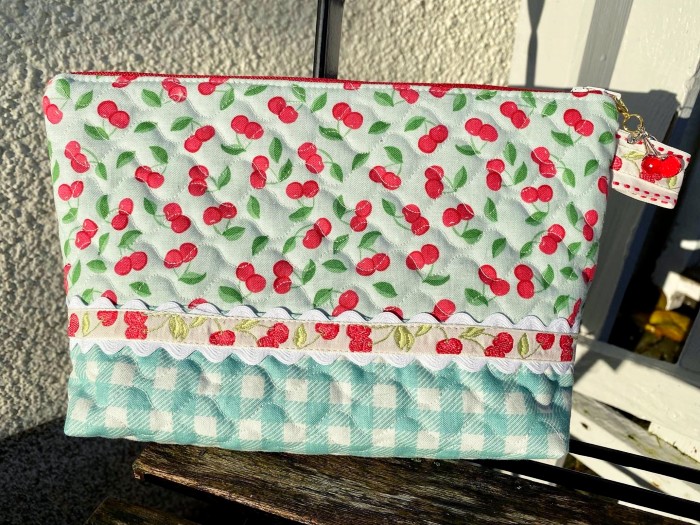
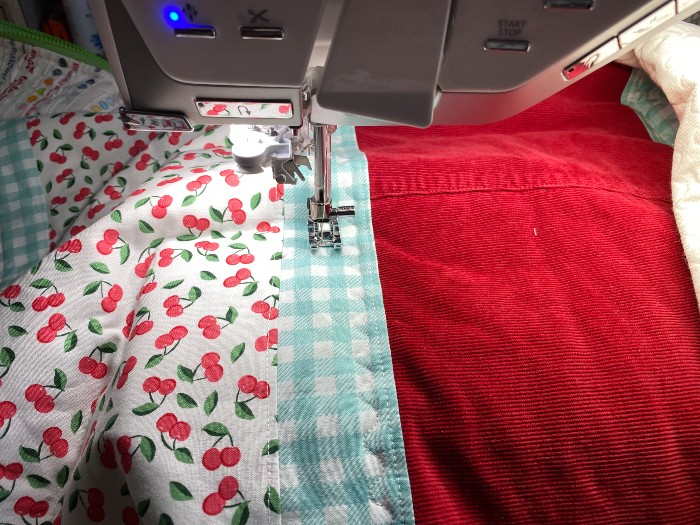
Corinna of @mietzomat made a beautifully quilted wash bag in coordinating cherry and gingham prints. There are handy compartments on the inside, and it is decorated with a perfectly matching cherry trim. This retro style bag will sure look pretty on the dresser! She is currently working on a big picnic bag as well as a quilt, which as you can see in the photo has been kitty-approved :)


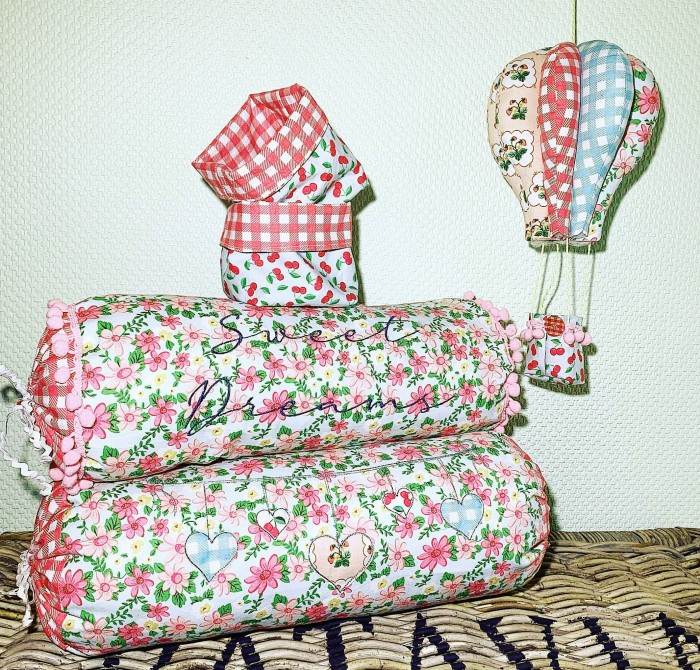
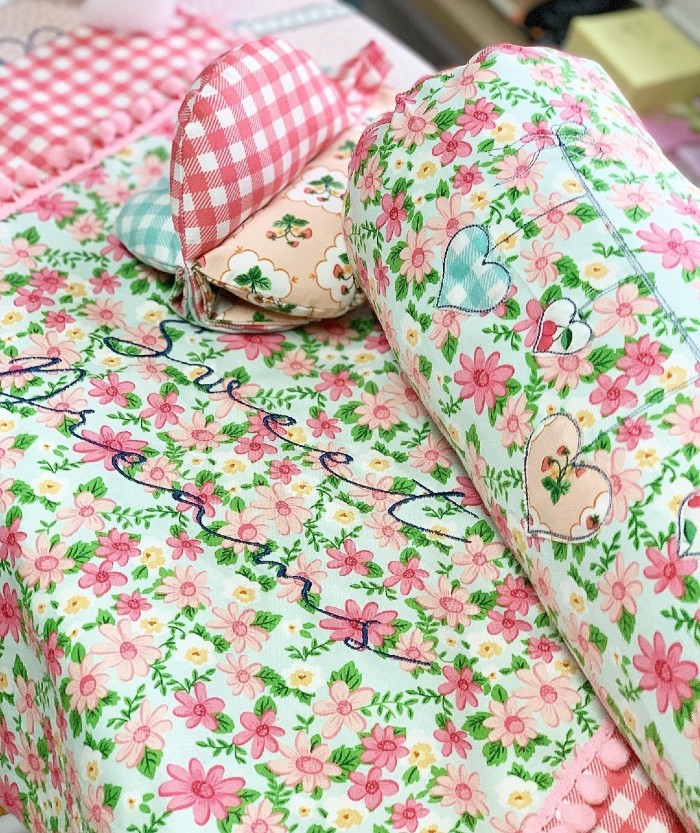
Kathy of @waldhauskitz made two adorable containers with the red cherries and gingham, a set of beautiful pillows - stitched with "sweet dreams" and cute hearts and this amazing decorative balloon that would look perfect in children's rooms. I love the mix-and-match feel of the fabrics on the balloon and all the thoughtful details.


A big THANK YOU to all three crafty sewists for sharing their unique work and inspiring us all!

The entire collection is so bright and fresh and I certainly feel cheered up just looking at it. These fabrics are premium quilting cotton at 44" wide. I sell them from units of 10 inches. All subsequent units will be cut fresh from the bolt in one continuous piece. As always, if you have any questions regarding this fabric collection or shipping, simply drop me a line at my email info(at)dunistudio.de

Attention US customers: if you prefer to shop on Etsy - there's a special deal waiting for you over there. (this does not apply to my own website). Contact me if you have any questions!

Closing this post with a photo of a gorgeous quilt designed by Melissa Mortenson.


I hope you enjoyed this post. Thank you so much for reading along. Wishing you all a wonderful weekend ahead and stay safe!


Sunday, November 10

Tilda fabrics, Paper Goods & New Sashiko Threads

[Werbung/Anzeige/Advertisement]

Tilda Old Rose

Hello dear readers!

This year has gone by so fast; I can't believe Christmas will be here in 6 weeks. Looking back I have  spent a good chunk of my precious time in doctor's offices, so a lot of my planned projects had to be put on hold. I am one step closer to figuring out what is causing my persistent symptoms, so there's that. A while ago I decided to focus less on the physical pain and more on the things that bring me joy. The Tilda fabrics seen in the picture above definitely make my heart skip! There are matching buttons in two sizes and woven jacquard ribbon with rose motif as well. I made some Christmas decor using the small red rose and the large grey rose fabric.


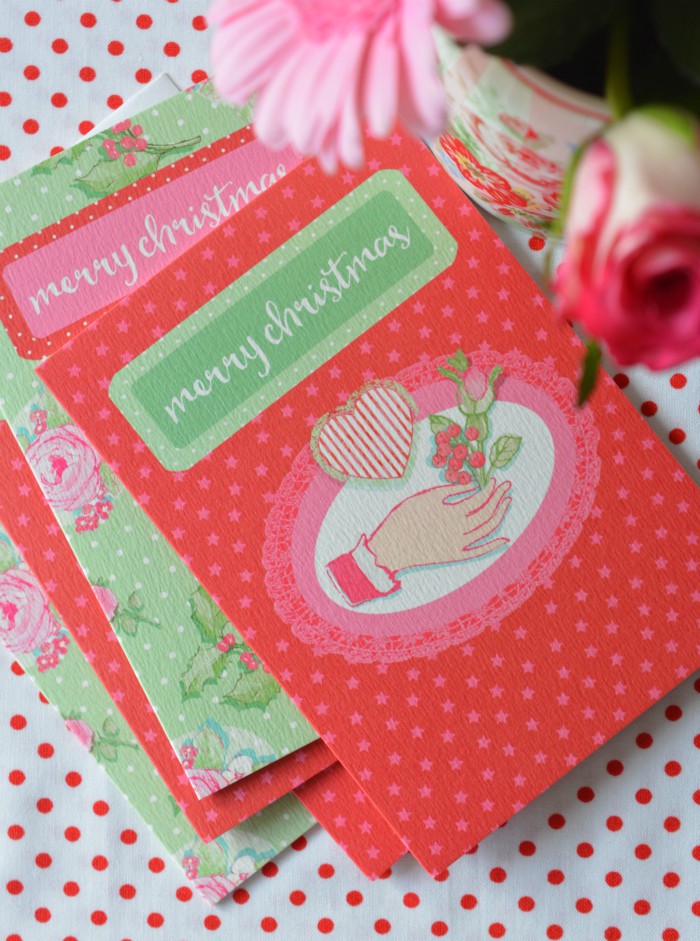
If you are looking for unique Christmas cards, check out these vintage-style card sets from April Rose. They come in sets of 8, with two designs and include a white envelope. There are four sets to choose from! Premium quality printed in England.

April Rose Card Sets

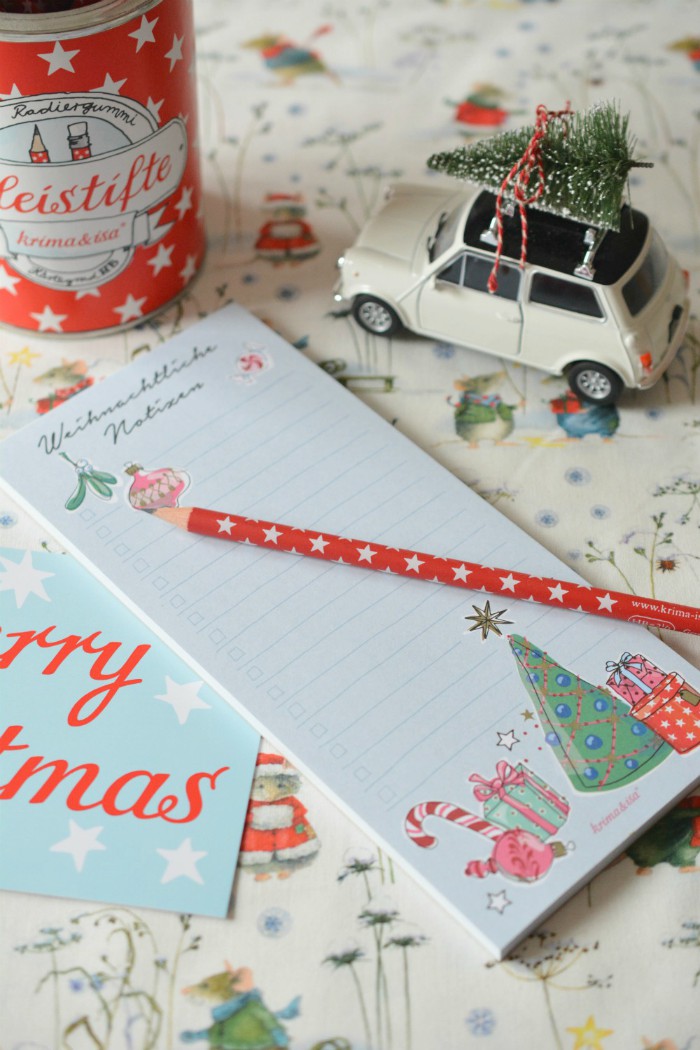
Jot down your Christmas gift or to-do list on these fun and practical Christmas-themed note pads from German paper goods supplier Krima & Isa. Matching pencils available too! Apart from these, there's a fun range of Christmas postcards, gift bags, tags, ribbons and advent stickers.

Krima & Isa

***

New in are these sweet and romantic fabrics from well-known Japanese fabric supplier Lecien. I had ordered these a long time ago, and I have to admit it's becoming increasingly difficult to acquire these fabrics. The bulk of fabrics usually go to the huge craft stores - independent stores like mine are at the bottom of the list. I'm lucky if I even get half of what I ordered. Nevertheless I love these floral prints from the Antique Flower 2019 collection!

Antique Flower in Pastel

Speaking of Japan, some of you might be familiar with Sashiko, the simple stitching tradition of northern Japan. Sashiko means "little stabs" creating little stitches that look a bit like rice grains. Originally this technique was used to mend and recycle garments with white thread. Nowadays Sashiko has developed into richly patterned and often brightly colored designs. I have been studying and practicing the art of Sashiko embroidery for several months now. I am still learning, but I find the results of the mostly geometric patterns quite satisfying. And now that we've entered the winter season, those long evenings at home are perfect for some meditative Sashiko stitching! You can find the original Sashiko threads in several colors in my shop. I especially like that they come on practical cones. To get started all you need is a long needle with a large eye and some fabric with an open weave, like linen, jeans fabric, cotton flannel etc. You don't require a hoop for this embroidery technique.

I am working on traditional pattern - Shippou

Mini Tutorial using Sashiko Thread


Apart from traditional Sashiko stitching, the thread is suitable for crossstitch, crochet and other crafts, such as tiny tassels or these wrapped beads - Here's my little tutorial for making a Sashiko thread bead necklace!


You will need:


wooden beads with large hole (as used for Makramee)
Sashiko thread
needle with large eye
glue
cord
small wooden beads (optional)

Cosmo Sashiko Thread

How to:


Thread the needle with a very long piece of Sashiko thread, double it up and tie a knot at the end. Dab a little bit of glue on the inside of the wooden bead and press the knotted end of the thread into it. Then start "wrapping" the bead with the thread, carefully pulling it through the hole. Make sure that all areas of the bead are covered. Weave the end through two or three threads on the inside and snip off. You can add a tiny bit of glue to secure on the inside. Make two more. 
Cut a piece of cord to the length you wish your necklace to be. Thread your Sashiko beads and (optional) smaller wooden beads and tie the ends. And you're done! Enjoy :)


 photo signature_zpscqkypdzs.png